Table of Contents
Groups

Assigning users to groups gives you powerful tools to manage large numbers of users and their privileges. Administrators can set access rights to entire groups rather than individually.
New group
Choose Add group and fill out the required fields. Your LaCie NAS can have up to 256 groups.

Delete a group
To delete a group, choose the configuration icon (pencil), then select Delete. Confirm in the dialogue window.
Deleting a group will not affect the data created by users in the group.
Existing group
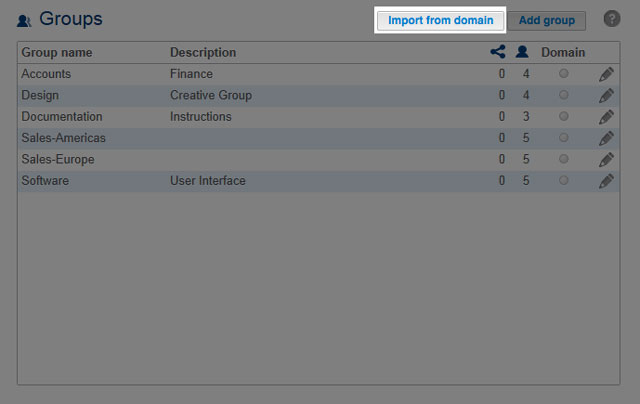
Group data is organized in a table.
- Choose the text in the Group name column to change the group name.
- Choose the empty space or text in the Description column to add or revise details for the group (optional).
- The number in the Shares column (connected dots icon) shows how many shares the group has access to. Choose the number to view the share(s).
- The number in the Users column (user icon) shows how many users belong to the group. Choose the number to view the user(s).
- A green light in the Domain column indicates that the group has been imported from a domain.
- Select the configuration icon (pencil) and choose:
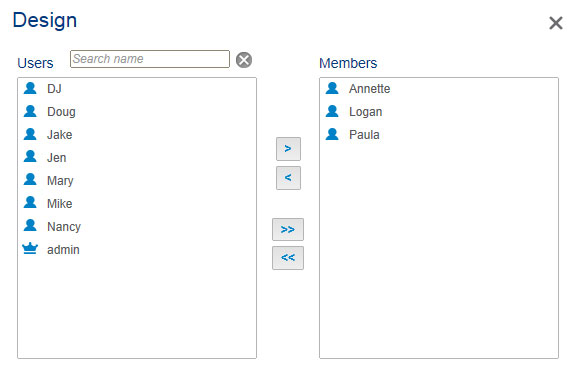
- Users to modify group members. In the resulting window, highlight a user, then choose the arrows to join/disjoin a user from the group.
- Delete to remove the group.

Importing groups from Active Directory
- If you have successfully connected to an active directory domain (see General Settings), you will see a button labelled Import from domain. Choose the button.
- A prompt allows you to search for groups on the domain. Begin by entering a the first letter of the group.
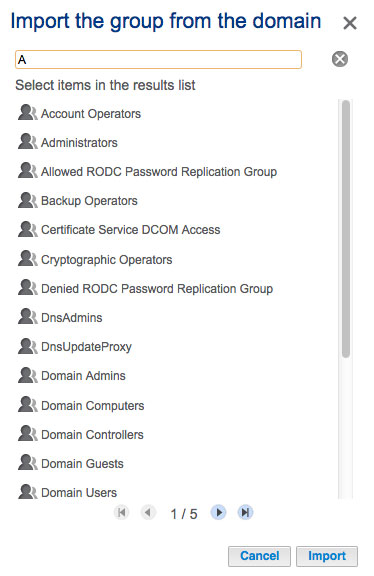
- To select multiple groups, hold down the Command key (Mac users) or Control key (Windows users).
- Choose the Import button.
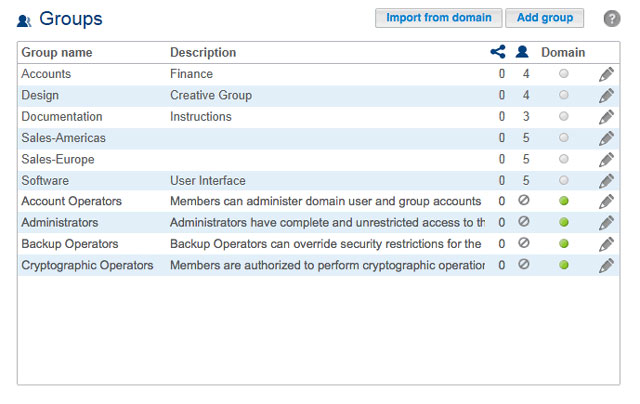
- The imported groups will appear in the table with a green circle in the Domain column.


Managing groups imported from an Active Directory
Groups imported from an active directory are managed by the administrator of the original domain. However, the administrator of the LaCie NAS can delete an imported group from the device by selecting the configuration icon (pencil) and Delete.
Users and groups imported from an active directory may have their rights adjusted by the administrator of the original domain. See Synchronize Users/Groups for instructions on synchronizing changes from an active directory.