Table of Contents
RAID
This section will help you decide which RAID mode is right for your application. For instructions on how to adjust the RAID mode, refer to section Changing the RAID Mode.
BIG (RAID 0) = 100% total accessible capacity
Safe (RAID 1) = 50% capacity
BIG (RAID 0)

BIG (also called RAID 0 or “Spanning” in some LaCie devices), allows for the fastest data transmission and capacity of the different RAID settings. Requiring at least 2 drives, RAID 0 stripes data onto each disk. The available capacities of each disk are added together so that one logical volume mounts on the computer.
If one physical disk in the array fails, the data of all disks becomes inaccessible because parts of the data have been written to all disks.
Applications
RAID 0 is ideal for users who need maximum speed and capacity. Video editors working with very large files may use RAID 0 when editing multiple streams of video for optimal playback performance. A RAID 0 array is more suited for actively working with files (editing video, for example) and should not be used as a single storage backup solution or on mission critical systems.
SAFE (RAID 1)

SAFE mode (also referred to as RAID 1) is a secure RAID mode that requires at least 2 drives and works with pairs of drives. One logical volume mounts on the computer and the combined available capacity of both drives is limited to the capacity of the lowest-capacity disk. If one physical disk fails, the data is available immediately on the second disk. No data is lost if one disk fails.
Applications
RAID 1 provides maximum data safety in the event of a single disk failure, but because data is written twice, performance is reduced slightly when writing. RAID 1 is a good choice when safety is more important than speed.
Changing the RAID Mode
Before you change the RAID mode of the LaCie Hard Disk MAX, familiarize yourself with the drive’s RAID modes. See RAID.
Disks must be inserted correctly in the Hard Disk MAX before configuration can be changed. LaCie recommends limiting contact with the disk drives as much as possible.
To Change the RAID Mode
- Unmount or safely remove the Hard Disk MAX volumes from your computer and turn off the Hard Disk MAX. It is important to allow the disks to cool before touching them.
- Insert a small, flat-blade screwdriver into the groove on the switch and move the screwdriver up or down to select a different mode.
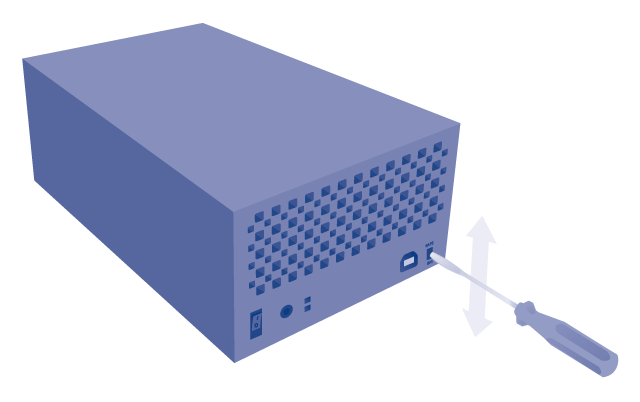
- Turn on the Hard Disk MAX.
- Reformat the disks (refer to Formatting and Partitioning).

Removing and Installing Drives/Enclosures
If you have discovered that one of the hard drives has failed (see LED Indicators) or the chassis no longer works, please contact your LaCie reseller or LaCie Customer Support. If the product is still under warranty, a LaCie Customer Support representative will instruct you on how to return the drive or casing for replacement. See Getting Help for contact information.
If your LaCie storage device is no longer within the warranty period, please use the directions below to replace a failed disk with a healthy disk purchased from a third party. LaCie recommends selecting a disk that is the same model number and capacity as the one it will replace.
Replace a hard drive
Follow the directions below to remove and replace a failed drive.
Remove the hard drive
- Identify the failed disk. Hard Disk MAX: The drive's LED has turned red. Network Space MAX: Consult the RAID page in the Dashboard.
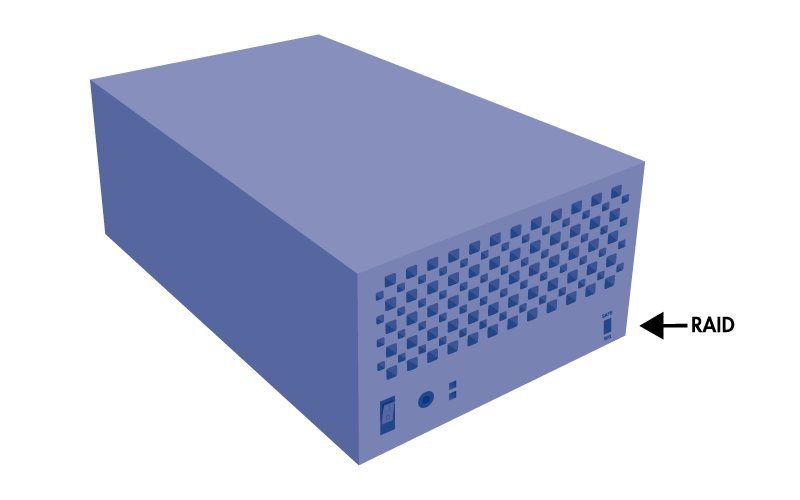
- Hard Disk MAX only: Note the RAID switch position (BIG = RAID 0, SAFE = RAID 1).
 Hard Disk MAX (USB 2.0)
 Hard Disk MAX (Quadra)
 - Turn off and unplug the LaCie device.
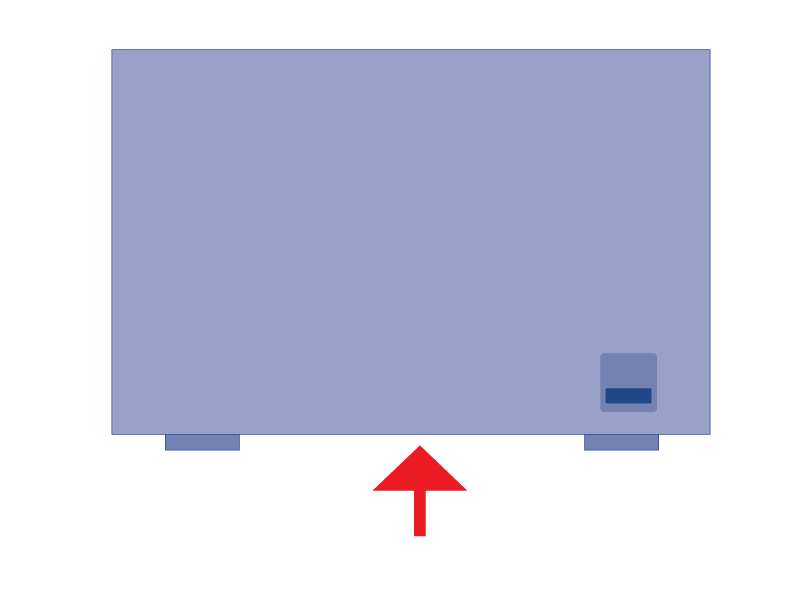
- The top enclosure must be removed to access the drives. Use your index finger to gently pull the front lip of the casing, specifically in the center, where the top shell clasps to the bottom plate.
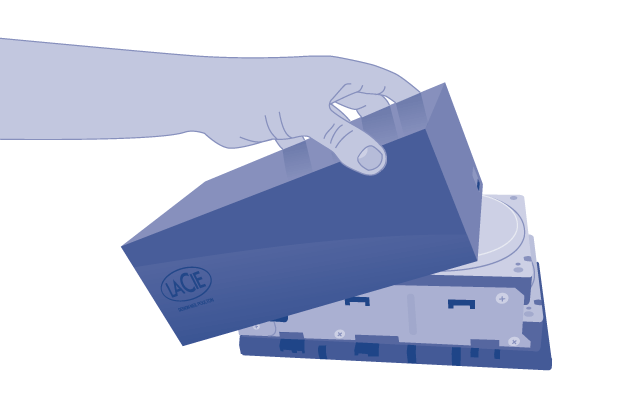
- Once it is unclasped, carefully pry the top shell from the bottom plate.
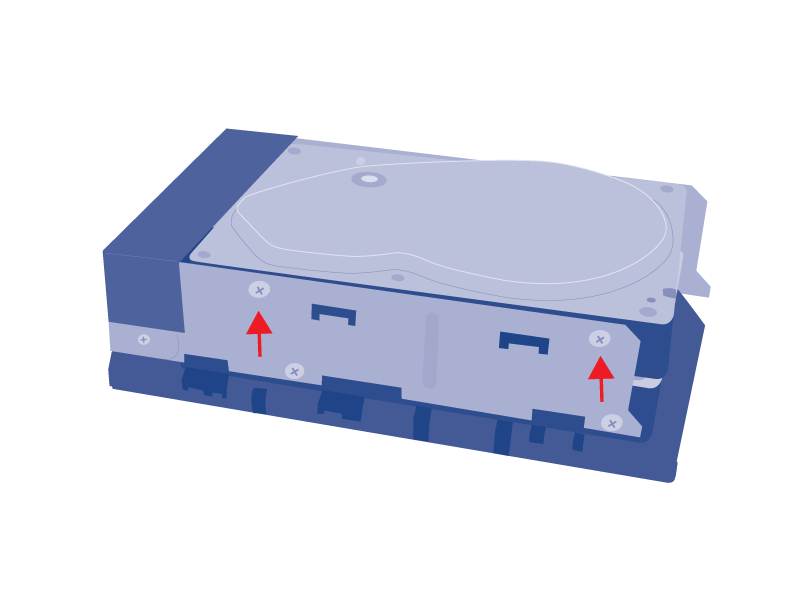
- Unfasten the screws holding the drive to the bay. Each disk is fastened to a bay by four screws, two on each side.
- Remove the failed drive.

- Return the failed drive to LaCie as explained by the LaCie Customer Support representative.


Replace the hard drive
Once you have received the replacement drive:
- Carefully insert the replacement drive into the empty drive bay. When fastening the drive to the bay, please make certain to use the same four screws that were included with the device. Using other screws could damage the unit and void your warranty.
- Close the casing.
- Hard Disk MAX only: Please make certain that the RAID switch position (BIG, SAFE) has not changed.
- Turn on the LaCie storage device. If the RAID setting is RAID 1, the front LED will blink blue and the rear LED will blink red during the rebuild. A RAID 1 rebuild may take several hours depending upon the capacity of your disks.
Replace the enclosure
Follow the directions below to remove and replace a failed or failing enclosure.
Remove the disks from the enclosure
Hard Disk MAX only: Before removing the enclosure, please note the position of the RAID switch (BIG or SAFE).
- Turn off and unplug the LaCie storage device.
- The enclosure must be opened to remove the drives. Use your index finger to gently pull the front lip of the casing, specifically in the center, where the top shell clasps to the bottom plate.
- Once it is unclasped, carefully pry the top shell from the bottom plate.
- Unfasten the screws holding the drive to the bay. Each disk is fastened to a bay by four screws, two on each side.
- Remove the drives from the bays of the failing enclosure. Please place the disks in a safe place along with the eight screws that hold them to the enclosure. Note the bay that each disk came from (bottom and top).
- Return the failing enclosure to LaCie as explained by the LaCie Customer Support representative.
Insert the disks into the replacement enclosure
Once you have received the replacement enclosure from LaCie:
- Open the replacement enclosure and carefully insert the drives into the same bay locations they held in the original enclosure. When fastening the drives to their bays, please make certain to use the same eight screws that were included with the device. Using other screws could damage the unit and void your warranty.
- Close the replacement enclosure and make certain that the RAID switch is the same as the original enclosure.
- Connect the enclosure to your computer and turn it on.