User Tools
Site Tools
CloudBox
User Manuals Print page
 Save page as PDF
Table of Contents


Table of Contents
Administering Your LaCie CloudBox
The LaCie CloudBox features an easy-to-use administration tool called the Dashboard. You can access the Dashboard via LaCie Network Assistant or directly in your Web browser.
The Setup Wizard will launch the first time you log into the Dashboard. With subsequent logins the administrator can manage or adjust the CloudBox settings. The Dashboard Home page:

Dashboard: Accessing
There are two ways to access the Dashboard:
- LaCie Network Assistant - Click on the LaCie Network Assistant icon in the system tray (Windows) or menu bar (Mac) and select CloudBox > Web Access…

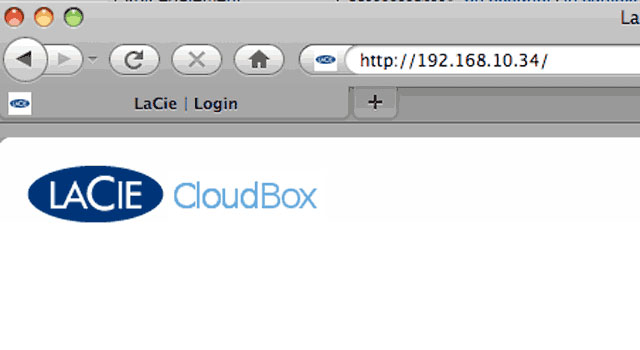
- Internet Browser - Open your Internet browser and type your CloudBox’s machine name (by default, CloudBox) or IP address in the browser’s URL (Web address) field.

IP address


Technical note: The IP address of your LaCie CloudBox can be found by clicking LaCie Network Assistant > Configuration Window… > [CloudBox or the name you have given the device].


The LaCie CloudBox login page will open in a new browser window or tab. If your browser is not open, LaCie Network Assistant will open it for you.

To open the Dashboard, you must enter the administrator Login and Password that were created during the Setup. Please note that the Login and Password are case sensitive. Click LOG ON to enter the Dashboard.
Important note: User logins and passwords will not open the Dashboard.
On the login page, you can:
- Select a preferred language

- Request to receive your administrator password hint via email. Click on Password hint under the LOG ON button then fill out the password hint fields. The administrator’s password hint will be sent to the email address provided during the Setup. User passwords do not require recovery since they are managed by the administrator.

- Switch to HTTPS: For a more secure login, you may choose the link Switch to https. The same page will appear using the HTTPS protocol.


Technical note: Only password hints are sent via email. The password itself should be easy to recover once the hint is received.
Dashboard: Home Page

The Home page provides the following information:
a. The amount of storage used on the CloudBox internal hard drive.
b. Online Backup Status.
c. Choose a Selective restore to PC or a Full restore on the Box. See Restore for more information on restoring your backups.
d. The days remaining on your Online Backup contract.
Online Backup Status
This section lists the date and times of the previous and next backups, backup history, data sent, and the current backup status. Examples of a backup status:
- Done - The backup completed successfully.
- Failed - The backup encountered a problem such as folders that contain more than 15,000 files or directories.
- Partial - Alerts the administrator that certain files were excluded from the backup, such as files that are specific to the operating system.
Backup In Progress
While a backup is running, you can:

a. Click the “i” icon to see the backup progress window.

b. Click STOP THE BACKUP to cancel the backup in progress.

Between Backups

Click the “i” icon for a History of your backups. You may also view and download the logs for each backup.
Dashboard: Navigation
The Dashboard is made up of a central area surrounded by “widgets”. Widgets are small boxes that represent the different pages that make up the Dashboard. No matter your place in the Dashboard, a widget displays a summary for easy reference. For full information, navigate to the page itself by clicking directly on the widget.
- To navigate to a page, click the widget below its title; or, drag and drop a widget to the center of the window.
- To minimize a widget, click the X next to its title.
- To expand a minimized widget, drag its icon over an expanded widget, which replaces it.
- To rearrange widgets, drag the minimized widget icon or the expanded widget’s heading onto the place of another widget.
Dashboard: Logging Out
To log out of the Dashboard or restart/shutdown the CloudBox, click the Shutdown Options button in the upper right-hand corner of any Dashboard page.
- If you are not restarting or shutting down the CloudBox, LaCie recommends logging out for security reasons. Logging out is very important if the computer is for public use.
- Please note that a backup in progress will be stopped if you shut down or restart the device. The Dashboard will warn you if a backup is in progress.


Dashboard: General Settings
The administrator can use this page to modify some of the CloudBox’s general parameters. To make changes, click on the selection to view a prompt for additional choices. For example, click on the Machine Name Cloudbox to open the field that permits you to type a new name.

Machine Name: Modify the machine name. The machine name identifies your CloudBox in LaCie Network Assistant and on the local network. The machine name is limited to 15 characters. Please use alphanumeric characters without spaces or symbols.

Date (mm/dd/yy): The date is set by your CloudBox Online Account.
Workgroup: Your CloudBox can join an existing Windows Workgroup. Click on Workgroup to change the name.
Technical note: Mac users connected to a network with Windows computers can access user folders in a Workgroup. From the Finder, select Shared > [Workgroup] > CloudBox. “[Workgroup]” is the name of the Windows workgroup.
Time: The time is set by your CloudBox Online Account.
Language: Choose your preferred language.
Time Zone: Set the time zone.
Status Light: The status light is enabled by default. Deselecting the checkbox will turn off the CloudBox’s front light. However, the drive will report potential errors via the light.
Dashboard: Users
Manage user accounts on this page.

User data is organized by a table:
Login: All user Logins may be revised by clicking on the name. The administrator name created during the Setup cannot be modified.
Password: Please note that all Passwords are listed with asterisks for the security of each user. User Passwords may be revised by clicking on the current password. To change the administrator password, go to the CloudBox Settings page and select the General tab. Please note that the CloudBox must have a connection to the Internet to change the administrator password.
Usage: If you have set a quota for a user, the amount of space used will be indicated as a percentage.
Quota: Set the limit that a user may store on the CloudBox. For example, a user may be assigned 10GB of storage space for his data.
Delete User: The column on the far right allows the administrator to delete a user and the user's data. Note that the administrator (“admin”) does not have an “X” in the far right column since the name cannot be deleted.
Adding a New User
A private folder is automatically created with each new user. The name of the user folder is conveniently associated with the user login. For example, the user “Sally”, has a user folder with the same name. If Sally changes her login to Bill, the user folder will also change to Bill.
- Click ADD USER.
- In the window prompt, enter:
- The login name for the user. You may use between 1 and 20 characters including letters (case sensitive), numbers, the hyphen, and the underscore. Spaces and other symbols are not supported.
- A password up to 32 characters. You must confirm the password. ASCII characters only.
- A quota for disk usage. The number value is in gigabytes (GB). For example, enter “5” means that the user may only use up to 5 GB of storage on the CloudBox.
- Click the green check sign on the right to create the user account.

Deleting a User
Important info: Deleting a user will also remove the associated user folder, the data within the user folder, and related backup jobs. Once deleted, the user and user data will not be included in the next online backup.

- Click the gray X to the right of the user listing in the table.
- In the confirmation box, click Delete.
Note that the administrator (“admin”) does not have an “X” in the far right column since the name cannot be deleted.

Editing a User
- Click on the text in any field in the user table to modify a value. Please remember that the Login name for the administrator cannot be changed. Go to Dashboard: CloudBox Settings for instructions on how to change the password for the administrator.
- If the user folder was mounted on a computer while the account was modified, unmount it. The changes will take effect the next time you mount the user folder on a computer.
Dashboard: Network
Adjust the network settings for your CloudBox on this page.

Configure using DHCP or manually: Most consumer networks are DHCP, assigning an IP address to each connected device. As a result, users will see that the table has been filled in with values assigned by a DHCP server. If you select Configure manually, you will be able to modify the table values. Please make certain that you are entering the correct IP address if you select a manual IP configuration.
Important Info: Please use caution when selecting Configure manually. Entering an incorrect IP address could create network conflicts or problems connecting to the CloudBox.
Proxy Configuration: The CloudBox may be used with a network that includes a proxy server for Internet access. Select the checkbox next to Enable proxy in order to enter the IP address and port number for the proxy server. Select the Authorization required checkbox if a Name and Password are needed to reach the Internet via the proxy server. Click APPLY to execute the changes.
The Dashboard may close once you have applied the changes to the CloudBox network configuration.
Dashboard: CloudBox Settings
This page provides Online Backup account information and the CloudBox health status via three tabs: General, Diagnosis, and History.
General - Backup Time and Bandwidth
Account Information
Important Info: Click on the words or asterisks of the settings you wish to change.
- View the name of the Main user (the administrator) and the expiration date for the Online Backup contract. Your account is activated during the Setup Wizard, allowing you to perform online backups for one year. After one year, you will be asked if you wish to extend the benefits of your Online Backup account.
- To change the administrator password, click on the asterisks.

- A new window will open asking for your current and new passwords as well as an optional hint. Please note that the CloudBox must have an Internet connection to change the administrator password.


Backup Settings
Important Info: Click on the words of the settings you wish to change.
Click BACKUP NOW to initiate an immediate backup.

Select the time of day for the CloudBox online backup by clicking the selection next to Online backup start time. LaCie recommends choosing a time of day when your network is less active.


You have the option to choose transfer rates for your CloudBox uploads and downloads. Please consider the amount of bandwidth that the CloudBox will use before making any changes. To initiate a change, click on the settings next to Download limit and Upload limit.


By default, the CloudBox online backup will ignore hidden files used by Mac OS X. To backup these files, you may click on No next to Ignore hidden Mac files. Select Yes to skip Mac OS hidden files.


Your First Online Backup
Depending upon the amount of data stored on the CloudBox, your initial online backup may require some time. Please do not be alarmed if the backup takes many hours or several days. All online backups occur in the background, leaving you free to operate your computer or workstation.
Factors that may contribute to a slow backup:
- Amount of data (tens of gigabytes at once will significantly increase the backup time)
- Network bandwidth
- Network activity
- Amount of files at one time (numerous files at once will increase the backup time)
Diagnosis: Drive Status

- Use this tab to see if the CloudBox is experiencing any errors. The status is color coded for easy identification of potential problems. See the table below.
- Click RELOAD to receive updates on the status.
| CloudBox service running | CloudBox connection quality | |
|---|---|---|
| Ok (Green) | Normal operation | Normal operation |
| Warning (Yellow) | Not applicable | The CloudBox network connection is very weak. *Please verify the network cable connections. *Confirm that there are no conflicts on your router ports. See your router user manual for more information on ports. *Speak with your network administrator or provider. You may require a proxy server to connect to the Internet. |
| Error (Red) | The Online Backup service is experiencing difficulty. *Wait for a minute before clicking RELOAD. *If the problem persists, try rebooting the CloudBox. *If the above options do not resolve the issue, try to restore the CloudBox to factory settings. | The CloudBox is not connected to the Internet. |
| Not available (Grey) | There is a problem connecting to the CloudBox. Try to save the system logs while troubleshooting. *Logout and reboot the browser. Go to the Dashboard login to see if the problem is resolved. *If the problem persists, try rebooting the CloudBox. *If the above options do not resolve the issue, try to reset the CloudBox. | There is a problem connecting to the CloudBox. Try to save the system logs while troubleshooting. *Logout and reboot the browser. Go to the Dashboard login to see if the problem is resolved. *If the problem persists, try rebooting the CloudBox. *If the above options do not resolve the issue, try to reset the CloudBox. |
History
Review the logs of your most recent online backups.

Click on the words Done, Failed, or In progress to see the log. A fourth option, Partial, indicates that the backup was successful but skipped unsupported files.

Dashboard: Support
The support page will allow you to access the system log and set up email alerts.

Version: The level of firmware currently being used by the CloudBox.
System log: Click the Download button to save the CloudBox log to your computer. The system log is helpful when speaking with Technical Support.

Email notification: When the checkbox is selected, the administrator will receive email notices concerning the state of the CloudBox. Email notifications include:
- Backup complete
- Backup failed
- Restore complete
- Restore failed
- Contract expiration notice
- Password hint
Default email notifications are sent to the administrator’s email address even if the Alert notification box is not checked:
- Expiration date notice
- Expiration date warning
- Backup failed
Logs: CloudBox warnings sent via email are also listed in the Alerts box. To clear the alerts box, click the Trash can icon on the right.
AUTO-Update: See Update Method 1: AUTO-Update for further information.
Restore to Factory Settings
Important info: Since all data and settings on the CloudBox will be erased and the device will revert to its original firmware, LaCie does not recommend performing a reset unless you have exhausted all other means of troubleshooting.
Caution: Resetting the device will erase all the Dashboard settings such as users, online backup schedule, etc. You can recover the settings when performing a Full Restore as part of the Setup Wizard (The CloudBox Setup Wizard - Existing Contract). The CloudBox must have successfully completed an Online Backup in order to perform a Full Restore. Please take a moment to consider if you have made any changes to your settings since the last Online Backup.
To reset the CloudBox to its out-of-the-box state:
- Make certain that the CloudBox is off.
- Press and hold the power button for 10 seconds. Release the button when the LED becomes solid red.
- Upon releasing the button, the LED will blink red. To reset the CloudBox, press the button while the LED blinks red. Please note that the LED will only blink red for five seconds. You must press the button again to confirm the reset before the five seconds elapse. If you do not press the button while the red light is blinking, the drive will start normally and the reset process will be aborted.
- Following a successful reset, the CloudBox will restart automatically, returning to its factory settings. Please be patient as the CloudBox may take longer than usual to boot.
Update Product Software
Important info: Do not interrupt the CloudBox while it is updating the firmware. Turning off the CloudBox during an update can harm the device beyond repair.
LaCie may improve your network device software or add new features over time.
To find the latest version of CloudBox software, go to Dashbaord > Support. Under Configuration, look for Version. The number that follows is the version of software installed on your CloudBox.

There are two methods for updating your CloudBox software.
Update Method 1: AUTO-Update (Preferred)
Your network hard drive is configured to obtain the latest software updates through the Internet. If a new version of software is found, you will receive a notification to update the device by email. If you do not see an email, please check your Spam filter. Consider revising your Spam settings if it contains email notifications from the CloudBox.
In most instances, the prompt for an update will also appear when you log into the Dashboard. You can go directly to the CloudBox Dashboard Support page to begin the update.
Updating your CloudBox should not erase your configuration or data.

a. Click the screwdriver and wrench icon to set the time that the CloudBox searches for firmware updates.
b. Manually search for an update:
- Open Dashboard > Support.
- In the AUTO-Update box, click the gray downward-facing arrow to check for a new update.
- If an update is available, the download will begin automatically.
- Once the download has concluded, click the Details link to see the change log. Click the Install button to continue.
- The drive will reboot and disappear from the network temporarily. Installation can take several minutes. When it reappears, you can verify the new software version on the Dashboard Support page.
Update Method 2: Update with LaCie Network Assistant Software
Recommendations for Updating Using LaCie Network Assistant:
- Connect your PC or Mac to the network using an Ethernet cable (turn off the wireless connection)
- Make sure users on your network have stopped data transfers to the CloudBox
- Turn off all network attached storage on the network save for the CloudBox
- Unmount all user folders associated with the CloudBox from computers on the network
This update procedure will not erase your configuration or files saved to the drive:
- Confirm that you are using the latest version of LaCie Network Assistant by visiting www.lacie.com. If you download a newer version, make sure to uninstall your current version of LaCie Network Assistant before installing the update.
- Check www.lacie.com for the latest update of your LaCie CloudBox. Download the update to your computer. Please note that the name of the update includes .capsule.
- Run LaCie Network Assistant.
- Go to LaCie Network Assistant > Preferences to confirm that IPConf Support is deactivated. You will know that IPConf Support is not active if the button reads Activate.

- Go to LaCie Network Assistant > Configuration to select your product from the list on the left. Click on the Update your NAS button. Enter your administrator username and password.

- Browse to and load the update package (.capsule file) you downloaded.
- Click Continue… to begin the update. Mac users may receive a prompt to type the administrator password for the computer. Installation can take several minutes.
- Once the update is complete, verify the update.
- Click the LaCie Network Assistant logo in the system tray (Windows) or menu bar (Mac) to select Configuration Window.
- Click the Network tab to see the CloudBox software version.


© LaCie 2024
Last modified : Mar 01, 2013