User Tools
Site Tools
Little Big Disk Thunderbolt 2
User Manuals Print page
 Save page as PDF
Table of Contents


Table of Contents
Getting Connected
Consider the following before connecting your LaCie Little Big Disk Thunderbolt 2:
- To reach transfer rates of up to 20Gb/s bi-directional, the Little Big Disk Thunderbolt 2 must be connected to a computer that supports Thunderbolt 2 technology. Connecting the Little Big Disk Thunderbolt 2 to a computer that supports first generation Thunderbolt technology allows for transfer rates up to 10Gb/s bi-directional.
- A single Thunderbolt 2/Thunderbolt technology daisy chain can have up to seven devices, including the computer (see Daisy Chain for further information). If your computer supports Thunderbolt 2 technology and you are adding the Little Big Disk Thunderbolt 2 to a daisy chain that includes first generation Thunderbolt devices, make certain that the Little Big Disk Thunderbolt 2 is the first enclosure connected to the computer. You can lose the higher performance offered by Thunderbolt 2 technology if the Little Big Disk Thunderbolt 2 is daisy-chained behind first generation Thunderbolt technology devices.
- While the ports on the back of the Little Big Disk Thunderbolt 2 can easily seat older Mini DisplayPort cable ends, Thunderbolt 2 storage will only work when connected to a computer that supports Thunderbolt 2 technology or first generation Thunderbolt technology. Additionally, a cable that supports Thunderbolt technology is required to connect the Little Big Disk Thunderbolt 2 to a computer.
Attach the stand
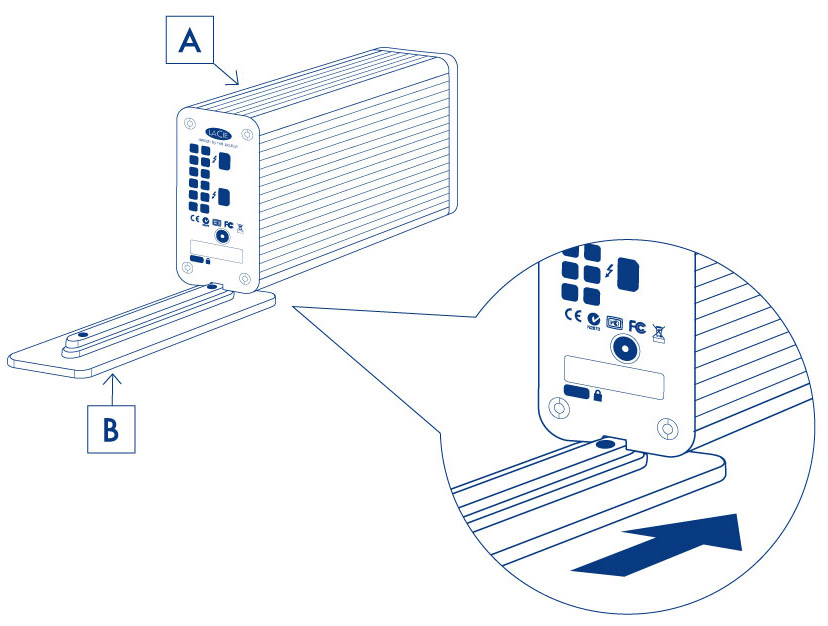
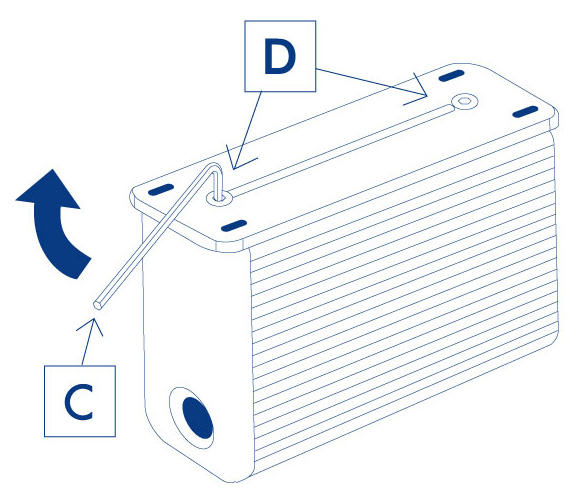
LaCie recommends attaching the included stand before connecting the Little Big Disk Thunderbolt 2 to your computer. Use the screws and hex key (Allen wrench) shipped with your device when following the instructions below. DO NOT attach the stand while the device is powered on.
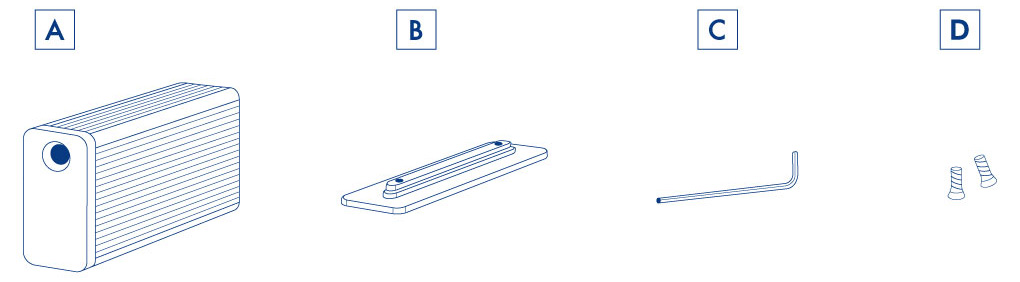
- Locate the following:
- Slide the stand into its slot on the bottom of the device.
- Fasten the screws using the hex key.


Connect the cables
Follow the setup steps in the order they are given to ensure that the volume mounts correctly on your computer.
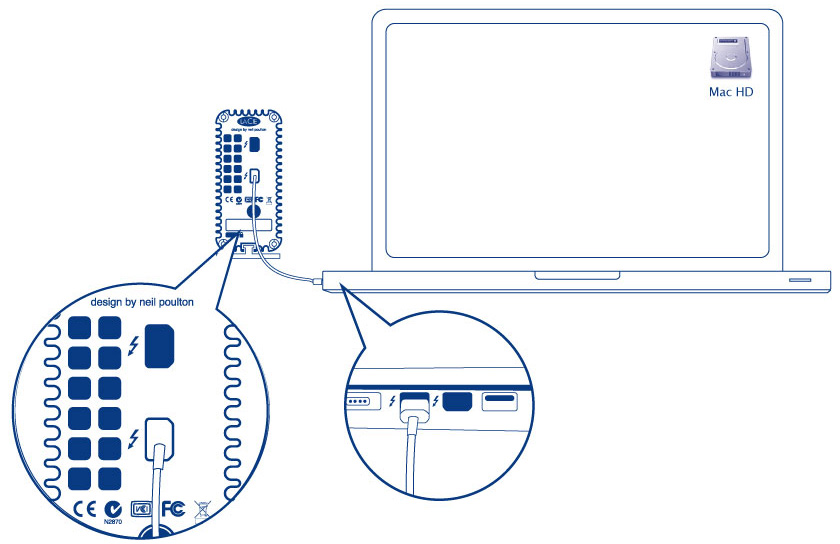
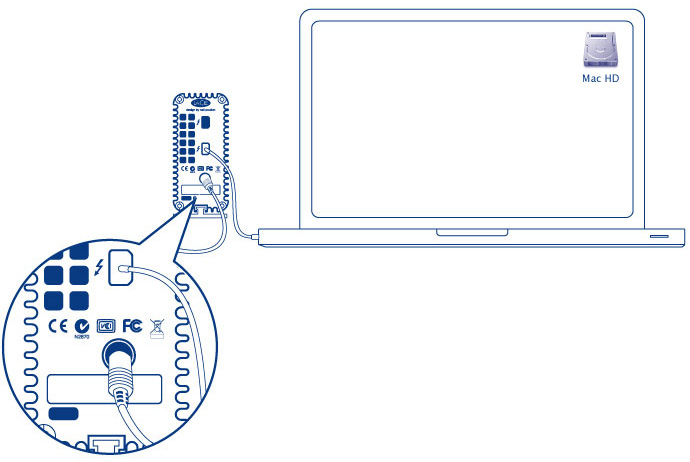
- Connect the included Thunderbolt cable to one of the enclosure's Thunderbolt 2 ports. Plug the other end of the cable to a compatible Thunderbolt 2 or first generation Thunderbolt technology port on your computer. The additional interface port on the enclosure can be used to daisy chain compatible devices and displays.
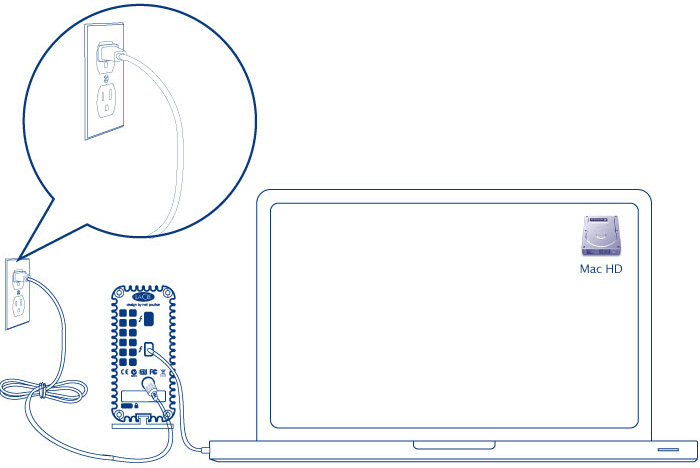
- Connect the included external power supply in the following order:
- First, to the enclosure's power port.
- Second, to an outlet.
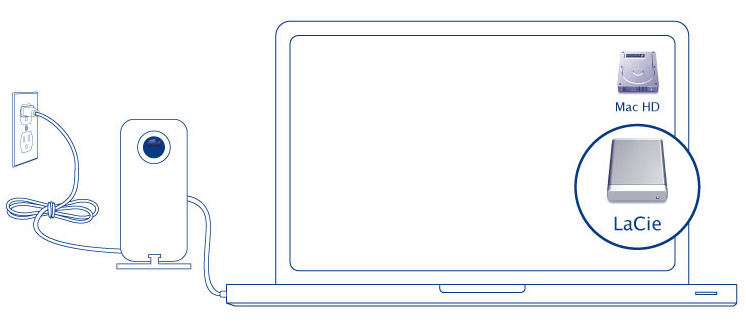
- The device will turn on automatically and the volume will mount on the desktop.


Receiving power
To receive power, the enclosure must be:
- Connected to a power source via the included power supply
- Connected to a computer or powered device compatible with Thunderbolt 2 technology or first generation Thunderbolt technology
Unmounting the volumes
In order to avoid file system corruption, it is important to unmount the volume before turning off the enclosure or disconnecting the interface cable. See Unmounting Your Drive for details.
© LaCie 2024
Last modified : Mar 28, 2014