Build one or two volumes using the New storage volume wizard. You can select:
Important note on creating a single-disk volume: Single-disk volumes can be created with expansion in mind. For example, you can use the New storage volume wizard to create a single-disk volume using JBOD or RAID 1. Though the volume will not provide data protection in a single-disk RAID 1 configuration, it is prepared for expansion when you add a second disk to the enclosure.
Important info: It is recommended that all users back up data to DAS or another NAS as further protection against disk failure or secondary points of failure (e.g. hardware, network, etc.) See
Backup Jobs for details.
.
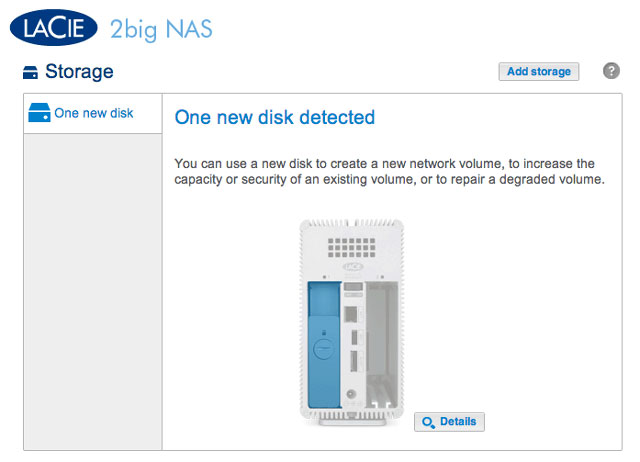
One disk
Install the disk into the enclosure before following the directions below. For instructions, see Remove/Insert a Hard Disk or Connect to the Network: Diskless LaCie 2big NAS.
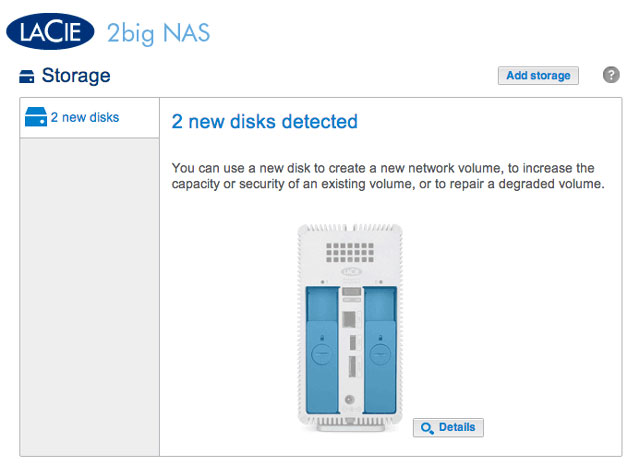
Select
One new disk at the top of the left-hand column, then choose
Add storage.
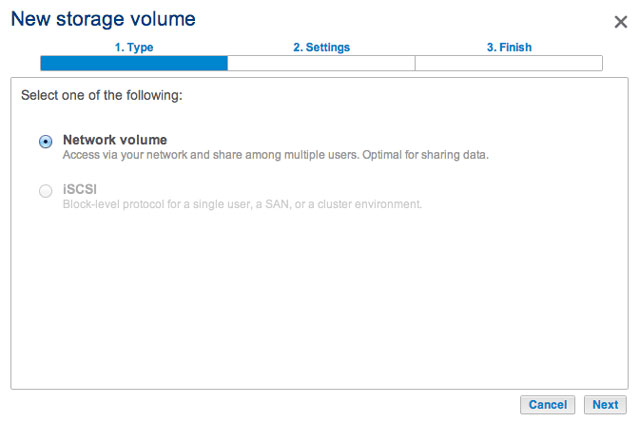
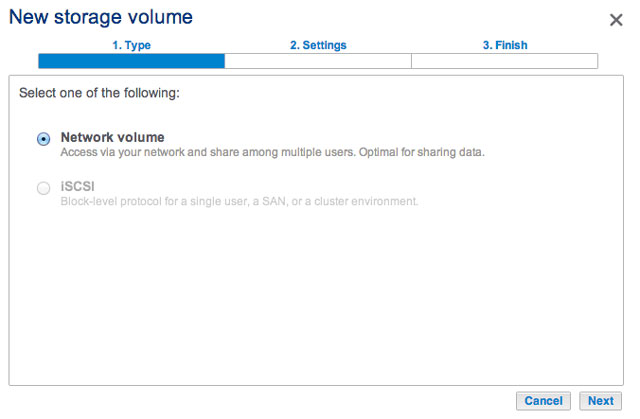
Select
Network volume then choose
Next.
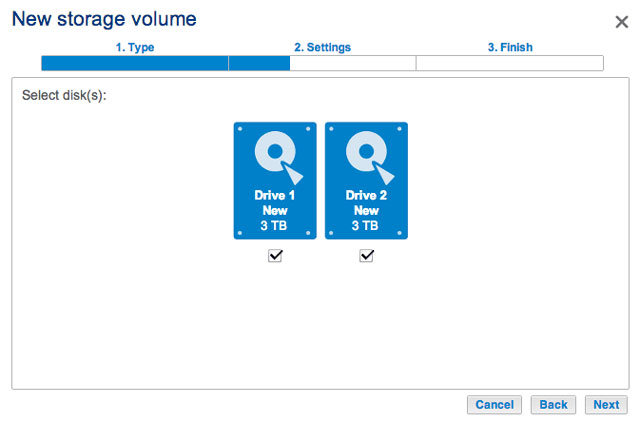
Select the check box under the new disk then choose
Next.

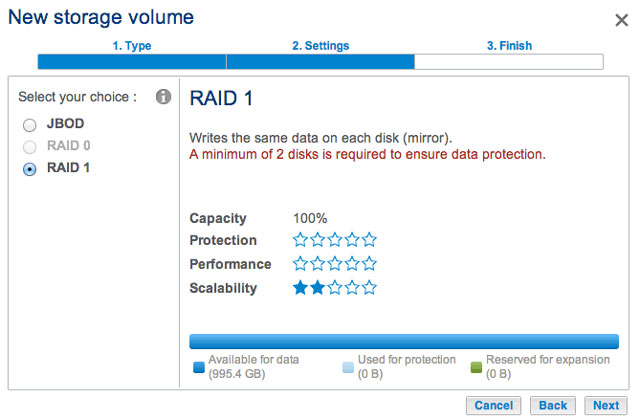
The RAID selection window helps you to select the optimal configuration for your environment:
Select a RAID mode's radio button to view an explanation of its strengths and weaknesses.
Use the cursor to choose the grey i tooltip to see a graphic summary of the strengths and weaknesses of each level of RAID.
Select JBOD or RAID 1, then choose
Next.
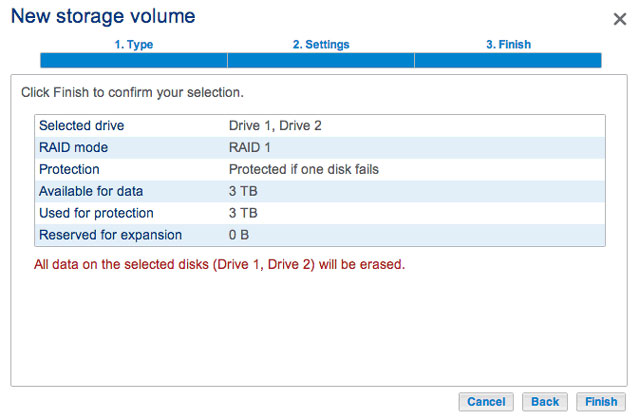
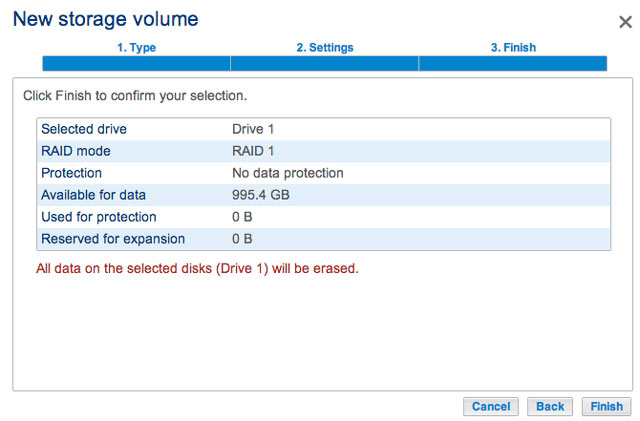
Review the summary window then choose
Finish. A popup window cautions you that all data on the selected disk will be deleted to create the volume. Select
Yes to build the volume.
To expand a single-disk volume, see Hard Disk Expansion.
Two disks
Install disks into the enclosure before following the directions below. For instructions, see Remove/Insert a Hard Disk or Connect to the Network: Diskless LaCie 2big NAS.
Choose
Add storage to launch the
New storage volume wizard.
Select
Network volume, then choose
Next.
The
Select disks window lists all the disks in the enclosure. Select the box under each disk then choose
Next. All data on the disks will be deleted to create the RAID configuration.
The RAID selection window helps you to select the optimal configuration for your environment:
Select a RAID mode's radio button to view an explanation of its strengths and weaknesses.
Use the cursor to choose the grey i tooltip to see a graphic summary of the strengths and weaknesses of each level of RAID.
Select the level of RAID that you want then choose
Next. Note, if you are reconfiguring an existing RAID, the new mode will erase files on the shares but your Dashboard configuration will not be affected.

Review the summary window then choose
Finish. A popup window cautions you that all data on the selected disks will be deleted to create the volume. Select
Yes to build the RAID.