Review the information below before attempting to add hard disks to a single-disk or unprotected volume.
Important info on NAS Backup: It is recommended that all users back up data to DAS or another NAS as further protection against disk failure or secondary points of failure (e.g. hardware, network, etc.). See
Backup Jobs for details.
An unprotected volume can be:
SimplyRAID single-disk
RAID 1 single-disk
JBOD
RAID 0
Removing a healthy hard disk from an unprotected volume while the LaCie 5big NAS Pro is powered on will delete all of the volume's data. While removing healthy disks is not recommended, you can avoid losing data by shutting down the LaCie NAS first. Return the hard drives to their proper bays before powering on the LaCie NAS.
Additionally, powering on the LaCie 5big NAS Pro with a missing disk in an unprotected volume will break its RAID and all data will be lost.
SimplyRAID
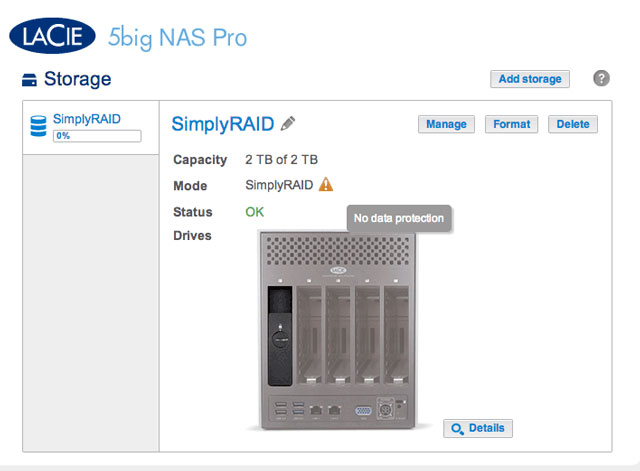
The screenshot above shows a single-disk volume configured for LaCie SimplyRAID (for instructions on how to change the name of the volume from the default to SimplyRAID, see Volume Tools). Follow the steps below to add one or more drives to your single-disk volume:
Insert a new hard drive into the next available drive slot in your LaCie 5big NAS Pro (see
Remove/Insert a Hard Disk for instructions). Following the disk installation, the
Dashboard > Storage page should display at least one
New hard drive.

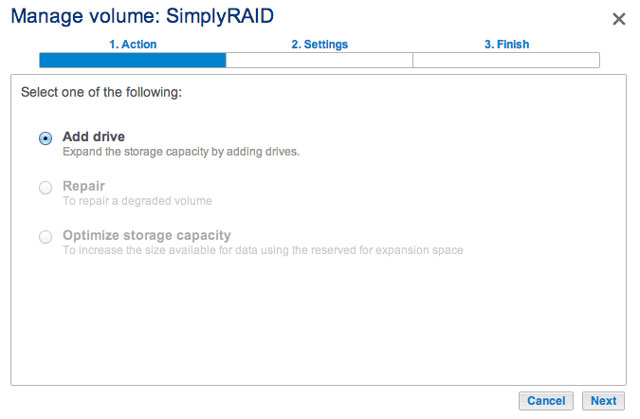
Choose Manage.
Select
Add drive and choose
Next.
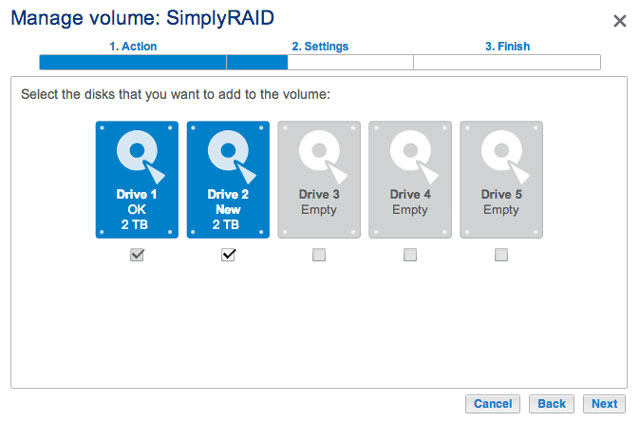
Select the new hard drive(s) and choose
Next.
Review the summary page and choose
Finish. Choose
Yes at the prompt to confirm the RAID.
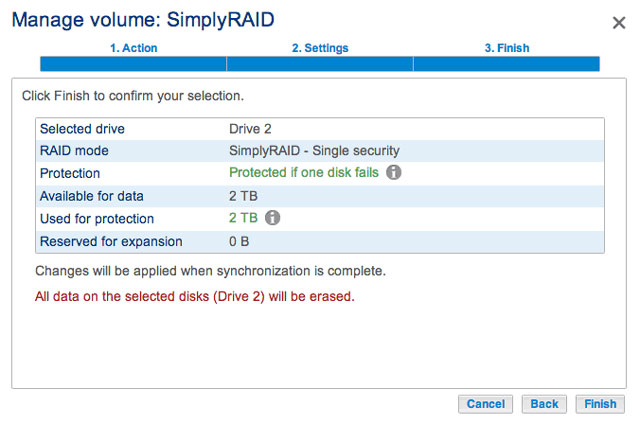
You can use the volume during the RAID syntonization.
RAID 1
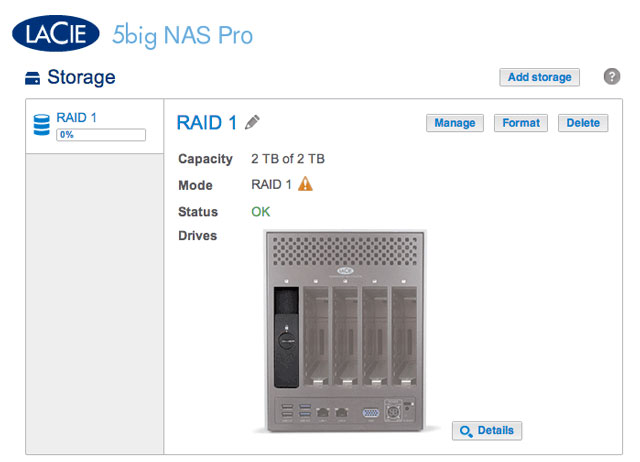
The screenshot above shows a single-disk volume configured for RAID 1 (for instructions on how to change the name of the volume from the default to RAID 1, see Volume Tools). Follow the steps below to add one or more drives to your single-disk volume:
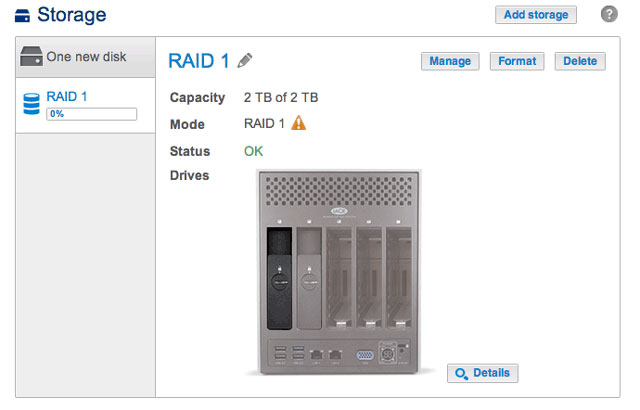
Insert a new hard drive into an available drive slot in your LaCie 5big NAS Pro (see
Remove/Insert a Hard Disk for instructions). Following the disk installation, the
Dashboard > Storage page should display at least one
New hard drive.
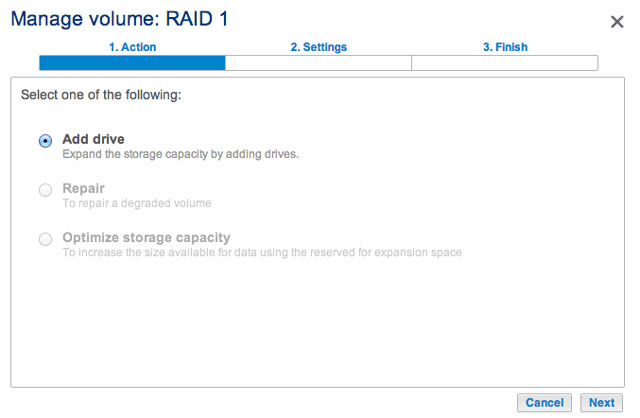
Choose Manage.
Select
Add drive and choose
Next.
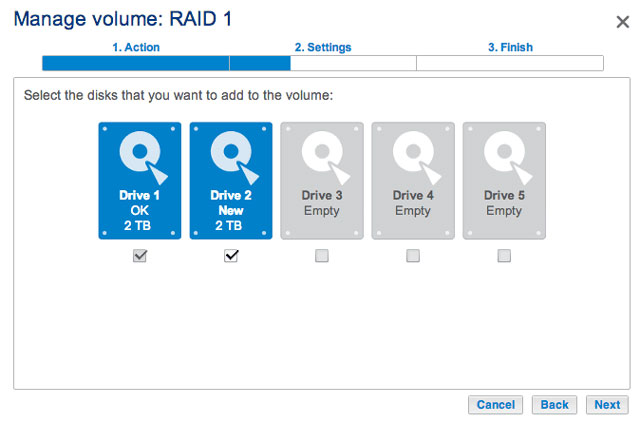
Select the new hard drive(s) and choose
Next.
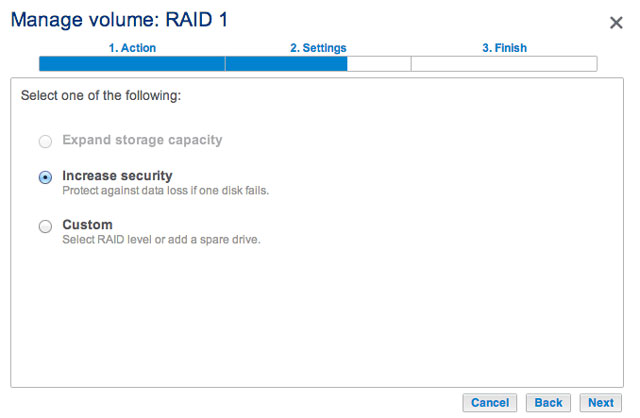
Select
Increase security and choose
Next. IMPORTANT: Choosing
Custom will bring you to the RAID selection menu. Selecting any RAID configuration via the
Custom menu will delete all media stored on the original drive.
Review the summary page then choose
Finish. Choose
Yes at the prompt to confirm the RAID.
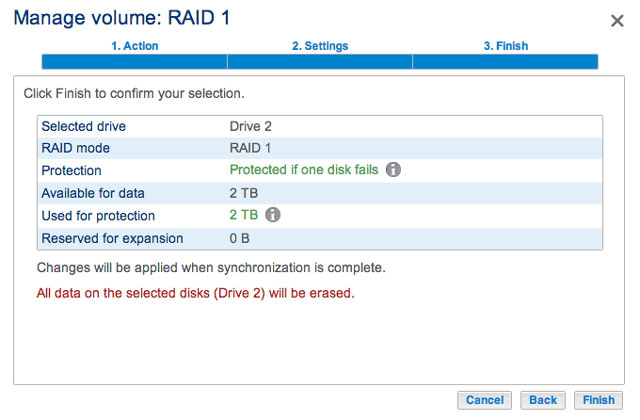
You can use the volume during the RAID synchronization.
JBOD
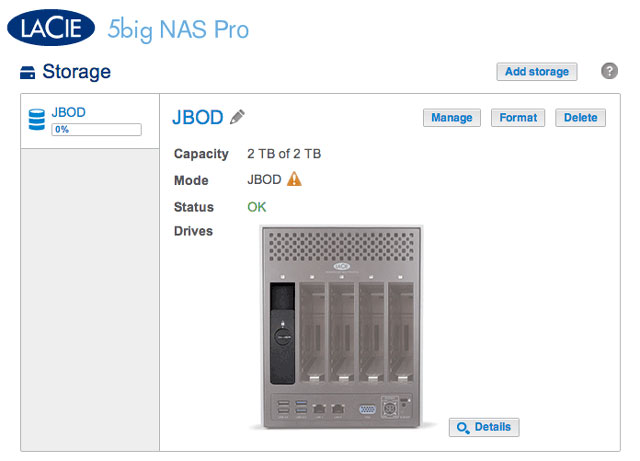
The screenshot above shows a single-disk volume configured for JBOD (for instructions on how to change the name of the volume from the default to JBOD, see Volume Tools). Follow the steps below to add one or more drives to your JBOD volume:
A JBOD volume can be expanded with new disks added to the LaCie 5big NAS Pro enclosure.
Insert a new hard drive into the next available drive slot in your LaCie 5big NAS Pro (see
Remove/Insert a Hard Disk for instructions). Following the disk installation, the
Dashboard > Storage page should display at least one
New hard drive.
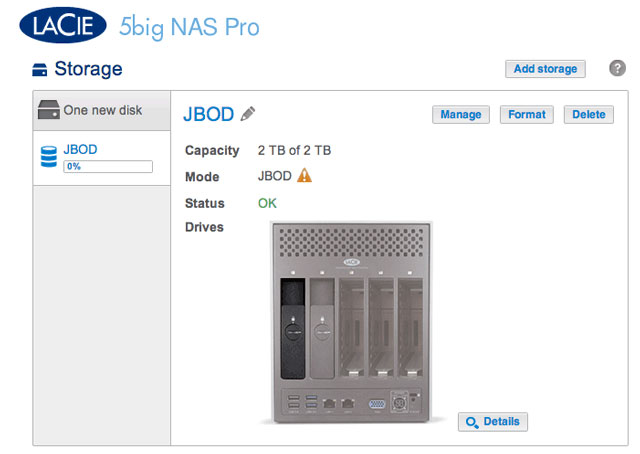
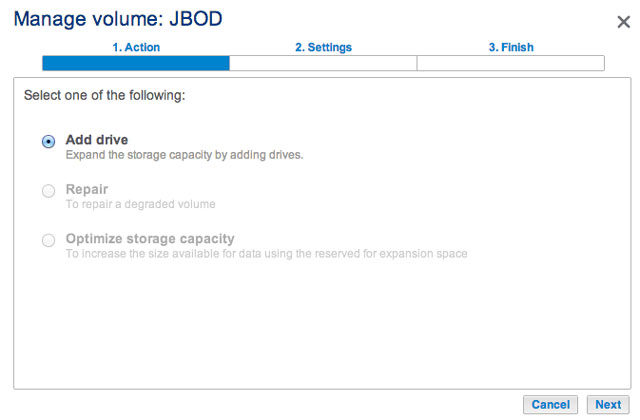
Choose Manage.
Select
Add drive and choose
Next.
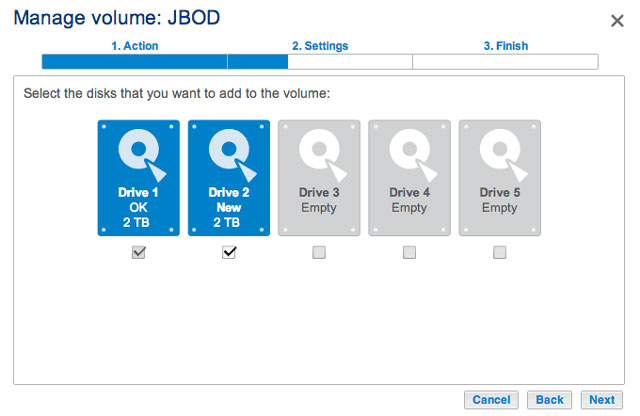
Select the new hard drive(s) and choose
Next.
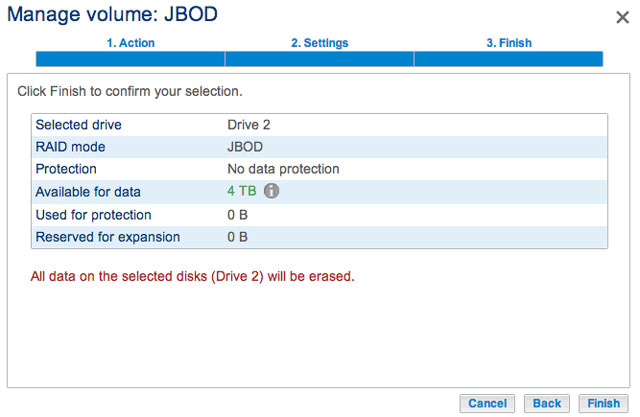
Review the summary page then choose
Finish. Choose
Yes at the prompt to confirm the RAID.
RAID 0
A RAID 0 volume cannot be expanded with new disks added to the LaCie 5big NAS Pro enclosure and/or swapped for disks of higher capacity.


