Table of Contents
Getting Connected
Follow the steps in the order they are given to ensure that the LaCie 2big Thunderbolt 2 volume mounts correctly on your computer. By default, the drives are configured in FAST mode (see Manage RAID) and formatted for Mac (HFS+ journaled).
Windows and the LaCie 2big
Since the LaCie 2big is preconfigured for Mac, Windows users must clean the hard drives when first connecting the device to the computer. Directions to clean the hard drives can be found below (Windows only - clean the hard drives).
Connect the power and interface cables
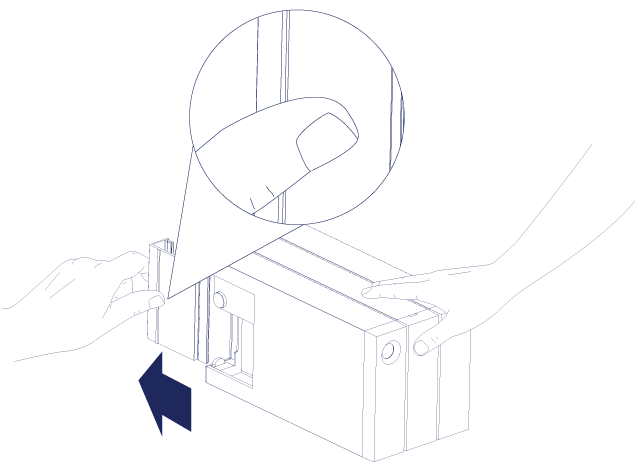
- Remove the side panel to access the interface and power connections. Place one hand on the front of the device for balance and use the other hand to push on the rear of the panel and slide the panel away from the enclosure. Important: The side panel may require added pressure to remove it from the slot.
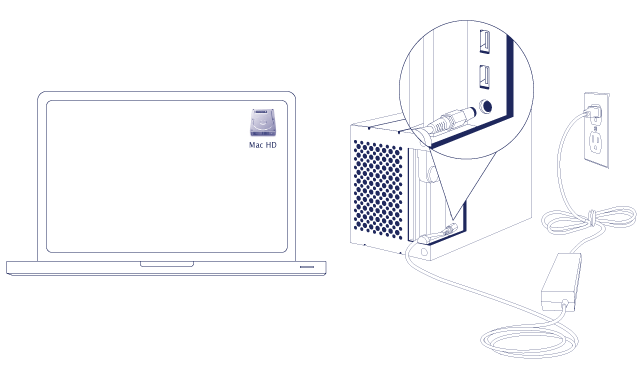
- Connect the included power supply in the following order:
- The LaCie 2big’s power port.
- An active power outlet.
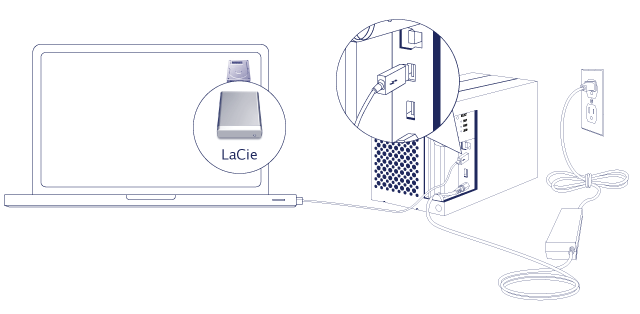
- Choose a port to connect the LaCie 2big:
- Thunderbolt 2:
- Mac: Connect the included Thunderbolt technology cable to one of the Thunderbolt ports on the LaCie 2big and a compatible port on your computer. The second Thunderbolt 2 port on the enclosure can be used to daisy chain compatible devices and displays (see Daisy Chain (Thunderbolt 2 only)). The LaCie 2big turns on automatically if your computer is powered on and the volume mounts on the desktop.
- Windows: See Windows: Install the Thunderbolt driver and then Windows: Clean the hard drives. Make certain to clean the hard drives before formatting them for Windows.
- USB 3.0: Connect the included USB 3.0 cable to the USB 3.0 port on the LaCie 2big and a compatible port on your computer. USB 3.0 transfer rates are only available when connecting the LaCie 2big to a computer with a USB 3.0 port.
- Mac: The LaCie 2big turns on automatically if your computer is powered on and the volume mounts on the desktop.
- Windows: The LaCie 2big turns on automatically if your computer is powered on. Make certain to clean the hard drives before formatting them for Windows. See Windows: Clean the hard drives.
- Replace the side panel to protect the cable connections. Important: The side panel may require added pressure to reinsert it into the slot.


Windows: Install Thunderbolt driver
Consider the following before proceeding with the directions below:
- Make certain that your PC has a Thunderbolt technology or Thunderbolt 2 port.
- Your PC may include a driver that recognizes the LaCie 2big Thunderbolt 2. However, LaCie cannot guarantee the same performance or features when using the built-in or default Windows driver rather than the driver provided by LaCie.
- Download the Thunderbolt driver for the 2big Thunderbolt 2 at the following link: LaCie 2big Thunderbolt 2 downloads.
- Unzip the downloaded file and note where it is located. For example, you can unzip the file on your PC’s desktop.
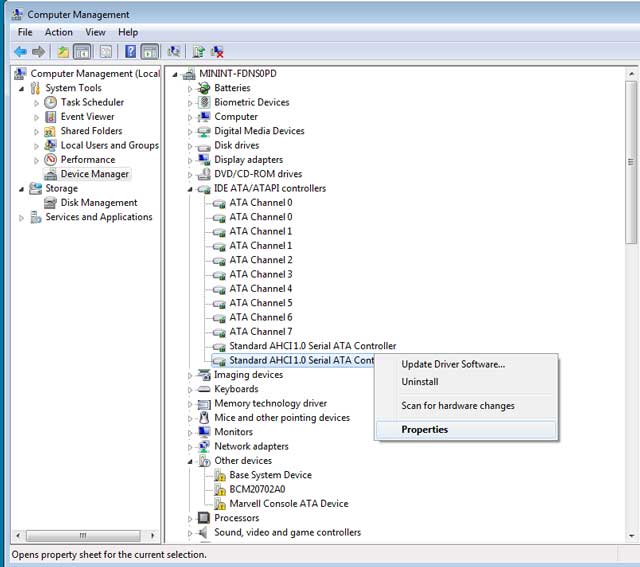
- Go to Start > Control Panel > Device Manager.
- Click IDE ATA/ATAPI controllers. Note that there is one item named Standard AHCI 1.0 Serial ATA Controller.
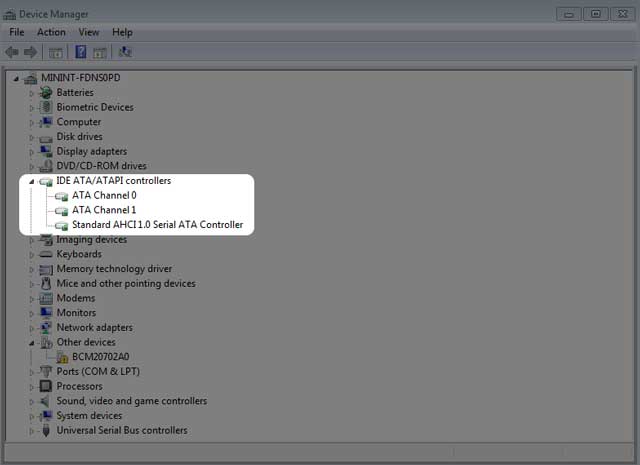
- Connect the 2big Thunderbolt 2 to your PC. Plug one end of the Thunderbolt cable to the LaCie 2big and the other end to a compatible port on your PC. Note that a second item named Standard AHCI 1.0 Serial ATA Controller appears in IDE ATA/ATAPI controllers.
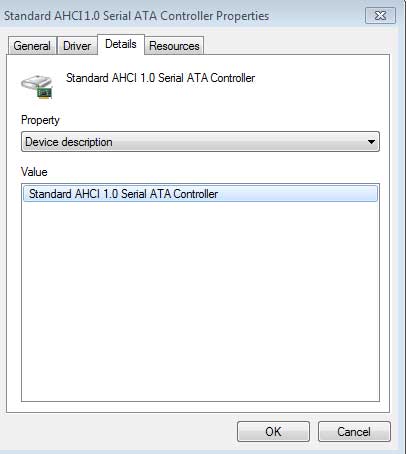
- Right click on the second item named Standard AHCI 1.0 Serial ATA Controller and choose Properties.
- Choose the Details tab.
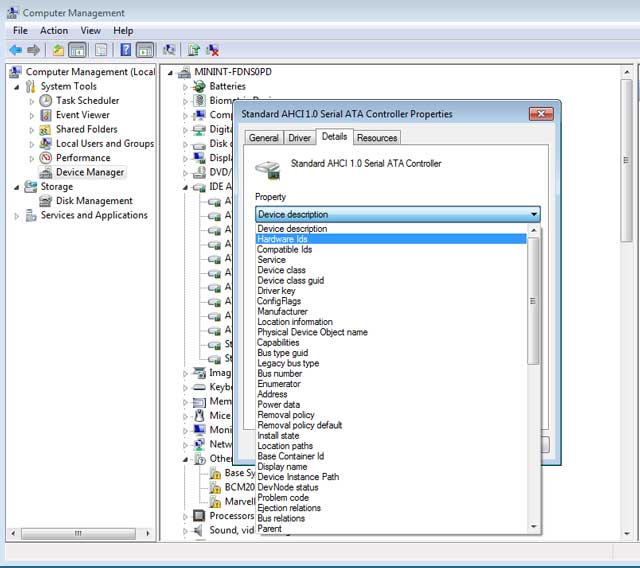
- In the pull-down menu, choose Hardware Ids.
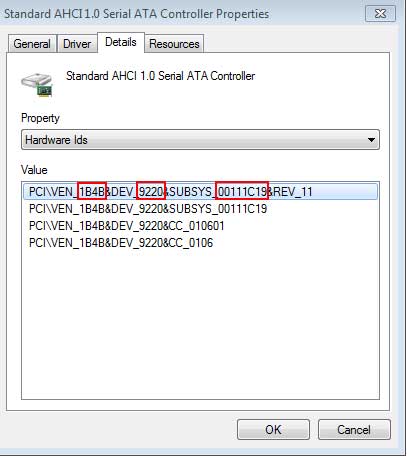
- Confirm that the value string includes 1B4B, 9220 and 00111C19. If the value does not include the characters demonstrated in the screenshot, close the properties and check the first Standard AHCI 1.0 Serial ATA Controller for the string.
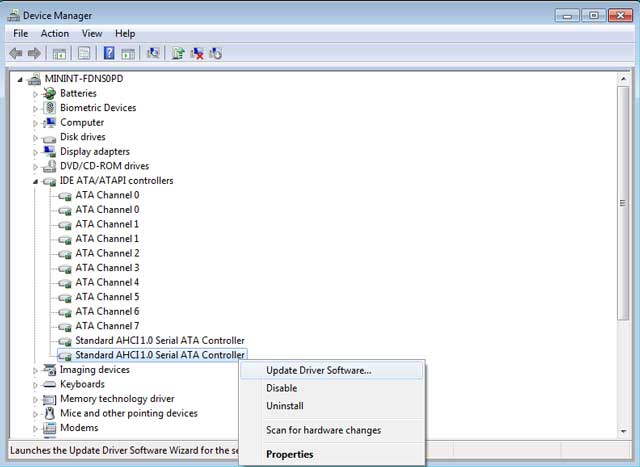
- Right click on the properly identified Standard AHCI 1.0 Serial ATA Controller and choose Update Drive Software.
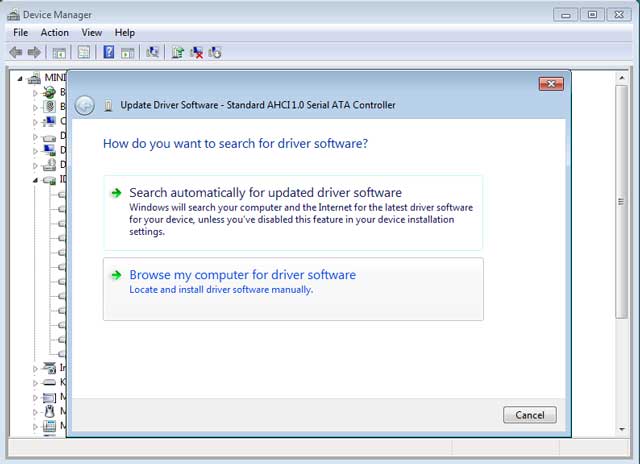
- Choose Browse my computer for driver software and navigate to the driver downloaded in step 1.
- Choose the folder that applies to your version of Windows and then choose OK:
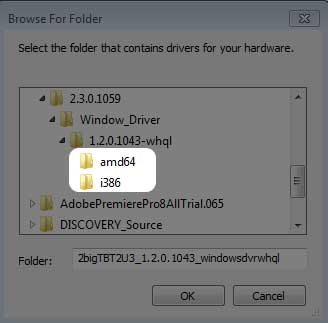
- 64-bit: Choose amd64.
- 32-bit: Choose i386.
- Choose Next to confirm the update.
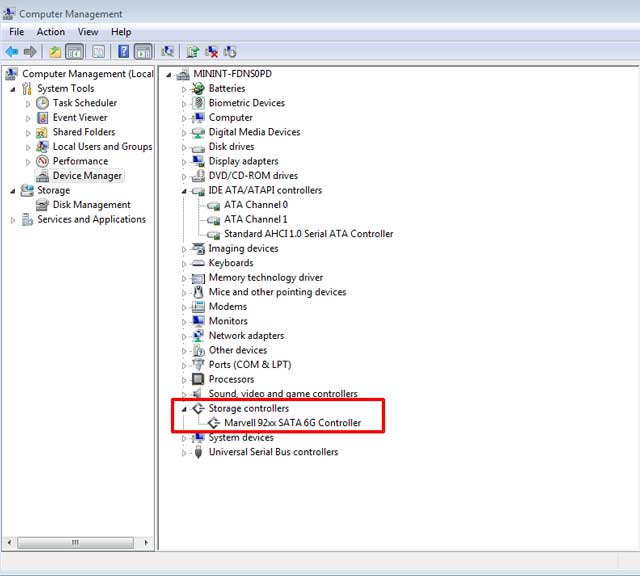
- Device Manager shows that the new driver has been installed.


Go to the next section to clean the hard drives before formatting them.
Windows: Clean the hard drives
Since the hard drives are formatted for Mac (HFS+), all partitions must be erased, including the EFI partition. Windows Disk Management cannot erase the EFI partition so you must run Diskpart, a separate Windows utility. For additional information on Diskpart, click here.

The steps below are illustrated using a standard hard drive enclosure with two hard drives. The images may not represent your product.
- Diskpart will delete and format any hard drive that you select. Therefore, to avoid deleting data on other devices, disconnect all external hard drives from your PC except the LaCie 2big. LaCie is not responsible for lost data. Diskpart cannot delete the System disk.
- Connect the LaCie product to your Windows computer via the included USB 3.0 cable (see Getting Connected). If necessary, turn the device on (see LEDs and LED Power Button).
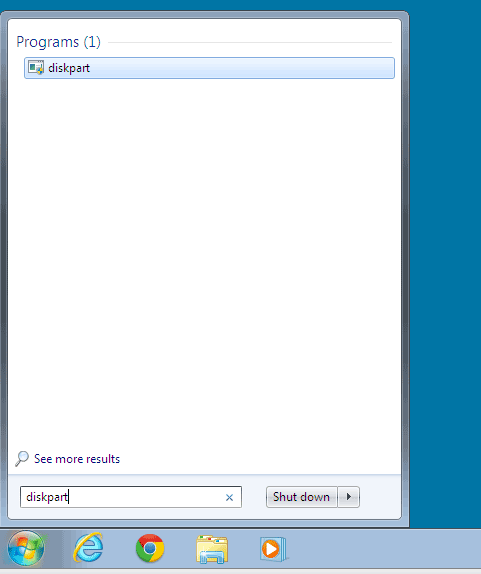
- Search for and launch Diskpart.
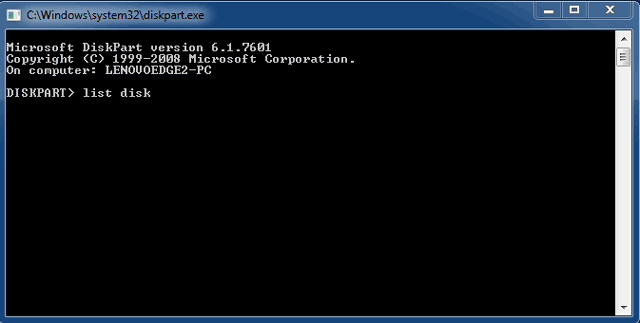
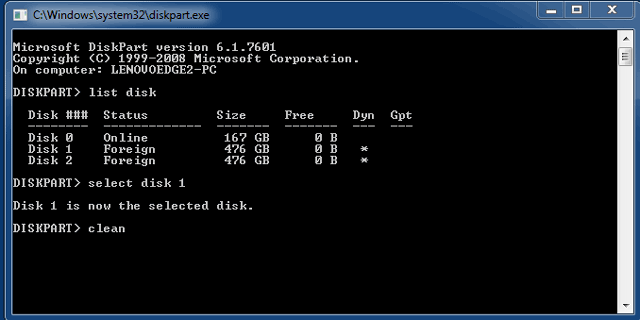
- In the Diskpart prompt, type list disk.
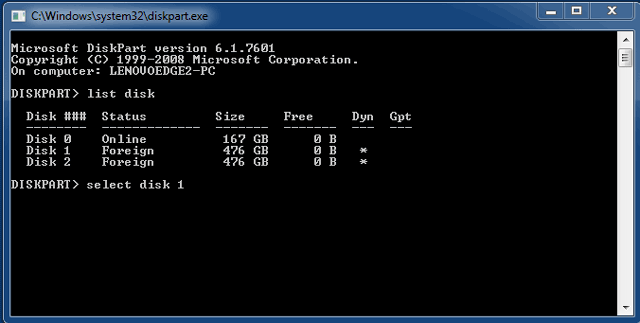
- Make certain to locate the disk number(s) for your LaCie device then type select disk n. n is the number for the first LaCie hard drive (1 in the screenshot below). If you are uncertain of the disk number for the LaCie product, launch Disk Management. You should see the number assigned to the LaCie product.
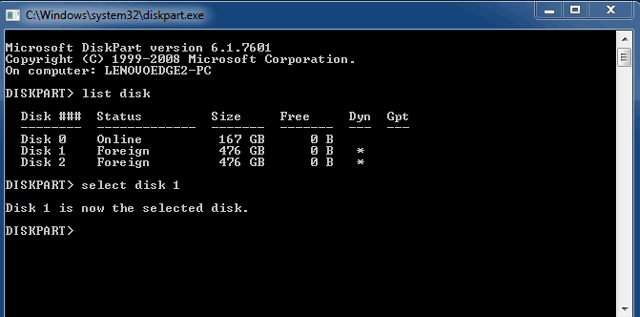
- Diskpart confirms that your hard disk has been selected.
- To delete all partitions on the hard disk, type clean.
- Diskpart confirms that your hard disk is clean, meaning that the partitions have been deleted.
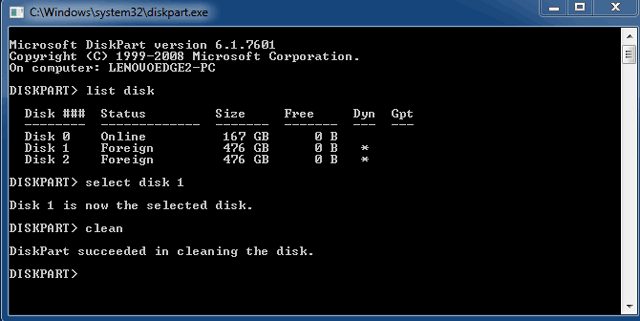
- The LaCie product is ready to be formatted for your operating system. See Formatting for instructions.


Unmounting the Volume
In order to avoid file system corruption, it is important to unmount the volumes before turning off the enclosure or disconnecting the interface cable. See Unmounting Your Drive for details.