Create a Local Backup (DAS)
Connect an external hard drive (direct-attached storage or, DAS) to one of the NAS's USB or eSATA ports before following the steps below (see Views of the Product for port locations). The DAS should appear as a volume on the Storage page LaCie NAS Ports and Direct-Attached Storage
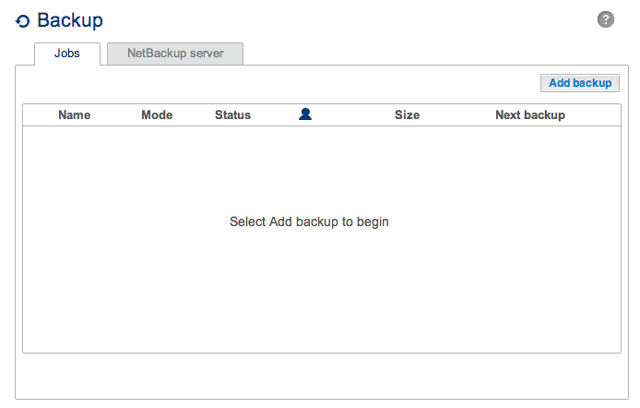
- Go to Dashboard > Backup.
- Choose Add backup.
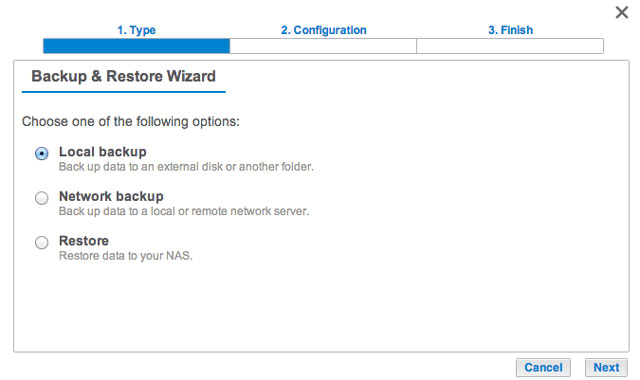
- Select Local backup then choose Next.
- Under Source on the left, select the NAS shares or DAS partitions to back up. Under Destination on the right, select the External ports or NAS share to store the backup job.
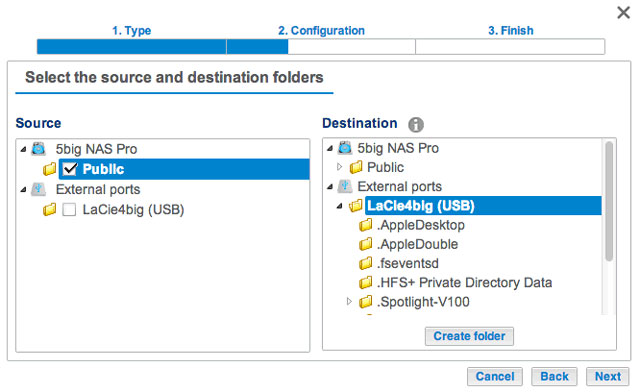
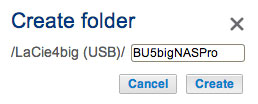
- To better organize backup jobs, you can create a folder inside the destination. Choose Create folder then enter its name. Choose Create then Next.
- Select a backup type, then choose Next.
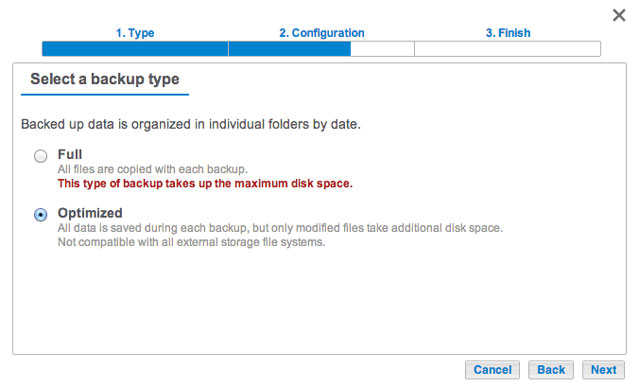
- Full: The entire contents of the source folder will be saved each time the backup job runs. This method offers high security but it requires a good amount of storage capacity on the destination.
- Optimized After the initial full backup, only modified files are added in subsequent backups. This is an efficient use of storage space on the destination. Important: Optimized backups are not available with certain DAS file systems. See Supported File Systems for Optimized Backups.
- Select Manual, Scheduled, or Custom then choose Next. See note regarding Manual backups.
- (Skip this step if you chose Manual.) Select the frequency for your backup job and the time of day. Choose Next.
- Enter a name for the backup job then choose Next.

- Confirm the backup settings on the Summary page. If you wish to begin the backup immediately, keep the box checked below the summary and choose Finish.
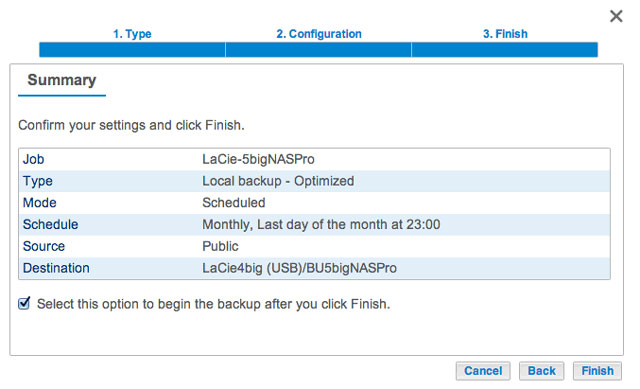


The backup job will appear on Dashboard > Backup.

Note on Manual Backups: A manual backup must be started by the administrator:
- Navigate to Dashboard > Backup.
- Locate the manual backup job you wish to start then click on its grey arrow icon on the far right.
Supported File Systems for Optimized Backups
| Operating Systems | Hard Disk File System | Optimized Backup (Incremental) |
|---|---|---|
| Linux | ext2, ext3, ext4, and XFS | Yes |
| Mac | HFS+ Non-Journaled | Yes |
| Mac | HFS+ Journaled | No |
| Windows/Mac | FAT32 | No |
| Windows | NTFS | No |