Table of Contents
Installation
This chapter explains how to connect your LaPlug to your network. Simply install LaCie Network Assistant, a small utility which will help you to discover and configure your product, then connect the LaPlug to the network.
Follow the steps below to get your product up and running. After you finish installation, move on to Access USB Devices or Administer the LaPlug.
Important info: Even if you intend to connect to the LaPlug using Wi-Fi, you must first connect it to your network via the Ethernet cable in order to configure the wireless connection.
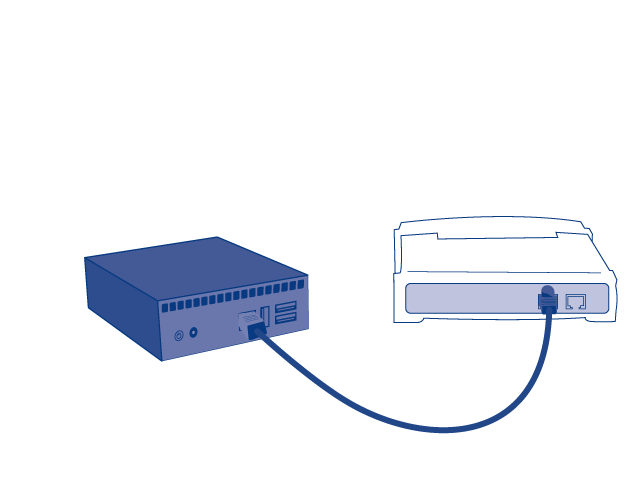
1 - Connect the Ethernet Cable
- Connect the Ethernet cable to the Ethernet port on the back of the product.
- Connect the other end of the Ethernet cable into an available Ethernet port on your router or hub (refer to your router or hub's documentation if necessary).

2 - Connect the Power Supply
- Connect the power supply to a wall outlet and to the product.
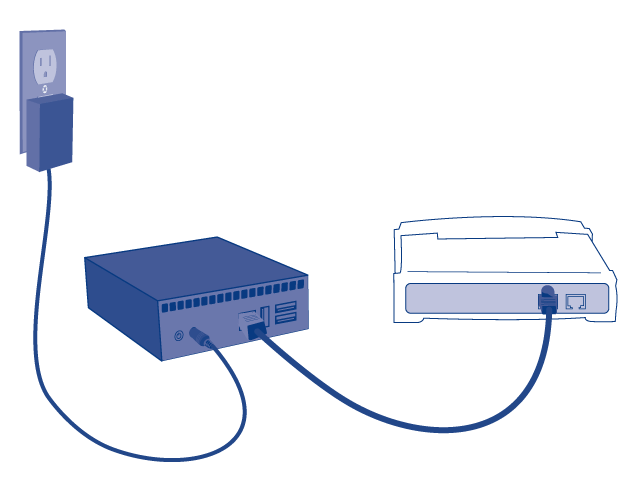
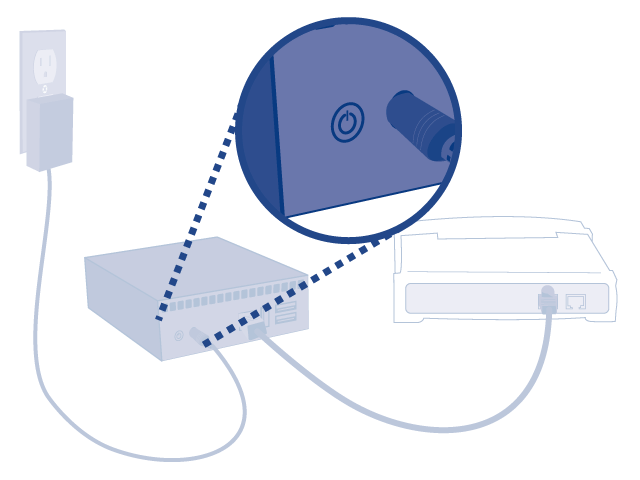
- Push the power button until the front LED turns blue. Release the button and the LED will flash blue. Then the product will boot, which may take up to two minutes. When the light becomes steady blue, the product is ready to use.


Caution: Only use the power supply supplied with your specific LaCie product. Do not use a power supply from another LaCie device or another manufacturer. Using any other power cable or power supply may cause damage to the device and void your warranty. Always remove the AC adapter before transporting your LaCie drive. Failure to remove the adapter may result in damage to your drive and will void your warranty.
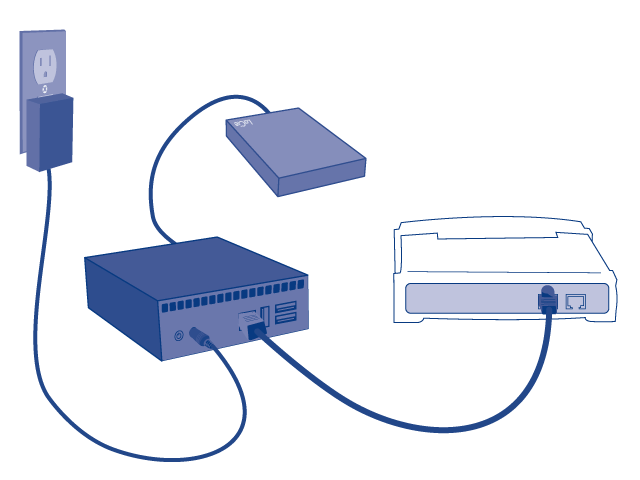
3 - Connect USB Devices
- Connect USB storage devices to the LaPlug's USB ports.

Important info: USB power failure: If you connect hard drive(s) to the LaPlug that experience a USB failure, the LED will blink red, all connected USB devices will become inaccessible, and you will receive an error on the Dashboard. Simply remove the last connected device and then follow the instructions that appear on the Dashboard.
Refer to USB Power Failure for more information.
Refer to USB Power Failure for more information.
4 - Install LaCie Network Assistant
Lacie Network Assistant detects all LaCie network-attached storage devices on your network and gives you easy ways to connect to or configure them.
Note: If you've installed LaCie Network Assistant before purchasing this LaCie product, make sure that you've downloaded and installed the latest version from the LaCie website.
- Insert the CD-ROM into your computer's CD-ROM drive.
- Windows users, the CD should appear in My Computer or Computer. Mac users, the CD should appear on the Desktop. Double-click the CD icon, then double-click LaCie Network Assistant Setup.
- Follow the Wizard to complete installation.
Note: After you finish installation, move on to Access USB Devices or Administer the LaPlug.