Table of Contents
Advanced Accessibility Features
This chapter will describe advanced accessibility features such as remote access, creating shortcuts to your shares, and multimedia streaming.
Remote Access
With your MyNAS address, you can log onto the Dashboard from remote locations. Enjoy your files anywhere via the File Browser or access the Dashboard to make adjustments in your settings.
MyNAS Address
If you do not have a MyNAS address, follow these easy steps to get started:
- Go to the Dashboard Network page.
- In the Remote Access pulldown menu, select MyNAS by LaCie.
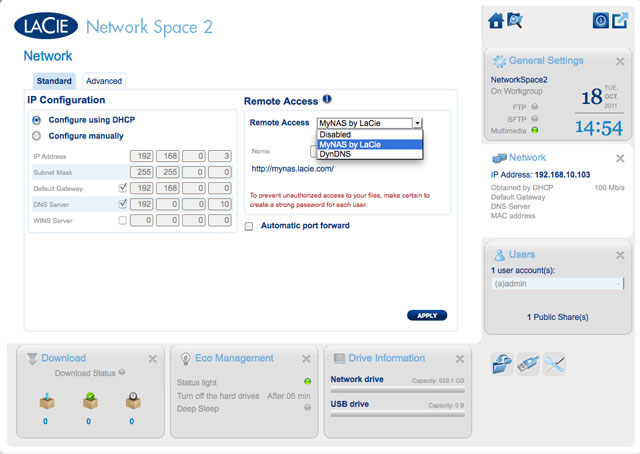
- Enter the name you would like to use for your MyNAS remote address. The name you enter here will follow http://mynas.lacie.com. For example, mynas.lacie.com/admin1967.
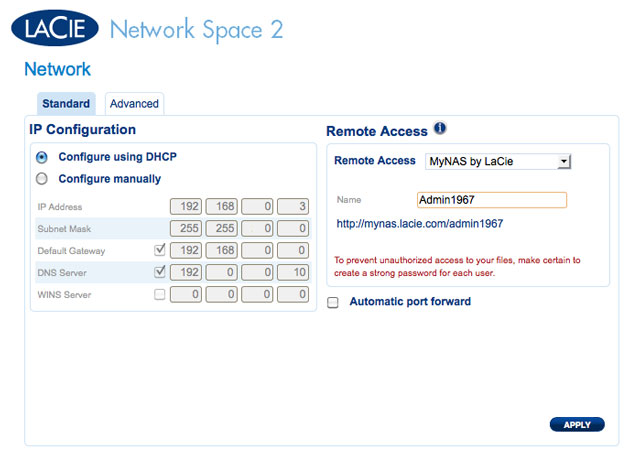
- Click APPLY.


To access LaCie MyNAS from a remote location:
- Launch an Internet browser
- Enter your MyNAS name in the available field
- Click on the arrow to the right of the field
- Log into your Dashboard

DynDNS
You may also choose DynDNS for remote access. For more information on creating an account with DynDNS, please see their website.
Creating Shortcuts to Shares
You can create shortcuts to shares using LaCie Network Assistant and your operating system.
Create a Shortcut Using LaCie Network Assistant
LaCie Network Assistant can be configured to automatically mount shares on your computer, which allows you quick access to the files they store:
- From the LaCie Network Assistant menu, click Open LaCie LaCie Network Assistant…. (Choose Configuration Window with earlier versions of LaCie Network Assistant.)
- Select your network storage from the left-hand column (i.e. Network Space 2 and/or Network Space MAX).
- Click the Volumes tab.
- Next to the share(s) you wish to map, check the box under the column Auto.
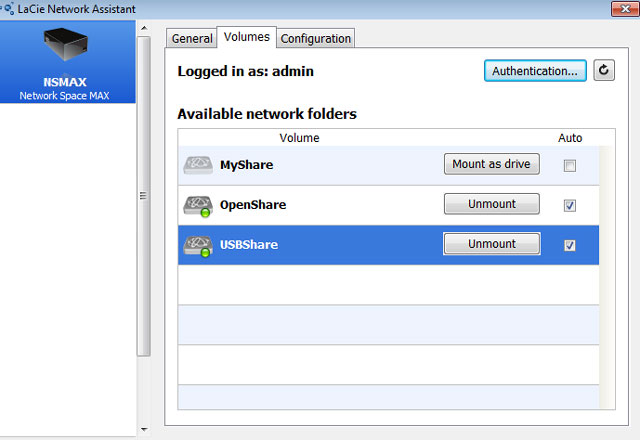

Auto Mount Shares - Administrator
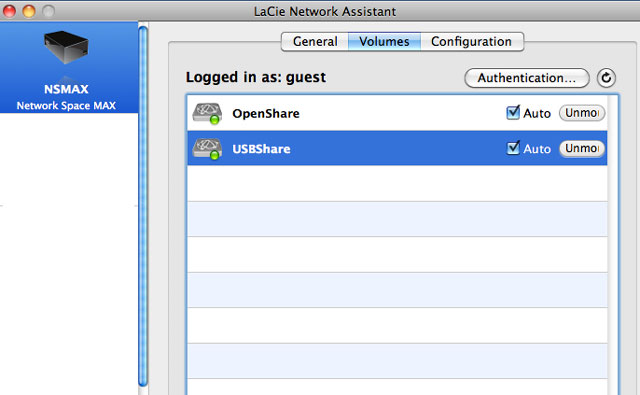
Auto Mount Shares - User
If you see the message “can't list volumes,” it may be because you are using an outdated version of LaCie Network Assistant. Download the most recent version from the LaCie website (http://www.lacie.com/support). - Windows users: The share will mount in My Computer/Computer automatically when the computer detects it on the network.
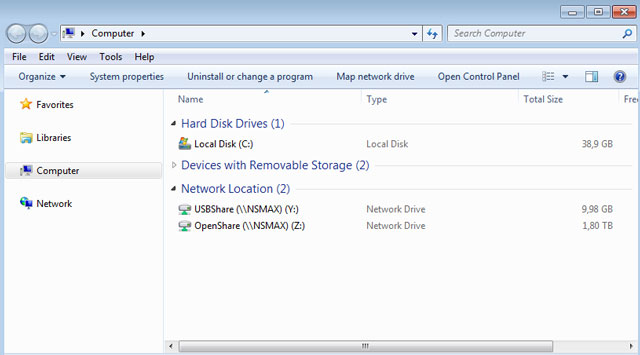
Auto Mount Shares - Windows
Mac users: The share volume icon will appear on your desktop and in your Finder automatically when the computer detects it on the network.
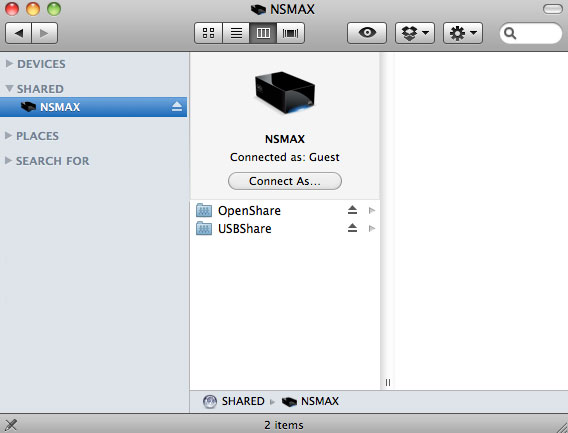
Auto Mount Shares - Mac


Create a Shortcut Using the Operating System
Windows XP, Vista, and Windows 7 Users
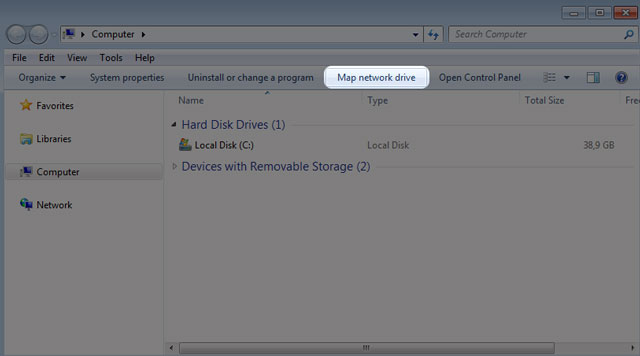
- From an Explorer window in Windows XP, select Tools > Map Network Drive. For Windows Vista and Windows 7, navigate to Computer in an Explorer window to click Map Network Drive.
- Browse to and select the share you wish to auto mount.
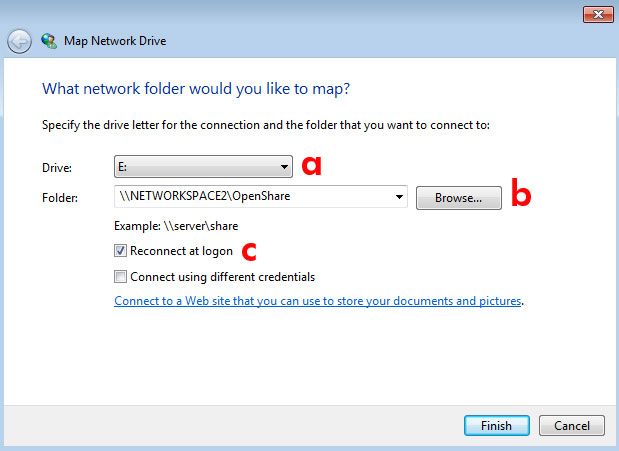
- a. Choose a free letter to assign to the share
- b. Browse the network for the share you wish to mount
- c. Check the box next to Reconnect at logon to have the share mount each time you log onto your computer
- Repeat the steps for other shares.


Mac Users
Mount
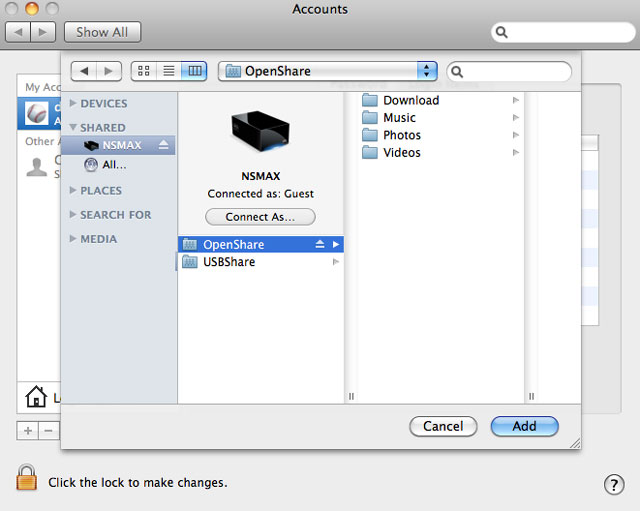
- Open a new Finder window. On the left of the window, navigate to Shared > [machine name] > [share]. OpenShare and USBShare will be available to all users on the network.
- For access to MyShare and User Shares:
- Select the LaCie network storage in SHARED
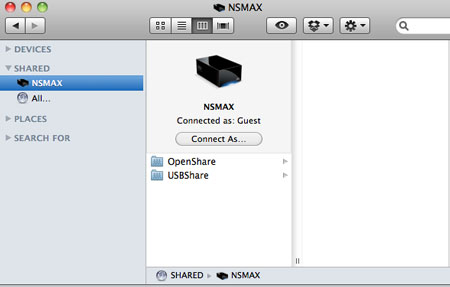
- Select Connect As… to enter the Name [user or administrator username] and Password
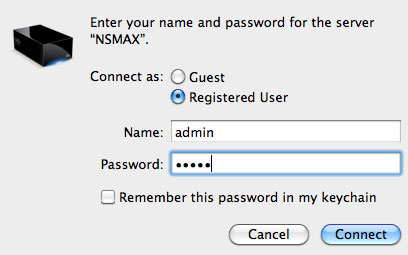
- The user share or MyShare will mount

- Repeat the steps for each share.


Auto Mount
Your share can be available each time you log onto your Apple computer:
- Follow the directions above to mount the share you wish to configure. The share must be available to the operating system in order to begin the setup for auto mounting.
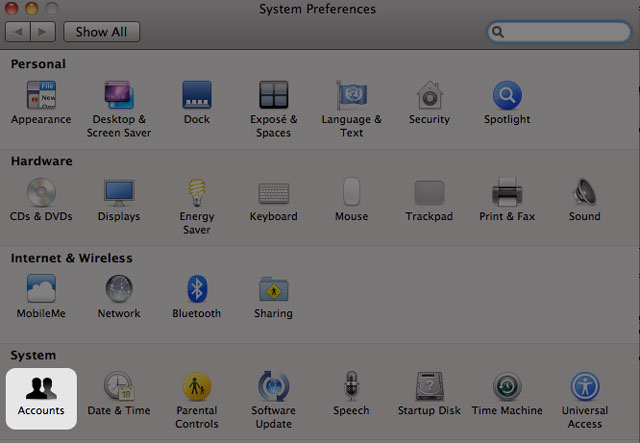
- From the Apple icon in the menu bar, select System Preferences…
- Select System > Accounts
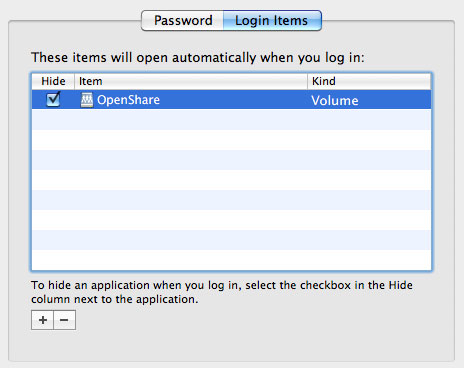
- Select the tab Login Items
- Click the + symbol
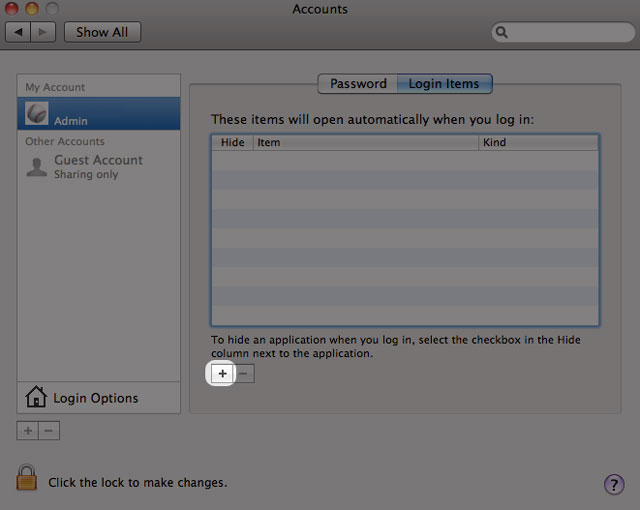
- Navigate to the share and click ADD
- The share(s) will be available each time you log onto the Mac. If you do not want the window for the share to open each time you log into your Mac, select the checkbox for Hide next to the share.


Accessing Shares via FTP
The FTP protocol is used to transfer files from one computer to another via the local network or the Internet. This protocol allows you to exchange files with your friends or relatives securely, as only people with a user account will have access.
The FTP service is disabled by default, so you must enable it in on the Dashboard - Network page.
Enter the network storage IP address in the FTP client's address field:
ftp://[IP-address]
Example: ftp://192.168.10.149
OR
ftp://[username:password]@[ip or machine name]/
Example: ftp://ringo:4xtp23@lacie-NSMAX/
To login, enter your Dashboard username and password. (By default, admin/admin.)

Access files via third-party FTP applications
To remotely access the share from a computer that is not on your network, refer to Remote Access. Instead of the machine name or the local IP address, you will use the host name created by the DYNDNS service.
Wake on LAN (WOL)
You can use LaCie Network Assistant to wake your LaCie network storage from Deep Sleep Mode.
- Go to LaCie Network Assistant > Wake Up a Device…
- Select your device from the pulldown menu Device to wake up:. You will see the device listed by its name and MAC address.
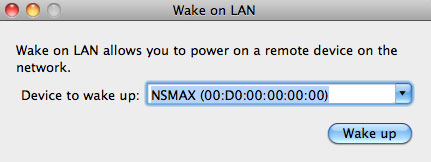
- Click Wake up
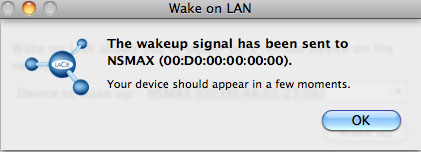
- A prompt will inform you that the message has been sent to your network storage.


Media Servers
You can configure your LaCie network storage to share files (read-only) with UPnP/DLNA devices connected to the same network. Follow these steps:
- Make sure your LaCie network storage is connected to your network as described in Connect to the Network.
- Enable the Multimedia service on the Dashboard (see Dashboard - General Settings)
- Now you will be able to play media files located on OpenShare (i.e. compatible photos, movies, and music). You must use a media player/adapter that is:
- UPnP/DLNA-certified, such as an Xbox® 360, PlayStation® 3, a DLNA mobile phone, etc.
- Connected to the same network as the LaCie network storage
Media Servers - iTunes®
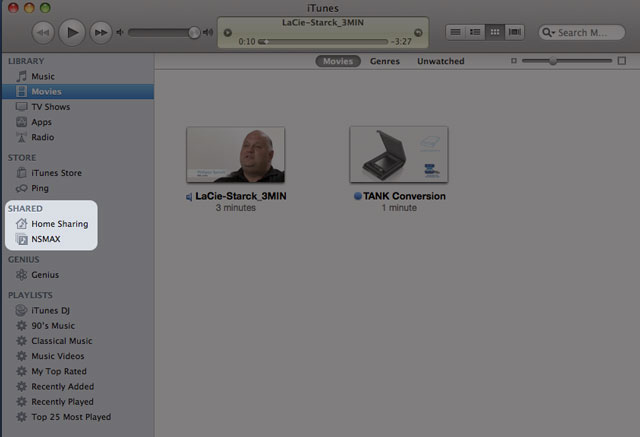
Your LaCie network storage can act as an iTunes Music server, streaming audio files to a computer on the network that is running iTunes. Once configured, your network storage's machine name will appear in the SHARED category within iTunes.
- Make sure your network storage is connected to your network as described in Connect to the Network.
- Enable the Multimedia service on the Dashboard (see Dashboard - General Settings).
- In iTunes, make sure Library sharing is enabled in Preferences > General > Shared libraries.
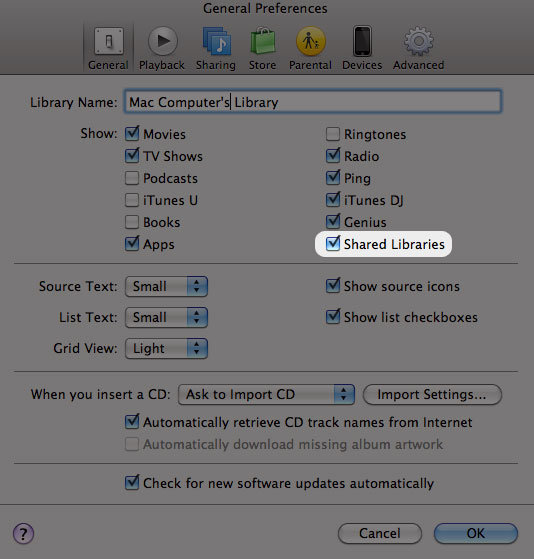
iTunes Preferences - Check Shared Libraries
- Access the media files from SHARED in iTunes.


Media Servers - Windows Media Player®
Once configured, Windows Media Player can play media files located on OpenShare via compatible network devices.
- Make sure your LaCie network storage is connected to your network as described in Connect to the Network.
- Enable the Multimedia service on the Dashboard (see Dashboard - General Settings).
- Launch Windows Media Player.
- Even if OpenShare is not mounted, your LaCie network storage device should appear in the section called Other Libraries.

Windows Media Player

Using Backup Software
Your LaCie storage device is fully compatible with Apple Time Machine®, Windows Backup and Restore®, and Genie Timeline®. A share can be set as the target network storage for most backup solutions. Please note that a user must have access to a share in order to backup his computer.