User Tools
Site Tools
Network Space 2 and Network Space MAX
User Manuals Print page
 Save page as PDF
Table of Contents


Table of Contents
Administration (Dashboard)
The Dashboard is an easy-to-use browser-based administration tool that will allow you to manage users, shares, backups, and many other features.
Dashboard - Accessing
There are two ways to access the Dashboard:
- LaCie Network Assistant
- Web browser
Dashboard Access Using LaCie Network Assistant
- Open LaCie Network Assistant:
- Windows: Right-click on the LaCie Network Assistant icon in the system tray
- Mac: Click on the LaCie Network Assistant icon in the menu bar
- Choose [machine name] > Web Access
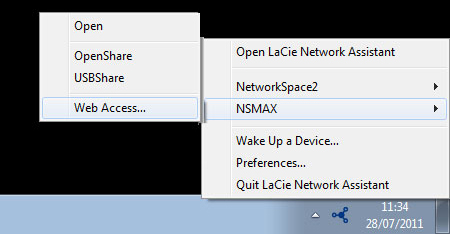

Windows
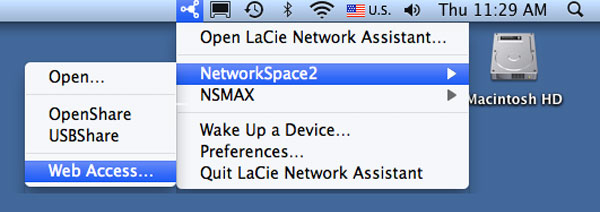
Mac - The login page will open in a new browser window or tab. If your browser is not open, LaCie Network Assistant will open it for you.
- You will be prompted to complete a quick Setup Wizard the first time the Dashboard is accessed. Your password can run from 4-20 alphanumeric characters and symbols, and your username should be from 1-20 alphanumeric characters (see Dashboard - First Logon). In subsequent logins, simply type in the username and password you selected.
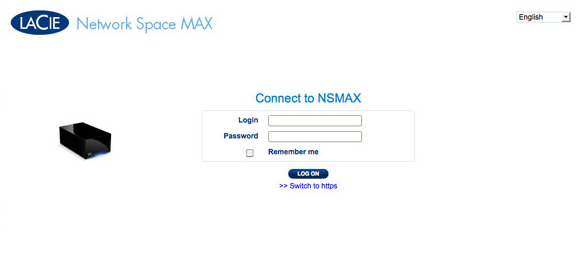
- Click LOG ON.


Dashboard Access Using a Browser
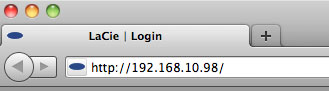
- Open your Internet browser (Firefox, Internet Explorer, Safari, etc.) and type your storage device's IP address or machine name in the browser's URL (web address) field.
For example: http://[IP-address] or http://[machine name] (Windows) or http://[machine name].local (Mac)
- You will be prompted to complete a quick Setup Wizard the first time the Dashboard is accessed. Your password can run from 4-20 alphanumeric characters and symbols, and your username should be from 1-20 alphanumeric characters (see Dashboard - First Logon). In subsequent logins, simply type in the username and password you selected.
- Click LOG ON.


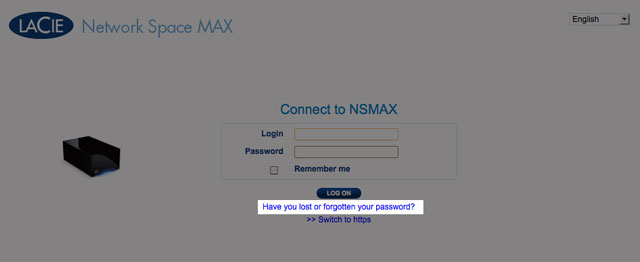
Recovering a Lost Password
If the administrator has forgotten his password, it can be recovered if an SMTP server has been assigned with an email address. See Dashboard - Network for instructions on adding an email address.
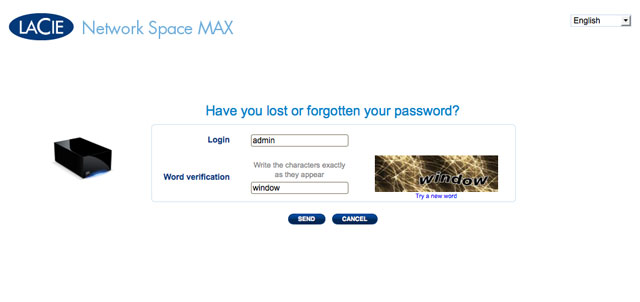
- On the login page, click Have you lost or forgotten your password?.
- On the next page, type in the username. Then type the word you see in the image on the right (this ensures that the request is coming from a person) and click SEND.
- The message will arrive in the administrator's email inbox. In the email, click the Click here link.
- In the Reinitialize your password screen, type your login, new password, then reconfirm the new password, then click Send.


Dashboard - First Logon
The first time you log onto your network storage, you will be asked:
- To enter a few initial settings, such as a login and password.
- To configure your LaCie MyNAS address. A MyNAS address allows you to access your network storage from a remote location with a connection to the Internet.
To begin, log onto your LaCie network storage via LaCie Network Assistant or enter the address manually in an Internet browser:
- Complete the initial settings for your device:
- Language (upper right): Select your preferred language.
- Machine Name: You may keep the default name of your device or enter a new one.
- Administrator login: This field cannot be changed.
- Enter your password: Use a password that is easy for you to remember but difficult for others to guess. Strong passwords include a mix of capital and small letters with at least one number.
- Time settings: You can enter the time manually or use a NTP (network time protocol) server. You can test the NTP server by selecting the TEST button.
- Set the size of your USB storage (USBShare).
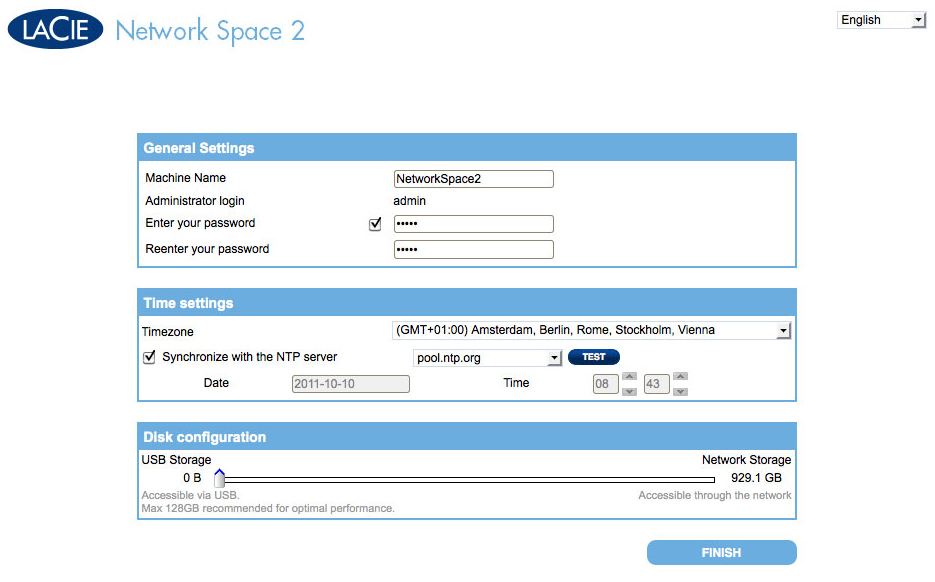
- Select FINISH.
- A window prompt will offer to configure remote access to your LaCie network storage. Click Configure to begin the quick setup.
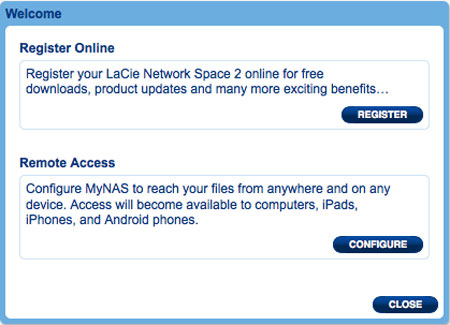
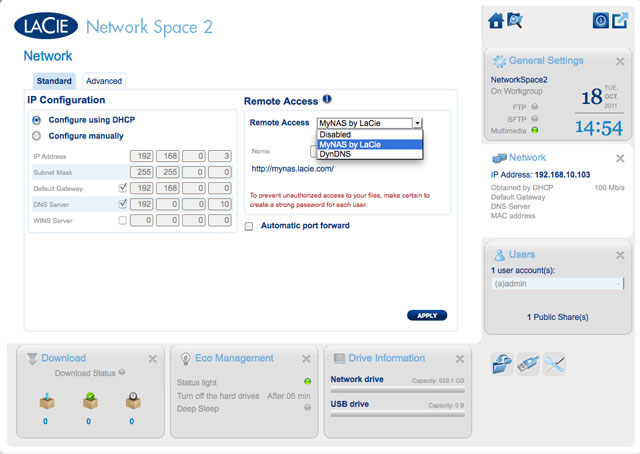
- The Dashboard Network page will open. In the Remote Access pulldown menu, select MyNAS by LaCie.
- Enter the name you would like to use for your MyNAS remote address. Since the address will always begin with http://mynas.lacie.com, LaCie recommends using a short name that is easy to remember.
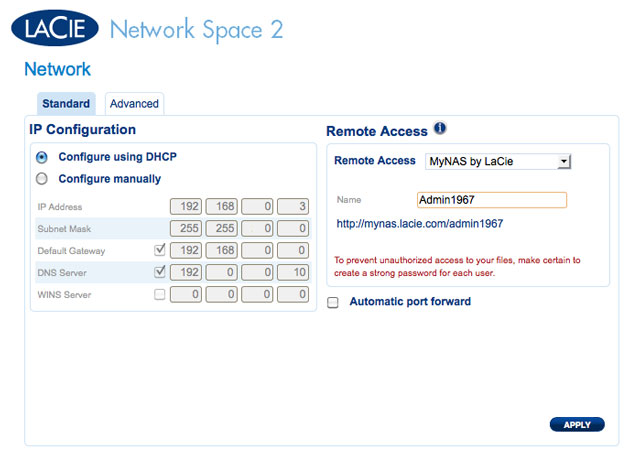
- Click APPLY.


Your LaCie network storage and MyNAS address are ready for use. See Remote Access for more information on MyNAS.
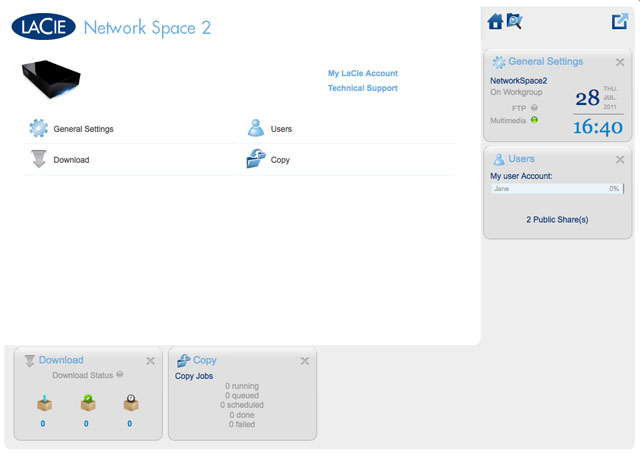
Dashboard - Welcome
The Welcome page contains links to helpful documents from the LaCie website, the ability to change details for the administrator, and a list of the different pages that make up the Dashboard.

Important info: Logging into the Dashboard with administrative credentials gives you full access to its features. Without administrative privileges, the only pages available to a user will be Welcome, Copy, User, and General Settings.

Support and Online Registration

- To log into your account with www.lacie.com, click on My LaCie Account.
- For product updates, software downloads, and important support information from LaCie, click Technical Support. You will be directed to the LaCie online Support & Downloads page.
- If you have not created a personal account at www.lacie.com, click Register Online to receive the latest information on your device as well as updates on other LaCie products.
Deep Sleep Mode, Restart, or Shut Down
To Shut Down, Restart, or put the network storage device into Deep Sleep Mode, click on the power button in the upper right of the Dashboard window. Since it is not available by default, Deep Sleep Mode must be enabled by the administrator (see Dashboard - Eco Management).

Log Out
To log out of the Dashboard, click the Log Out button in the upper right of the Dashboard window. For security reasons, LaCie recommends logging out of the Dashboard if it is no longer needed.

File Browser
File Browser icon
Dashboard - Navigation
The Dashboard is made up of a central area surrounded by widgets, or small boxes that represent the different pages. The widget displays a summary of the information contained in the page. For full details, navigate to the page itself.
- To navigate to a page, click the widget below its title; or, drag and drop a widget to the center of the window.
- To minimize a widget, click the X next to its title.
- To expand a minimized widget, drag its icon over an expanded widget or to an open widget space.
- To rearrange widgets, drag the minimized widget icon or the expanded widget's heading onto the place of another widget.
Dashboard - Users

This page allows you to manage user accounts.
New User
To create a new user, click the ADD USER button, then fill out the required fields.


Important info:
The password is case-sensitive.
In text fields, you may enter 1 to 20 characters using letters, numbers, symbols, hyphen, and underscore. Do not begin or end with a hyphen or underscore.
The password is case-sensitive.
In text fields, you may enter 1 to 20 characters using letters, numbers, symbols, hyphen, and underscore. Do not begin or end with a hyphen or underscore.
Existing User
User data is organized in a table:

- Click the text in the Login column to change the user name.
- Click the text in the Password column to change the user's password.
- Click the text in the Email column to change the user's email address.
- Click the text in the Quota column to assign the storage capacity available to the user.

- Click the text in the Time Machine column to turn the option on or off. Choose Yes if the user's computer runs Mac OS X and expects to back up to the share.

Delete a User
To delete a user, click the gray X on the far right of the user's row. A pop-up window will ask for confirmation. By clicking APPLY, you will delete the user's share and all of his data.

Note: The admin does not have an X since the account cannot be deleted.


Dashboard - Drive Information

This page shows you information about disk usage and will allow you to reformat the Network drive or the USB drive (USBShare).
Network Drive
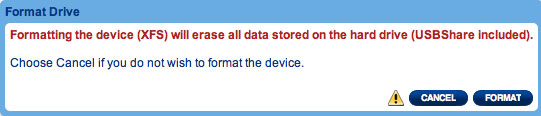
When you click the top FORMAT button, ALL data on the disk(s) (including USBShare and User Shares) will be erased and the disk(s) will be formatted. Data on any USB Key or hard drive connected to the front expansion port will not be affected.
Caution: Formatting will erase all the data on your drive (but will not remove users or settings). Make sure to back up all your data onto another volume before proceeding. LaCie cannot be held for responsible for the loss of data occurring during formatting.
To reformat the Network Drive:
- Click the FORMAT button.

- In the blue window that opens, confirm by clicking the FORMAT button.


USB Drive (USBShare)
See Connect to a Computer via USB for details on connecting your LaCie network storage to a computer via the rear USB device port.
On this page, you can:
- Increase or decrease the storage capacity allocated to the USB Drive
- Format the USB Drive
Caution: Formatting and resizing the USBShare will erase all the data on this volume. Make sure to back up all your data onto another volume before proceeding. LaCie recommends you use the File Browser (see Dashboard - File Browser) instead of using desktop copy. LaCie cannot be held responsible for the loss of data occurring during formatting.
To change the storage allocated to USBShare:
- Click the configuration icon (the intertwined wrench and screwdriver) in the USB drive row

- From the selection window, choose Resize the USBShare

- Drag the slider to the right (increase capacity up to the maximum 500GB) or to the left (decrease capacity). Once you click on the slider, you can also use the right or left arrow keys on your keyboard to fine-tune the capacity.
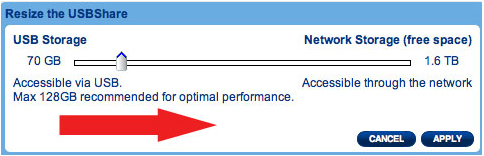
Increase USBShare Storage Capacity

Decrease USBShare Storage Capacity
- Once you have selected the capacity, click Apply.
- A warning will ask you to confirm the change in capacity. Doing so will delete all the data on the USBShare. However, data stored on other volumes (i.e. MyShare, OpenShare, User Share) will remain intact.

- Click APPLY to confirm the change in USBShare storage capacity


To format the USBShare:
- Click the wrench and screwdriver icon in the USB drive row
- From the selection window, choose Format
- A warning will ask you to confirm the share format. Doing so will delete all the data on the USBShare. However, data stored on other volumes (i.e. MyShare, OpenShare, User Share) will remain intact.

- Click FORMAT to continue.

Dashboard - Download

The Dashboard features a torrent server that will allow you to download torrent files. For more information on torrents, see:
http://en.wikipedia.org/wiki/BitTorrent_protocol
- Click the Start Download Machine button on the lower left of the window.
- To start a download, click the Add Download button.
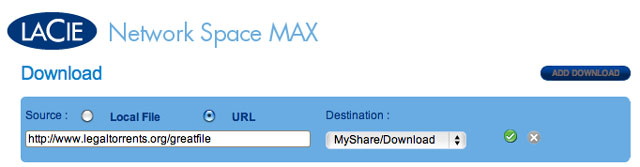
- Choose whether the torrent source is a file or a URL, then navigate to the source.
- Choose the destination (i.e., on which share the downloaded file will be stored) and click the green check mark.
- The file will begin downloading. It may take a few minutes to start the download.


Download Page Settings

Below the list of downloads are several settings.
- TCP Listening port: Click the number to choose a router port through which the torrent service will operate.
- Download rate limit: Click the number here to type a maximum download speed.
- Upload limit rate: Click the number here to type a maximum upload speed.
- Max. active downloads: Click the number here to limit the number of torrents that can download/upload simultaneously. Type zero for no limit.
Technical note: Because the torrent client service uses bandwidth and system resources, multiple simultaneous downloads can impact your LaCie network storage performance. Further, even after a download has completed it may still be active (i.e. uploading), which will continue to use system resources.
Dashboard - General Settings

- Machine Name: The machine name identifies your LaCie storage device on your network. You can change it from the default by clicking on the text and typing a new one. Keep in mind that the machine name: is limited to 15 characters, is case-sensitive, and can consist only of alphanumeric characters without spaces or symbols.
- Workgroup: Click the text, then type a Windows workgroup name (use from 1 to 15 alphanumeric characters).
- Language: Click the text to change the Dashboard language.
- Multimedia service (OpenShare): Multimedia service allows you to stream media files from your LaCie network storage to UPnP-enabled players (such as cell phones, computers, and game consoles). Media files must be stored on OpenShare to be played.
- FTP service: Standard network protocol used to copy files from one host to another over a TCP-based network.
- SFTP service: SSH File Transfer Protocol. While this offers a more secure FTP service, transfer rates will be slower due to encryption.
- Date: The date and time are set automatically if you assign an NTP server (see below). If not, click the text and select a day from the calendar.
- Time: If the time is not set by the NTP server, click the text and select the proper time.
- Timezone: Select your timezone from the drop down window.
- Time Synchronization: This option allows your network storage to sync the time and date with an NTP (network time protocol) server. Setting the time automatically will avoid the need to adjust the time settings for daylight savings.
Dashboard - Support
Configuration

- Version: The LaCie NAS OS version used by your network storage device. This information can be important when updating the OS or speaking with LaCie technical support.
- System Log: Click the Download button to save the system log to your computer. The log may be useful if you are troubleshooting with LaCie technical support.
- Email notification: By default, the checkbox is selected. Note that an SMTP server must be defined and the administrator must have added an email address on the Users page.
Email Notification Triggers
The following events will trigger an email notification if an email address has been provided in the User page:
| Event Identifier | Description | Recipient |
|---|---|---|
| Capacity | When the total available capacity is less than 90% | Admin |
| Quota event | When capacity reaches 90% of the amount set by the quota | Admin |
| Download | When a download has completed or when a download error has occurred | Admin |
| Backup | When a backup begins, ends, is cancelled, or fails | Admin |
| Temperature | The product has remained at maximum temperature for at least one minute | Admin |
| Password recovery | A user has recovered his/her password | Admin or user, depending on who made the request |
AUTO-Update
By default, your LaCie network storage will search for updates to its operating system on a weekly basis. If an update is found, the system will install it for you. See Update Product Operating System for details on adjusting the update settings.
Logs
The Logs section will list important events, such as warnings and RAID change results (RAID is only available on the Network Space MAX).
To purge the text from the list, click the Trash icon.
Dashboard - Backup

Your LaCie network storage features a robust backup and restore system that allows you to back up files:
- From your LaCie network storage to an external hard drive connected to the front USB port
- From an external hard drive connected to the front USB port to the LaCie network storage
- Between shares on the network storage (i.e. from OpenShare to MyShare, MyShare to USBShare, etc.)
Examples:
Backup: To secure the family media and other important files, you wish to backup the contents of your LaCie network storage onto an external USB hard drive. Once the external hard drive is plugged into the front USB expansion port, you can use the Backup page to schedule the frequency and type of backup. Backups are flexible, allowing you to choose every day, once a week, or once a month.
Restore: Someone in the household accidentally deleted a critical term paper from his LaCie network storage share. Thankfully, you have backed up the network storage every night onto an external hard drive. Once the external hard drive is plugged into the front USB expansion port, you can go to the Backup page to restore the missing document.
The Backup & Restore Wizard will help you set up backup jobs and to restore files that may have been deleted or lost. The system saves up to 10 versions of backups, giving you the flexibility to restore earlier versions of files.
To begin:
- Choose the Backup page in the Dashboard
- Click the CREATE JOB button
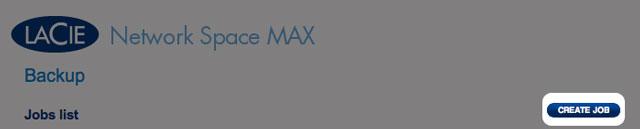
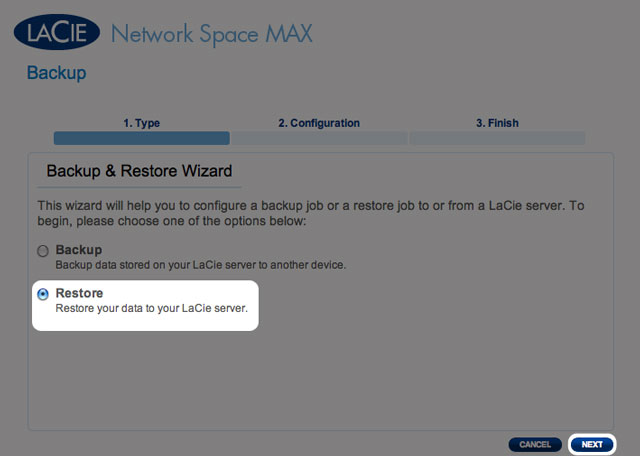
- Choose between Backup and Restore
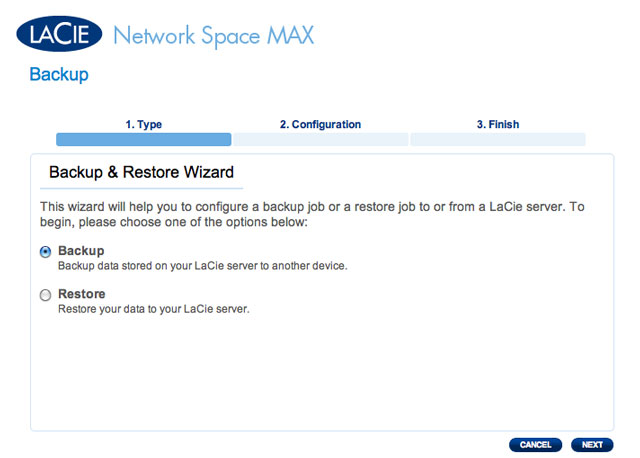
- Follow the directions below


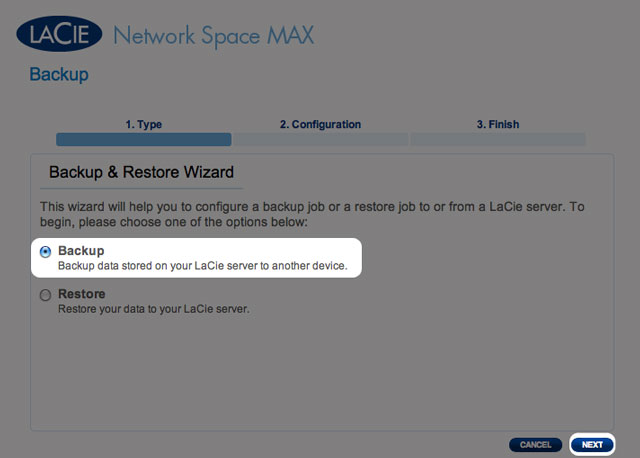
Backup
- Select Backup, then click NEXT.
- In the next screen, choose one or multiple sources (i.e., what will be backed up) in the left-hand column. Then choose a destination (i.e., where the files will be backed up) in the right-hand column.
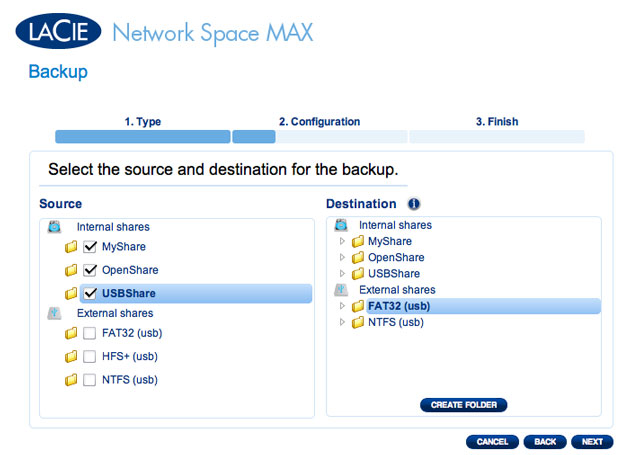
- To create a new folder, navigate to an ideal location on the destination volume then click the CREATE FOLDER button. Note that shares or folders to which you do not have write access will not be listed. For example, volumes that are formatted in HFS+ (Mac) can be read but not written to.


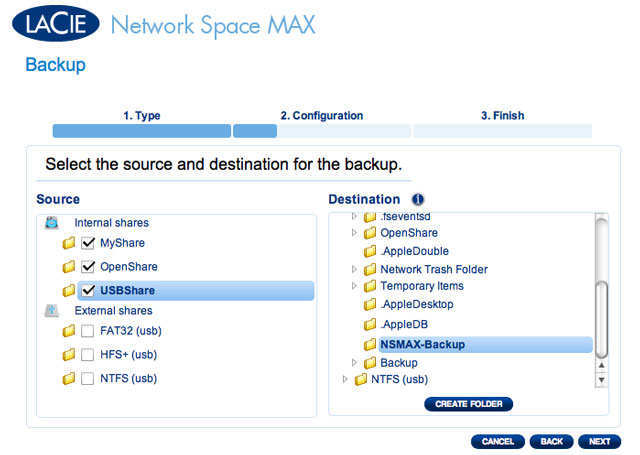
- Click NEXT.
- Select a backup mode, then click NEXT.
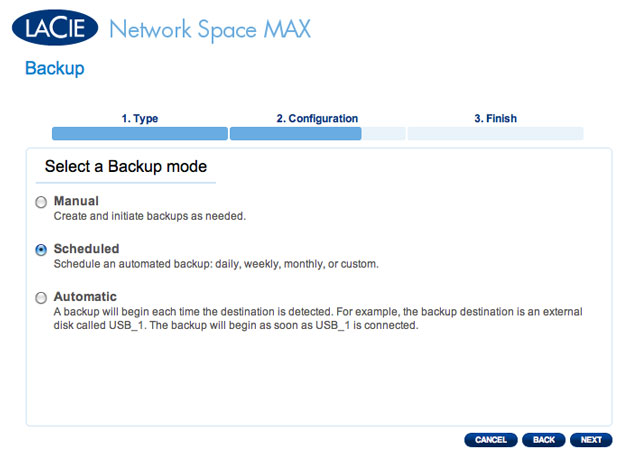
- Manual means that the backup job will only run when you execute it.
- Scheduled means that the backup job will run according to a schedule you set.
- Automatic means that the backup job will run automatically when both the backup source and destination are available. This option is only available if one of the devices (Source or Destination) is an external hard drive. Once Automatic is selected, you will have the option to select Auto eject to unmount the external hard drive once the backup has completed.
- If you selected Scheduled as a backup mode, another window will ask you to choose a frequency and a time before clicking NEXT.

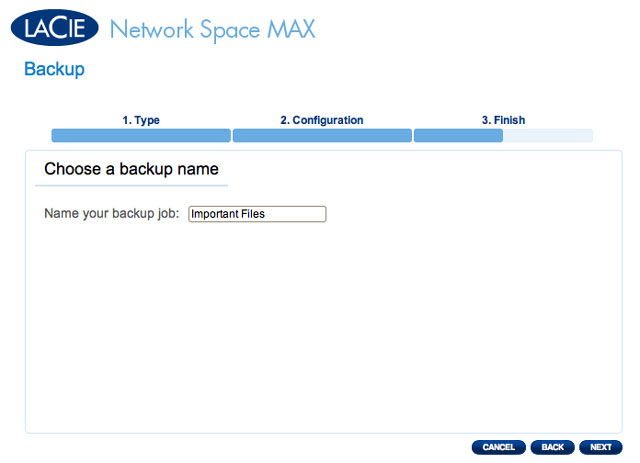
- Type a name for the backup job then click NEXT.
- The next screen will display a summary for the backup job. You will have the option to begin the backup by checking the box next to Start the backup immediately. Click FINISH.
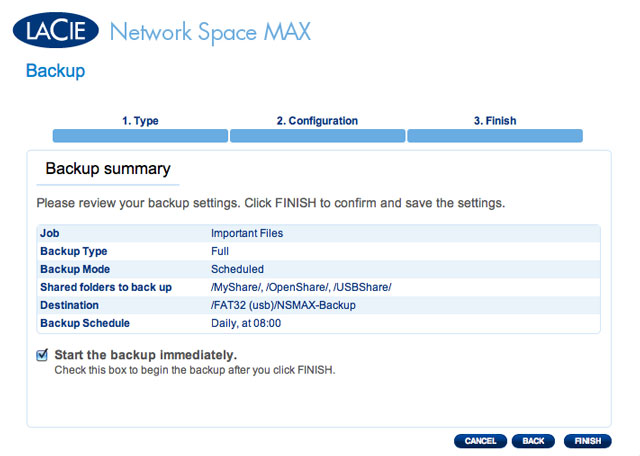
- The backup will be added to the Jobs list.


Restore
- Select Restore, then click NEXT.
- Select a restore type, either from an existing backup job, or from a backup folder. Click NEXT.
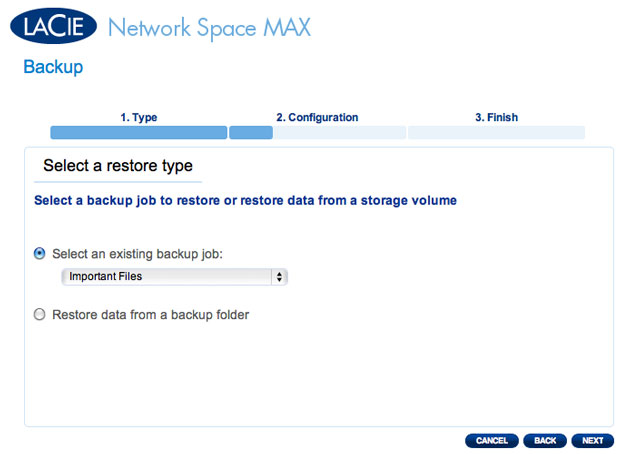
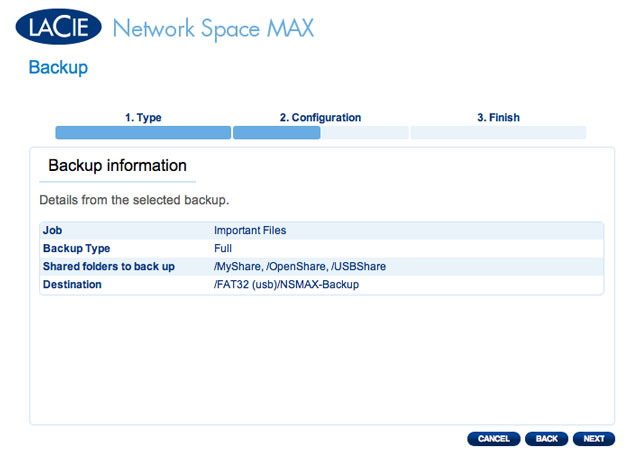
- If you chose to restore from an existing backup job, information about that job will be listed in the next screen for your confirmation. Click NEXT.
- If you chose to restore data from a backup folder, the next screen will allow you to select the source from which you want to restore the data. Valid backups will have a red folder icon. Choose the backup directory, then click NEXT. Information about that backup source will be listed in the next screen for your confirmation. Click NEXT.
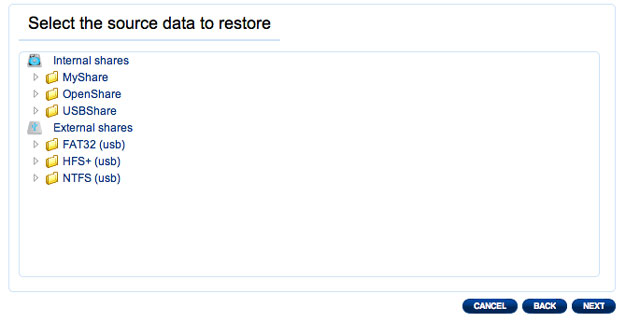
Browse to the Source data location
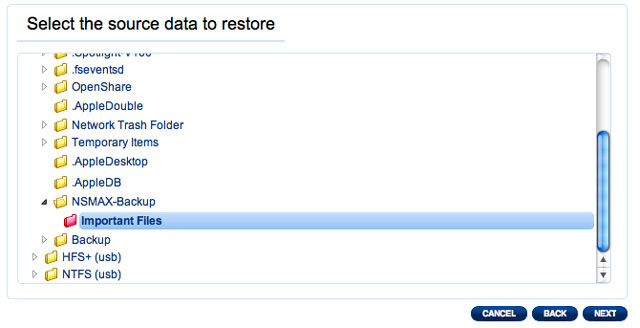
A valid Backup to Restore will appear as red
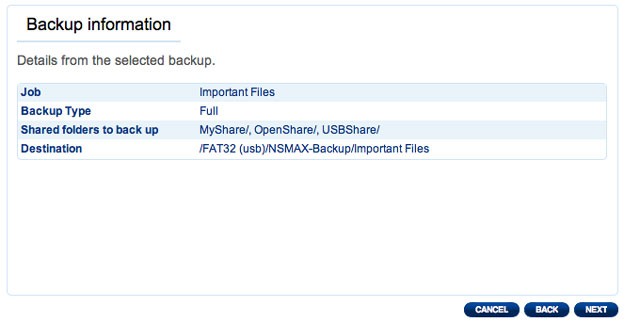
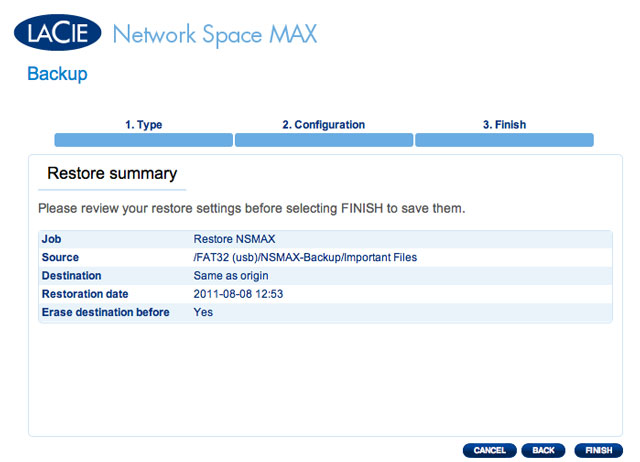
Summary of the Backup that will be Restored
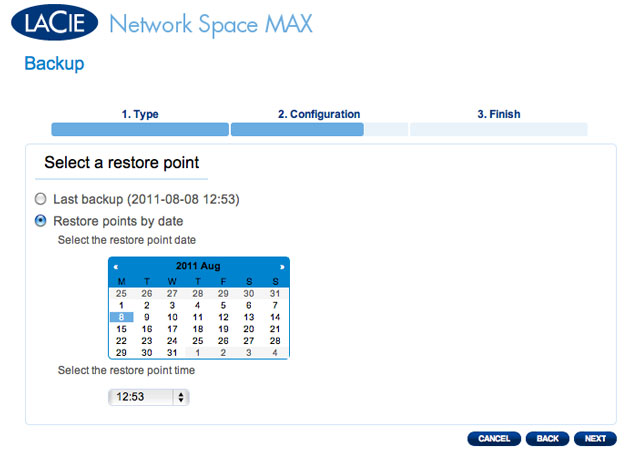
- In the next screen, choose a restore point. A restore point corresponds to a version of the directory for each time it was backup up. Choose to either restore the directory from the last backup, or by date. If you choose by date, select the date in the calendar, and the time from the drop-down menu. Then click NEXT.

- In the next screen, choose where to restore the backup.
- Restore to the initial location of the data, which will save over the source folder with the backed up folder. This gives priority to the backup and will replace the source folder contents.
- If you want to restore the backup to a specific folder, click this option, then click the BROWSE button. Navigate to the destination, then click APPLY.
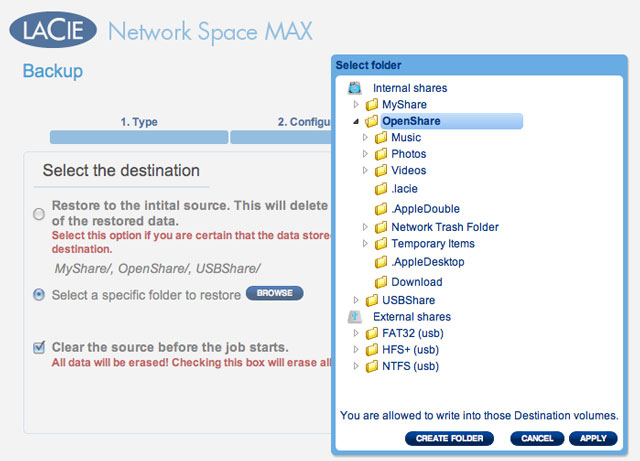
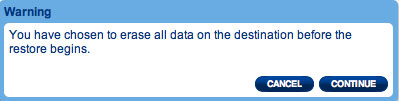
- To free disk space, you can choose to clear the source before the job starts. By checking the box in this step, all data will be erased in the source directory. Before continuing to the next step, a prompt will ask you to acknowledge that all data will be erased in the source before the restore begins.
- In the next screen, name the restore job, then click NEXT.

- The next screen will display a summary for the restore job. Click FINISH to add the job.


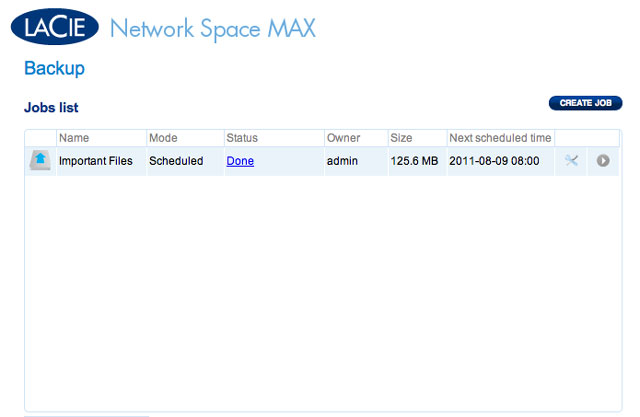
Modifying Existing Jobs
Jobs you have created will be listed in the table on the Backup page. This table will display useful information that will help you to manage the jobs. Click the configuration (intertwined screwdriver and wrench) icon in the far-right column for options. You can get detailed information on a job, start it, delete it, or enable/disable it.
If you disable a scheduled job, it will not run until it is enabled.

Modify a Backup Job

Modify a Restore Job
Dashboard - Front USB Port (Expansion)

This page provides information on devices connected to the front USB expansion port. Please note that the rear USB device port is meant to plug the network storage device to your computer.
USB Printer
Your LaCie network storage device features a printer server. 
To activate it:
- Check the box next to Activate the printer server
- Power on the printer and connect it to the front USB expansion port.
- Once connected, the printer will be listed on the Dashboard - External Ports page, and it will become available throughout your network. Correct printer drivers must be installed on the host computer.
Important info: For multi-function printers, only the print feature is supported. If your printer has a scan feature, for example, it will not work when connected to LaCie NAS.
In addition, only PostScript printers are supported. If your printer does not display on the Dashboard - External Ports page, it is likely that the printer does not support PostScript printing. This is frequently the case with multi-function and photo printers. LaCie cannot guarantee that your printer supports the proper protocols to make it a networked printer.
In addition, only PostScript printers are supported. If your printer does not display on the Dashboard - External Ports page, it is likely that the printer does not support PostScript printing. This is frequently the case with multi-function and photo printers. LaCie cannot guarantee that your printer supports the proper protocols to make it a networked printer.
External Drives
Connect an external hard drive to the front USB port and it will be listed on this page. Once connected, the drive's partition(s) will behave similarly to OpenShare or USBShare on your LaCie network storage. You may view the volume(s) on the Dashboard - Shares page and access data using your operating system's file system (an Explorer window for Windows users, and the Finder for Mac users).
Important info: External hard drives connected to the USB expansion port are always fully public on the network and their names cannot be changed.
To avoid damaging your external hard drive's file system, click the EJECT button before disconnecting it from your LaCie NAS.

Technical note: External USB hard disks must be formatted in one of the supported systems to be compatible with your LaCie storage device: MS-DOS (FAT32), NTFS, HFS+ (non-journaled only), EXT3, or XFS. Please note that HFS+ is read only.
Dashboard - Network
Standard Tab

IP Configuration
Choose between Configure using DHCP and Configure manually. If your network is DHCP-enabled, as are most consumer networks, the LaCie network storage will automatically be assigned an IP address. As a result, most users will see that the table has been filled in with values. If you select Configure manually, you will be able to modify the table values to conform to your non-DHCP-managed network.
Important info: Please make certain that you do not change the IP address without a complete understanding of your network. You may risk losing contact with your network storage device if the IP address is not compatible with your network. Contact your Internet provider or network administrator for further information.
Remote Access
Advanced Tab

Proxy Configuration
Your LaCie network storage can be configured to connect to a proxy server:
- Activate the feature by clicking the Enable proxy box
- Fill in the proxy server address, port, and optional authentication information
- Click APPLY
SMTP Configuration
To permit your LaCie network storage to send alert emails to users, configure the SMTP settings in this section. Verify that the alert system works by:
- Check the box next to Send a verification email
- Fill in the field for Email address
- Clicking the APPLY button.
Dashboard - Eco Management

- Status light on: Uncheck this box to turn off the front blue LED. Note that this will not disable warning indicators.
- Turn off the hard drives: Set the duration of inactivity after which the disks will revert to Eco mode. In Eco mode, the disks spin down to reduce power consumption. The product leaves Eco mode automatically when a request is sent to the drive.
- Deep sleep enabled: Deep sleep means that the drive will enter a very low energy consumption mode when you activate it using the Shutdown Options button on the Dashboard. This mode can also be triggered by holding the device's power button. To wake the drive from Deep Sleep Mode, press the power button or use the Wake on LAN function in the LaCie Network Assistant (see Wake on LAN).
Important info: When deep sleep mode is activated, all processes, including downloads and backups, will be terminated.
- Power on/off schedule: Set the drive to activate/deactivate deep sleep mode at a certain time to save energy. Click the setting in the Power on and Power off columns to enter the time for each day of the week.
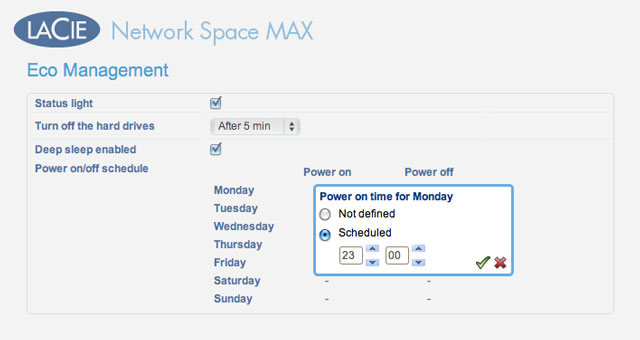
Schedule Deep Sleep Mode
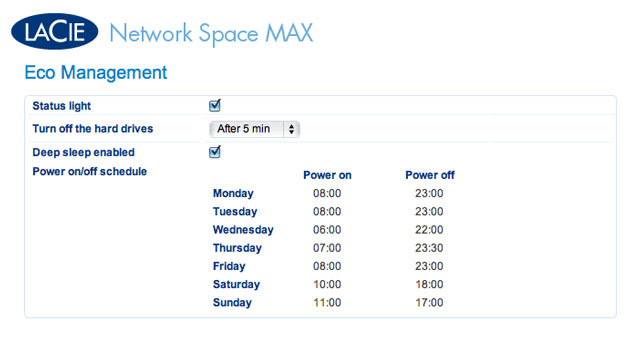
Example of a Deep Sleep Mode Schedule


Dashboard - RAID Management
Dashboard - File Browser

The Dashboard features an interactive file browser that allows you to manage and transfer files via HTTP. Access the File Browser by clicking its icon in the upper right-hand corner of the Dashboard.
File Browser icon
The File Browser allows you to transfer, copy, and delete files, as well as view photos in thumbnails and even stream multimedia content such as mp3 music files. It is a convenient way to interact with files stored on your external hard drives through the network, whether they are connected via the local network or the Internet (see Remote Access). Also, since the File Browser offers faster transfers than desktop drag-and-drop, it is more effective when copying large files.
The File Browser is composed of four parts:
- The toolbar allows you to perform a range of functions, such as changing the way files are displayed and uploading files to streaming files and creating folders.
- Folders shows the folder structure on the selected share.
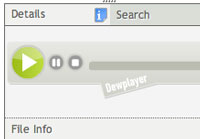
- Details displays information on a selected file, such as name, thumbnail (image files), file type, dimensions (photos), or duration (videos), while Search allows you to search for files based on file name.
- This section displays the files contained in a selected folder. To view the files as thumbnails, click Thumbs in the Tool bar.

You can view photos, edit text files, and stream certain types of music. Select the file, then:
- Photo and TXT files: Click the Open with… button in the toolbar.
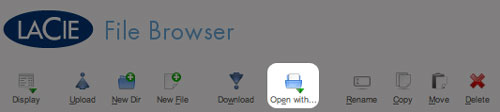
- Music: Click the play button in the Details panel.


© LaCie 2024
Last modified : Mar 01, 2013