Table of Contents
Manage RAID and Adding a Disk
Use the Dashboard's RAID Management page to monitor and manage the RAID configuration of your Network Space MAX.
About RAID Modes
RAID 0: RAID 0 is the fastest RAID mode. In a RAID 0 array, the available capacities of each disk are added together so that one logical volume mounts on the computer. It offers the best performance but no protection should a disk fail.

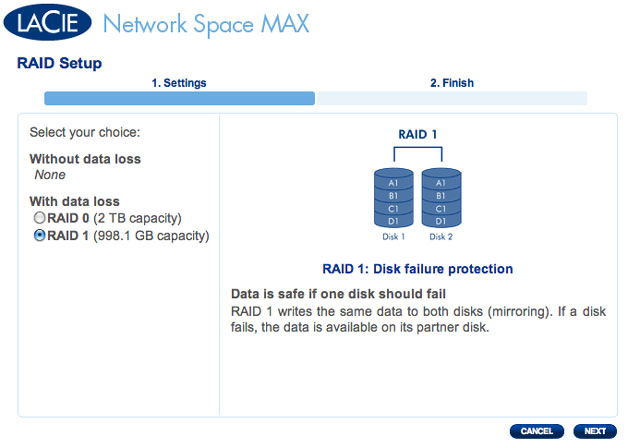
RAID 1: RAID 1 offers protection since all data is written to each disk at the same time. In the event of a single disk failure, data remains available on the other disk. Due to the time it takes to write the data twice, performance is slightly reduced. RAID 1 is a good choice when safety is more important than speed. However RAID 1 also reduces the available disk space by 50% due to the need to write each bit of data on each hard drive.

Default RAID - Single and Dual Disk
The default RAID mode depends upon the model of the Network Space MAX:
| RAID Mode | Capacity | Protection | Factory Default |
|---|---|---|---|
| RAID 0 | 100% |  | Network Space MAX dual disk |
| RAID 1 | 50% |  | Network Space MAX single disk1 |
1 Since it has only one disk, the Network Space MAX single disk cannot work in a true RAID 1 configuration that writes all data to a partner hard drive. However, it is shipped “RAID-ready” in preparation for RAID 1. See below for further details on rebuilding a RAID 1 array after adding a second disk.
- The Network Space MAX single disk includes a 1TB hard drive. When adding a second drive, make certain it also has a capacity of 1TB.
- The 4TB Network Space MAX has two disks, each with a capacity of 2TB. If one disk should fail, please replace it with a hard drive of equal capacity.
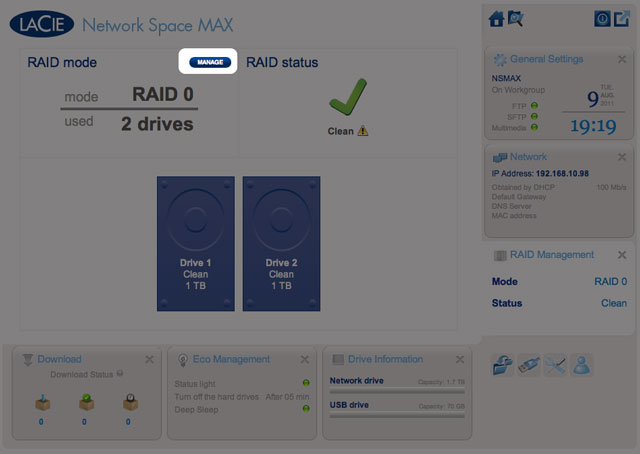
Dashboard - RAID Management

- RAID mode: This box shows you the current RAID scheme for network storage, as well as the number of disks involved in the scheme. Selecting the MANAGE button will launch the RAID Setup Wizard.
- RAID status: This box lets you know whether the array is Clean (healthy), Degraded, or Synchronizing (building the RAID). A yellow warning icon will inform you if your array is unprotected in the case of a single disk failure. This may be due to a degraded protected RAID array or if you have chosen RAID 0.
- Drive map: Click the illustrations to learn the slot positions for each disk. Bottom slot = 1 and Top slot = 2
Modifying the RAID
You can change your RAID configuration at any time. For example, you may have started with a RAID 0 array but decide that you want to move to RAID 1 to protect data stored on the Network Space MAX. The RAID Setup Wizard is an easy tool for adjusting the RAID, offering a few simple steps to suit your needs. However, it is critical that you understand the potential consequences that reconfiguring the RAID will have upon existing data.
Effects and Time Required to Modify the RAID
- Changing from RAID 0 to RAID 1:
- All data will be deleted on all shares. Please copy and backup all media stored on the Network Space MAX before changing the RAID.
- The USBShare will lose its allotted capacity, returning to 0GB.
- RAID Synchronizing (moving from RAID 0 to RAID 1) may take three to four hours.
- You may use and administrate the Network Space MAX during the RAID synchronization. Please note that using the device while it is Synchronizing will prolong the time it takes to build the RAID.
- Changing from RAID 1 to RAID 0:
- All data will be deleted on all shares. Please copy and backup all media stored on the Network Space MAX before changing the RAID.
- The USBShare will lose its allotted capacity, returning to 0GB.
- RAID Synchronizing (moving from RAID 1 to RAID 0) will take up to five minutes.
- Building a RAID when adding a new disk to a Network Space MAX single disk:
- All data and the USBShare will be preserved when creating a RAID 1 array. The RAID will take many hours to build, depending on the capacity of the disks.
- All data and the USBShare will be deleted when creating a RAID 0 array.
- Rebuilding a protected RAID 1 array with a replacement disk:
- This may be used when:
- Adding a second hard drive to a Network Space MAX single disk
- Replacing a failed hard drive with a new disk
- Data will be preserved.
- The USBShare will maintain its allotted capacity.
- The RAID rebuild will take many hours, depending on the capacity of the disks.
- You may use and administrate the Network Space MAX during the RAID synchronization. Please note that using the device while it is Synchronizing will prolong the time it takes to build the RAID.
RAID Setup Wizard
Changing an Existing RAID
- Click the MANAGE button to launch the RAID Setup Wizard.
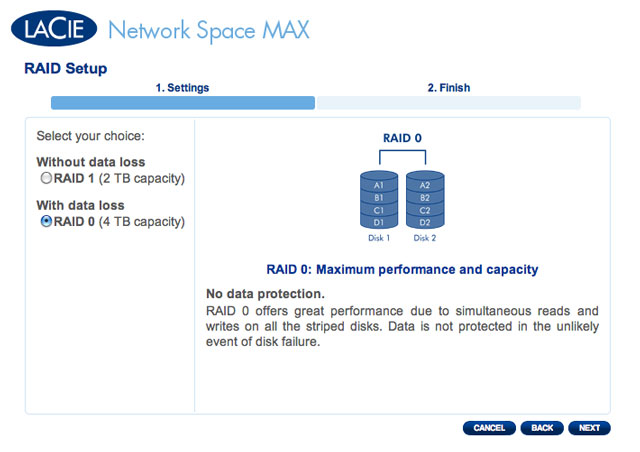
- On the left side of the window, choose between RAID 0 and RAID 1.
- The RAID will be configured once you select FINISH. ALL DATA WILL BE DELETED. DO NOT continue if you wish to preserve data stored on ALL SHARES of your network storage. Instead, select CANCEL to back up your media on all the shares. Once the data is backed up, you may run the RAID Setup Wizard again.
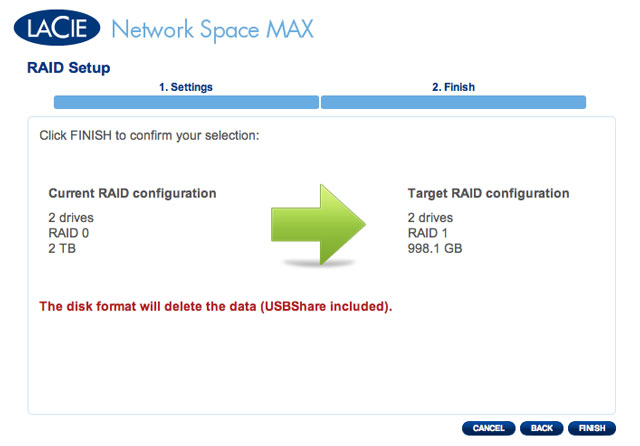
- If you wish to configure the RAID, click FINISH.
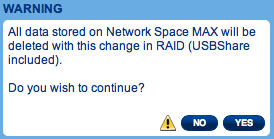
- A confirmation window will ask if you wish to continue. Click YES to initiate the RAID configuration.
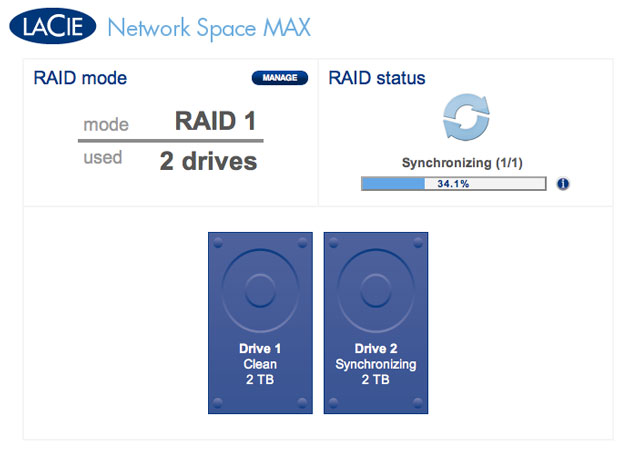
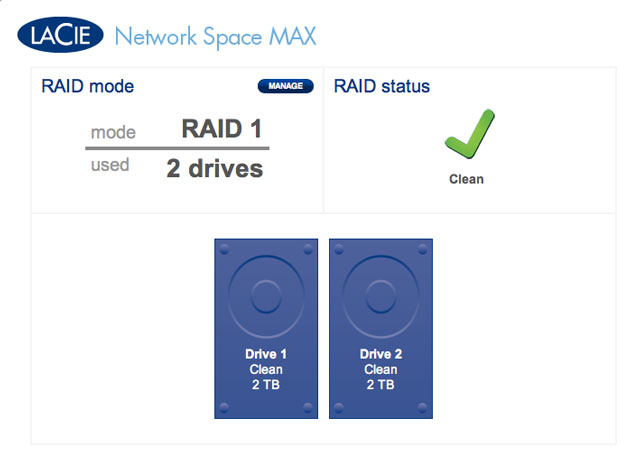
- Synchronizing from RAID 0 to RAID 1 will take four or more hours depending upon the capacity of the hard drives. While the network storage will briefly go offline when resetting the RAID configuration, you will have access to the storage once Synchronize begins. A green check mark will appear in the RAID status window once the RAID configuration is complete.


RAID - Synchronizing
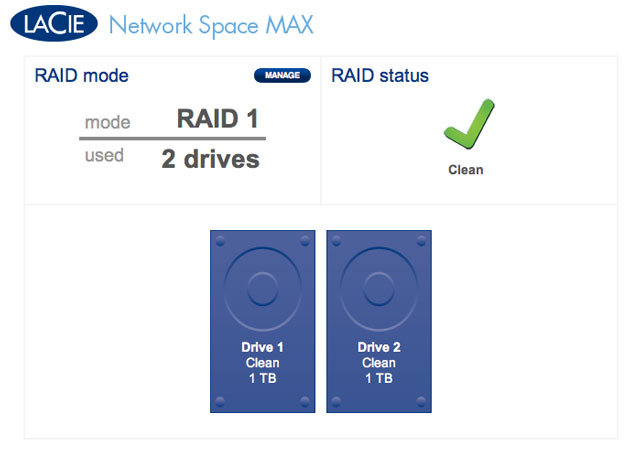
RAID - Complete


Removing and Installing Drives/Enclosures
If you have discovered that one of the hard drives has failed (see LED Indicators) or the chassis no longer works, please contact your LaCie reseller or LaCie Customer Support. If the product is still under warranty, a LaCie Customer Support representative will instruct you on how to return the drive or casing for replacement. See Getting Help for contact information.
If your LaCie storage device is no longer within the warranty period, please use the directions below to replace a failed disk with a healthy disk purchased from a third party. LaCie recommends selecting a disk that is the same model number and capacity as the one it will replace.
Replace a hard drive
Follow the directions below to remove and replace a failed drive.
Remove the hard drive
- Identify the failed disk. Hard Disk MAX: The drive's LED has turned red. Network Space MAX: Consult the RAID page in the Dashboard.
- Hard Disk MAX only: Note the RAID switch position (BIG = RAID 0, SAFE = RAID 1).
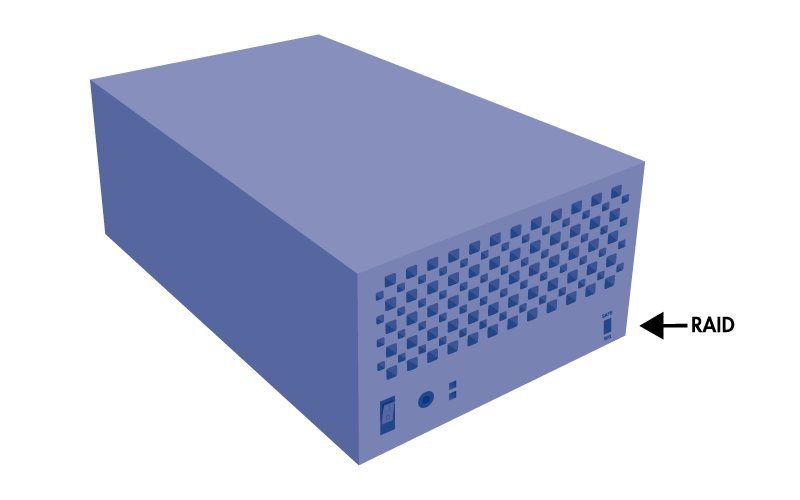 Hard Disk MAX (USB 2.0)
 Hard Disk MAX (Quadra)
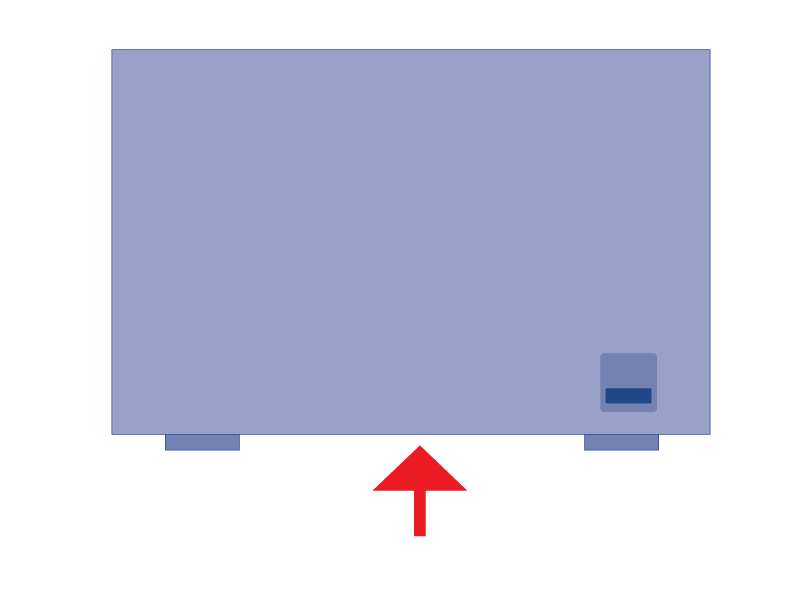
 - Turn off and unplug the LaCie device.
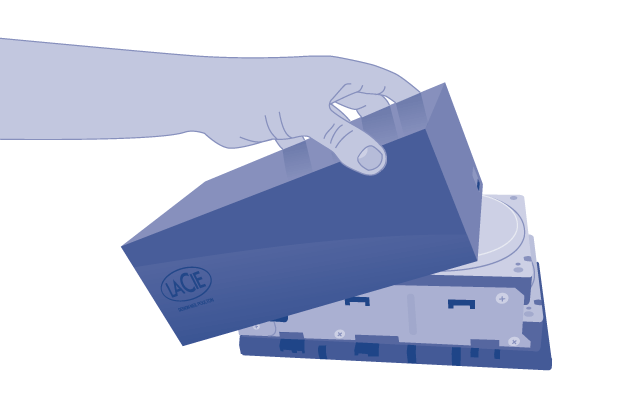
- The top enclosure must be removed to access the drives. Use your index finger to gently pull the front lip of the casing, specifically in the center, where the top shell clasps to the bottom plate.
- Once it is unclasped, carefully pry the top shell from the bottom plate.
- Unfasten the screws holding the drive to the bay. Each disk is fastened to a bay by four screws, two on each side.
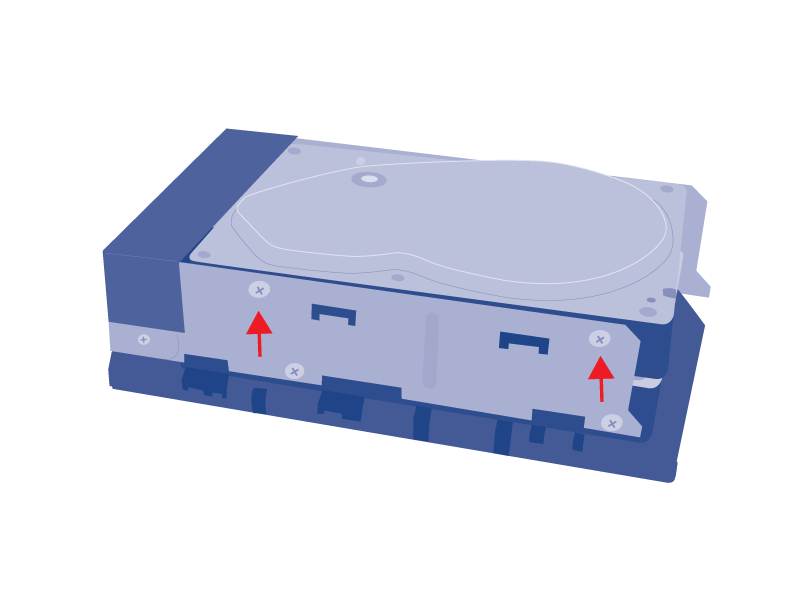
- Remove the failed drive.

- Return the failed drive to LaCie as explained by the LaCie Customer Support representative.


Replace the hard drive
Once you have received the replacement drive:
- Carefully insert the replacement drive into the empty drive bay. When fastening the drive to the bay, please make certain to use the same four screws that were included with the device. Using other screws could damage the unit and void your warranty.
- Close the casing.
- Hard Disk MAX only: Please make certain that the RAID switch position (BIG, SAFE) has not changed.
- Turn on the LaCie storage device. If the RAID setting is RAID 1, the front LED will blink blue and the rear LED will blink red during the rebuild. A RAID 1 rebuild may take several hours depending upon the capacity of your disks.
Replace the enclosure
Follow the directions below to remove and replace a failed or failing enclosure.
Remove the disks from the enclosure
Hard Disk MAX only: Before removing the enclosure, please note the position of the RAID switch (BIG or SAFE).
- Turn off and unplug the LaCie storage device.
- The enclosure must be opened to remove the drives. Use your index finger to gently pull the front lip of the casing, specifically in the center, where the top shell clasps to the bottom plate.
- Once it is unclasped, carefully pry the top shell from the bottom plate.
- Unfasten the screws holding the drive to the bay. Each disk is fastened to a bay by four screws, two on each side.
- Remove the drives from the bays of the failing enclosure. Please place the disks in a safe place along with the eight screws that hold them to the enclosure. Note the bay that each disk came from (bottom and top).
- Return the failing enclosure to LaCie as explained by the LaCie Customer Support representative.
Insert the disks into the replacement enclosure
Once you have received the replacement enclosure from LaCie:
- Open the replacement enclosure and carefully insert the drives into the same bay locations they held in the original enclosure. When fastening the drives to their bays, please make certain to use the same eight screws that were included with the device. Using other screws could damage the unit and void your warranty.
- Close the replacement enclosure and make certain that the RAID switch is the same as the original enclosure.
- Connect the enclosure to your computer and turn it on.
Rebuilding the RAID with a New or Replacement Disk

One drive only
- Once the new drive has been inserted, navigate to Dashboard > RAID Management.
- In the drive map, the new disk will be represented by a light grey with the label New. A yellow warning symbol will appear if you have inserted a disk that does not have the same capacity as the existing hard drive.
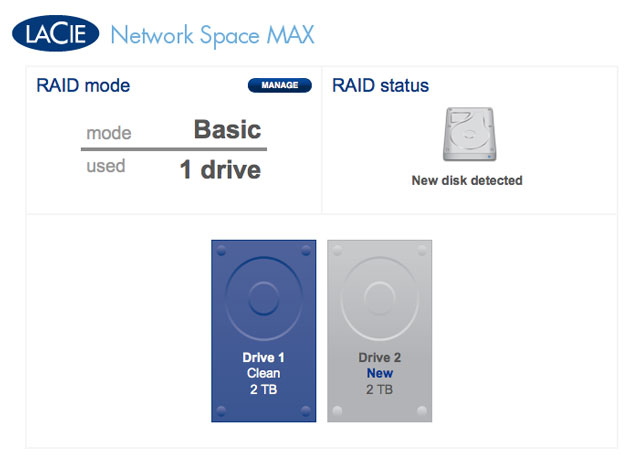
New disk - equal capacity
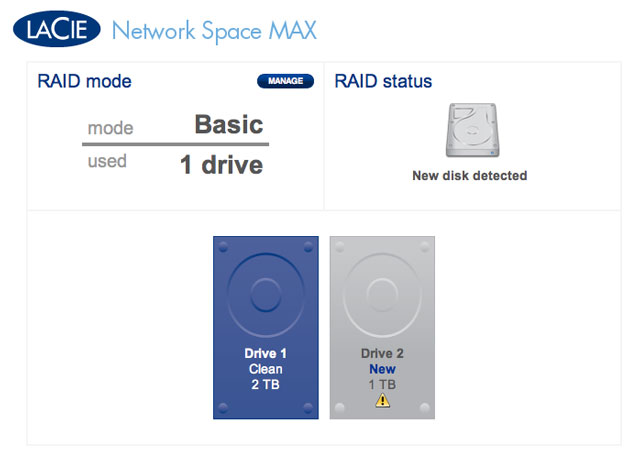
New disk - unequal capacity. Not recommended
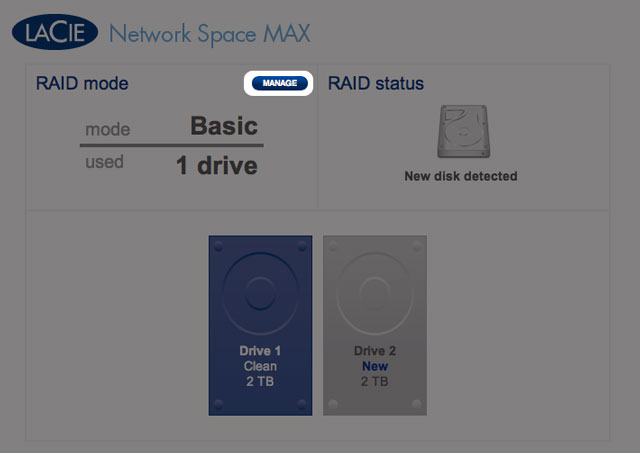
- Click the MANAGE button.
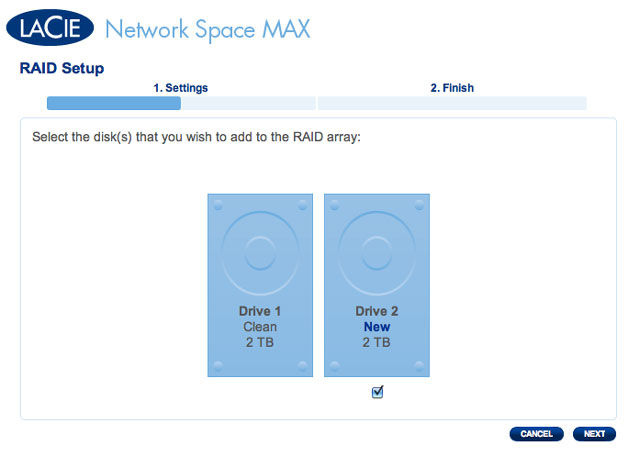
- You will be asked to select the disk(s) for the RAID array.
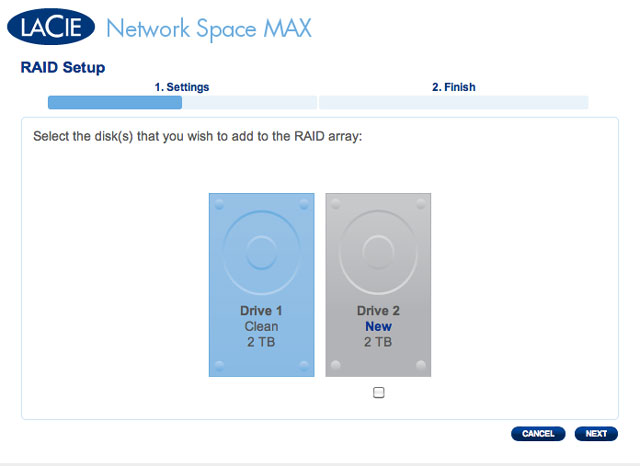
- Check the box under the new disk, then click NEXT.
- Choose a RAID level. Note that selecting RAID 1 will preserve all your data while RAID 0 will delete it. If you wish to build a RAID 0 array and you have not backed up all your data, select CANCEL to end the RAID configuration. You may return once the data backup is complete.
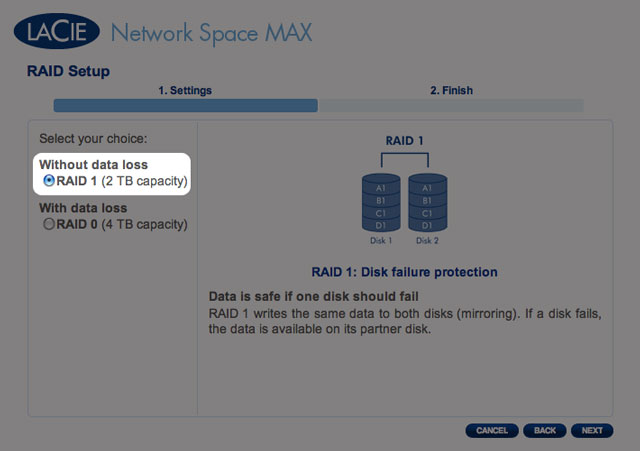
RAID 1 is non-destructive
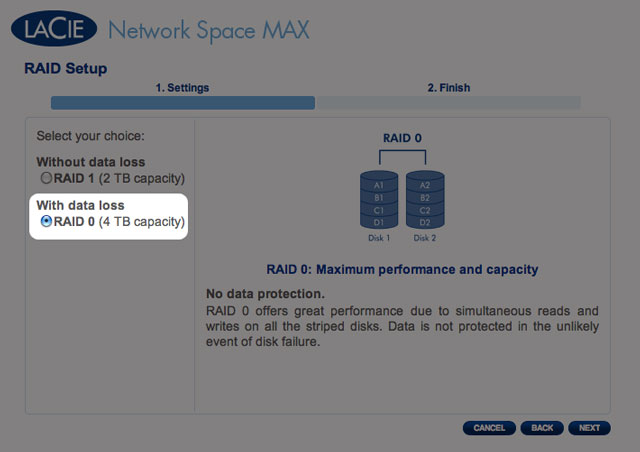
RAID 0 will delete all data
- If you are certain of the selected RAID, click NEXT.
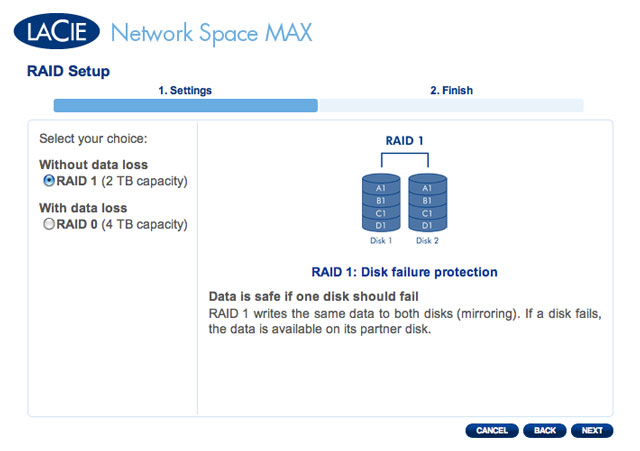
RAID 1 selected
RAID 0 selected
- A short summary will explain the target RAID. Click FINISH to begin building the RAID array.
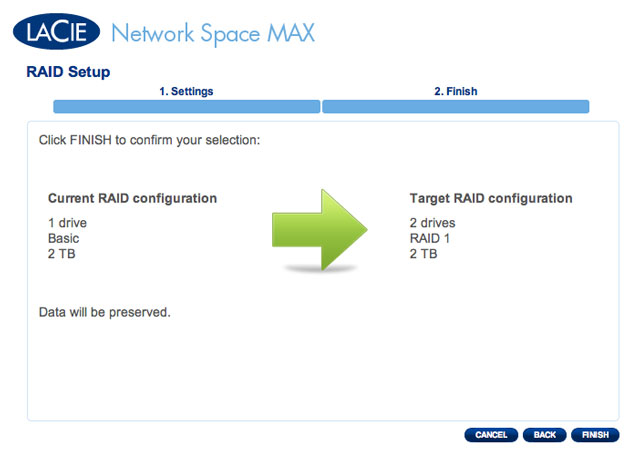
RAID 1 build
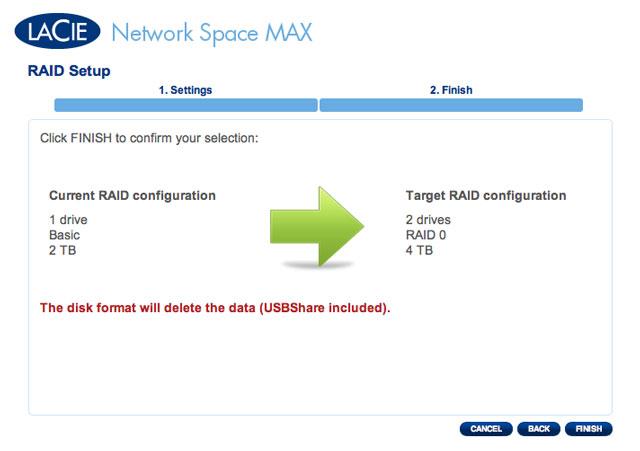
RAID 0 build
- RAID 0 only: You must confirm your selection. Read the warning and click YES if you agree to continue.
- Synchronizing to RAID 1 will take four or more hours depending upon the capacity of the hard drives. RAID 0 should not take longer than five minutes. While the network storage will briefly go offline when building the RAID configuration, you will have access to the storage once Synchronizing begins. A green check mark will appear in the RAID status window once the RAID configuration is complete.
RAID - Synchronizing
RAID - Complete


