User Tools
Site Tools
4big Quadra
User Manuals Print page
 Save page as PDF
Table of Contents


Table of Contents
Getting Connected
This section covers the installation and configuration of your LaCie 4big.
Connect the Interface Cable
- Plug one end of the interface cable (USB, FireWire or eSATA) into the corresponding port on your host computer.
- Connect the other end of the cable to the matching port on the 4big.
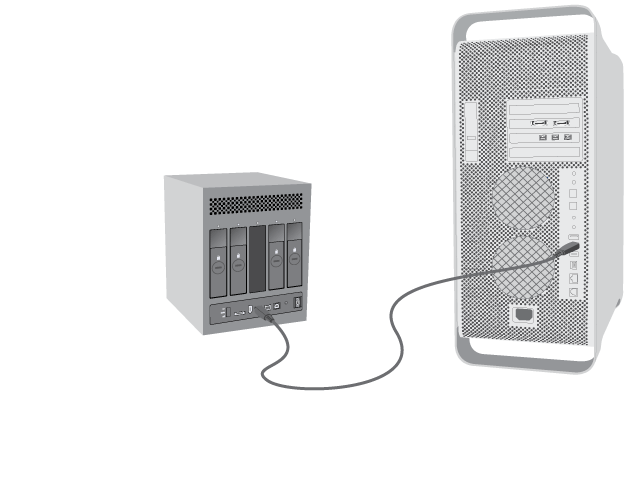

Technical note: If two interfaces are connected at the same time, the first one connected remains active and the second will not work.
Turn the 4big On
The power supply kit is composed of two cables: one cable (A) connects to the LaCie drive; and the other cable (B) connects to a power outlet, such as a wall outlet or a surge protector.
- Connect cable A to the 4big.
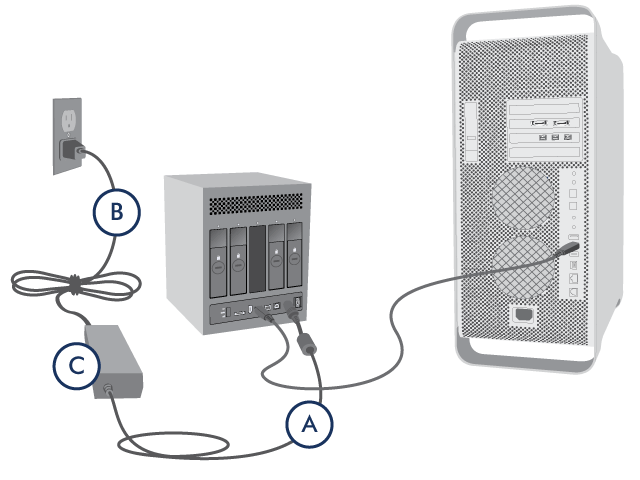
- Connect cable B to the power supply brick (C).
- Connect cable B to a surge protector or wall outlet.
- Turn on the drive by moving the power switch on the back of the drive to the “on” position.


The 4big system may take up to 30 seconds to boot up.
Caution: Only use the AC adapter supplied with your specific LaCie device. Do not use a power supply from another LaCie device or another manufacturer. Using any other power cable or power supply may cause damage to the device and void your warranty.
Always remove the AC adapter before transporting your LaCie drive. Failure to remove the adapter may result in damage to your drive and will void your warranty.
Always remove the AC adapter before transporting your LaCie drive. Failure to remove the adapter may result in damage to your drive and will void your warranty.
Technical note: You may use your LaCie drive when in a foreign country thanks to its 100-240 Volt power supply. To be able to use this feature, you may need to purchase an appropriate adapter or cord. LaCie accepts no responsibility for any damage to the drive resulting from the use of an inappropriate adapter. Using an adapter other than one authorized by LaCie will void your warranty.
Note: Depending on your country, power outlet connections may be different from the one shown above.
© LaCie 2024
Last modified : Mar 01, 2013