User Tools
Site Tools
eSATA Hub Thunderbolt™ Series
User Manuals Print page
 Save page as PDF
Table of Contents


Table of Contents
Getting Connected
Please follow the setup steps in the order they are given to ensure that the eSATA drives mount correctly on your computer.
Important Info: If your LaCie eSATA drive features an “Auto” power mode, please do not use it.
Compatible Devices
Most storage with eSATA ports can be connected to the LaCie eSATA Hub. The table below offers a list of LaCie hard drive enclosures that are perfect for your eSATA Hub.
| LaCie storage with a compatible eSATA 3Gb/s interface |
|---|
| LaCie d2 Quadra |
| LaCie Big Disk Quadra |
| LaCie 2big Quadra |
| LaCie 4big Quadra |
Connect the Interface Cable
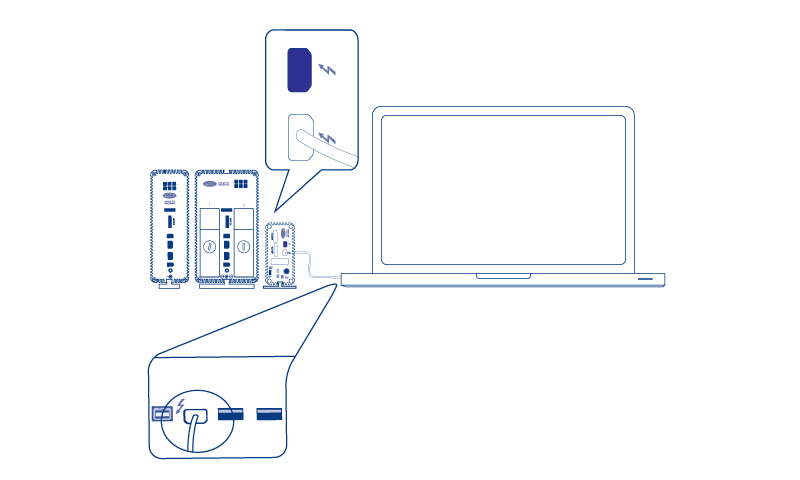
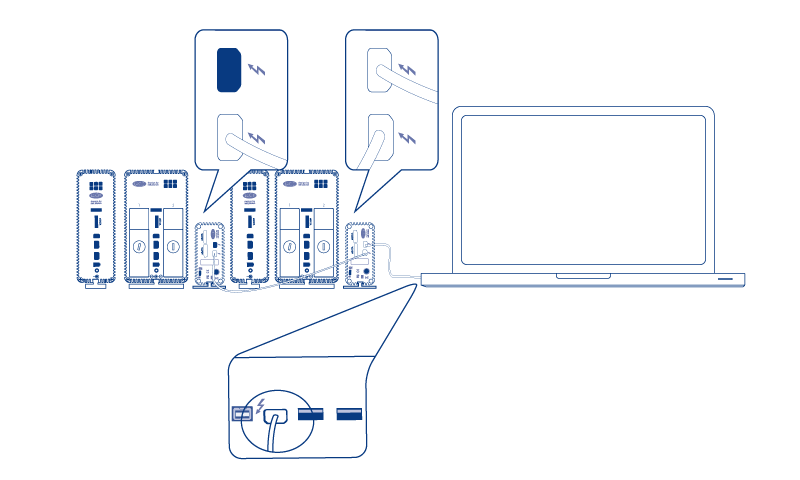
- Connect a cable that supports Thunderbolt technology to one of the Thunderbolt technology interface ports on the eSATA Hub. Plug the other end of the cable to a compatible Thunderbolt technology port on your Macintosh computer. The additional Thunderbolt technology port on the eSATA Hub may be used to daisy chain compatible devices. For example, you can attach one or more eSATA Hubs.
 eSATA Hub
 eSATA Hub daisy chain
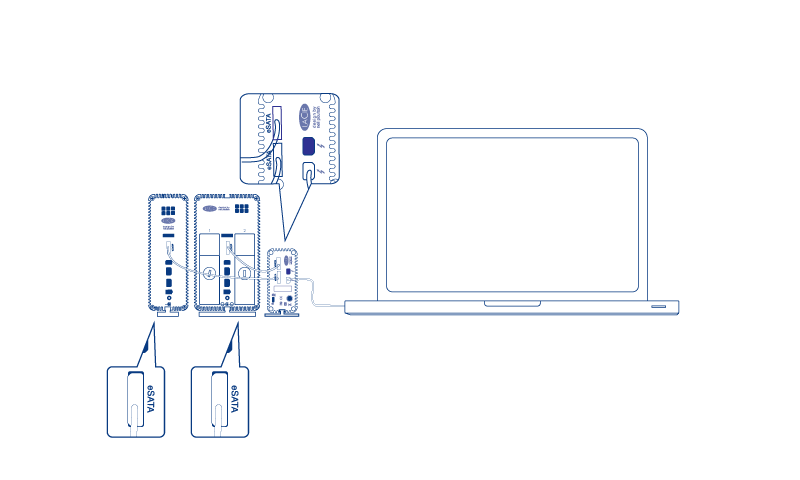
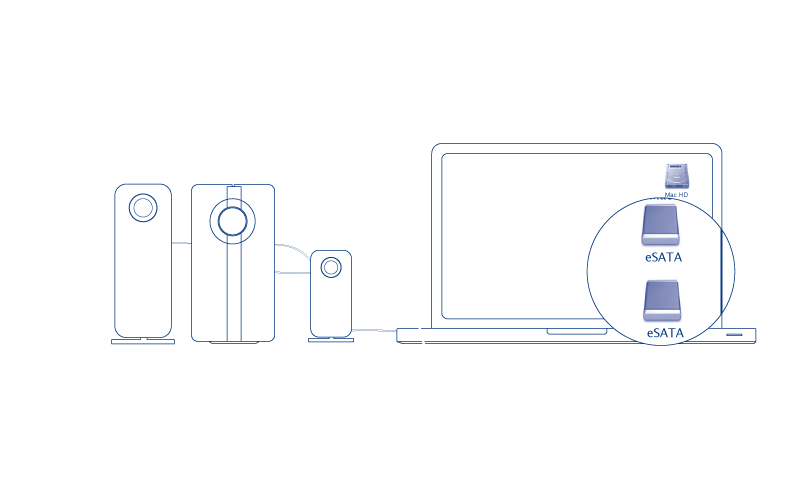
- Connect an eSATA cable to one of the eSATA interface ports on the eSATA Hub. Plug the other end of the cable to the eSATA port on your drive enclosure. You may attach a second eSATA enclosure to the additional eSATA port on the eSATA Hub. If you are daisy chaining eSATA Hubs, please connect eSATA enclosures to each eSATA Hub on the daisy chain during this step.
 eSATA Hub
 eSATA Hub daisy chain
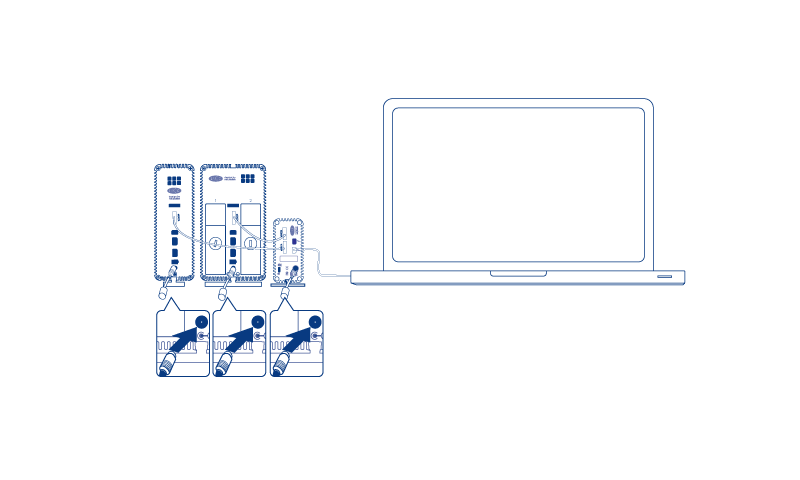
- Connect the included external power supply to a power outlet and to the eSATA Hub. If you are daisy chaining eSATA Hubs, please connect the included external power supply/supplies to each eSATA Hub on the daisy chain. Make certain to connect the power supplies to each eSATA enclosure connected to the eSATA Hub. The eSATA Hub will turn on automatically if power is available and it is connected to a Macintosh computer that supports Thunderbolt technology.
 eSATA Hub
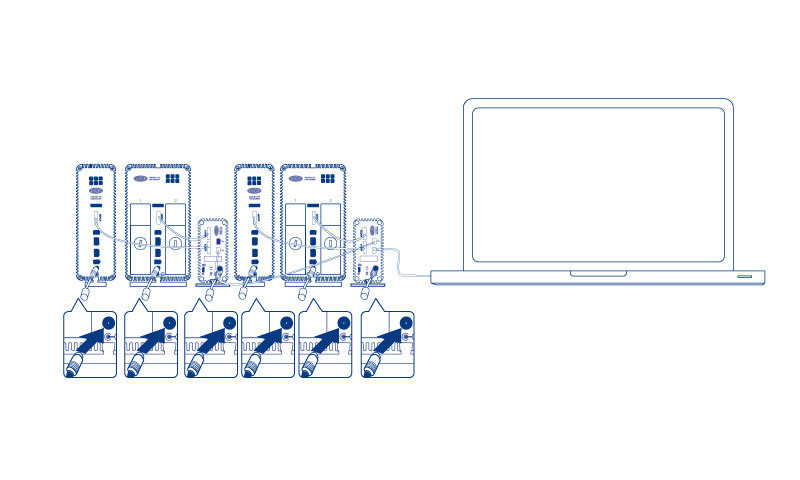 eSATA Hub daisy chain
- Power on the eSATA drive enclosure(s) if necessary.
- The disks will mount on the Mac desktop. You may use the Mac OS X Disk Utility to format and partition the volumes.
 eSATA Hub
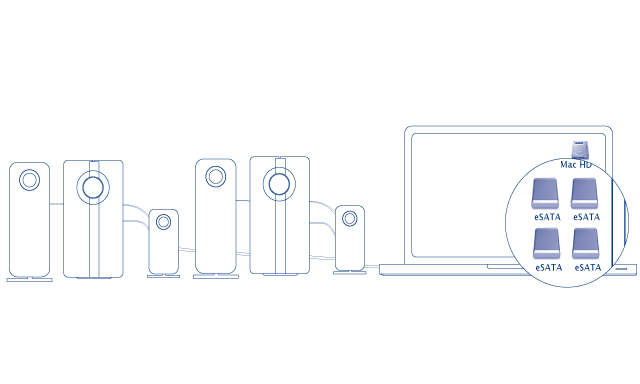 eSATA Hub daisy chain


Technical note: Thunderbolt technology supports seven devices on a daisy chain, including the computer. You can connect up to six eSATA Hubs for a total of 12 eSATA drive enclosures. The total disks will vary according to the amount of hard drives per enclosure.
Powered eSATA Enclosure Does Not Mount
Certain eSATA enclosures/drives may experience difficulty mounting onto the desktop when “hot plugged” into the eSATA Hub. For example, an eSATA enclosure connected to a powered eSATA Hub is not available on the desktop. Further, it cannot be mounted from the Mac Disk Utility. If you encounter such a case, please follow the instructions below:
- Confirm that the eSATA enclosure power switch is set to On rather than Auto. Certain eSATA enclosures include an Auto mode that powers on the device when it receives a signal from the computer. This setting will effect performance when connected to the eSATA Hub.
- Unmount ALL eSATA enclosures/drives that are attached to the eSATA Hub (Unmounting the eSATA Volume(s)). This includes any enclosure that may be connected to daisy-chained eSATA Hubs. Make certain that open programs are not using the drives before unmounting them.
- Disconnect the Thunderbolt cable from the computer.
- Wait five seconds.
- Make certain that all eSATA enclosures connected to the eSATA Hub are powered on.
- Reconnect the Thunderbolt cable to the computer.
- All eSATA drives should be available for use.
Unmounting the Drive
In order to avoid file system corruption, it is important that you unmount the volume(s) before turning off the eSATA enclosures and/or the eSATA Hub. See Unmounting the eSATA Volume(s) for details.
© LaCie 2024
Last modified : Feb 27, 2013