Unprotected volumes (Single-disk volume, RAID 0, or JBOD):
Removing the sole disk in a single-disk volume will break the RAID and all data will be lost. Since NAS OS is installed on the hard drive, you will lose connection to the device if the only disk in the enclosure is removed while the device is powered on. Try to shut the NAS off then reinsert the disk. Power on the device and wait approximately five minutes before logging on to the Dashboard.
Removing a healthy hard disk from an unprotected volume while the LaCie 2big NAS is powered on will break the RAID and all data will be lost. To avoid problems, shut down the LaCie NAS before removing healthy disks. Return the hard drives to their proper bays before powering on the LaCie NAS.
Powering on the LaCie 2big NAS with a missing disk in an unprotected volume will break its RAID and all data will be lost.
Protected volumes:
Important info: If a hard disk that you have purchased from LaCie fails, please contact your LaCie reseller or LaCie Customer Support.
Important info on NAS backup: It is recommended that all users back up data to DAS or another NAS as further protection against disk failure or secondary points of failure (e.g. hardware, network, etc.) See
Backup Jobs for details.
Select your RAID below to add the new disk to an existing volume.
RAID 0
A RAID 0 volume cannot be expanded with new disks added to the enclosure and/or swapped for disks of higher capacity. Doing so will break the RAID 0 volume and destroy all of its data. Additionally, data will be lost in a RAID 0 volume if one of its disks fails. In such a case, you can replace the failed disk and create a new RAID volume (see New Storage Volume Wizard for instructions).
JBOD
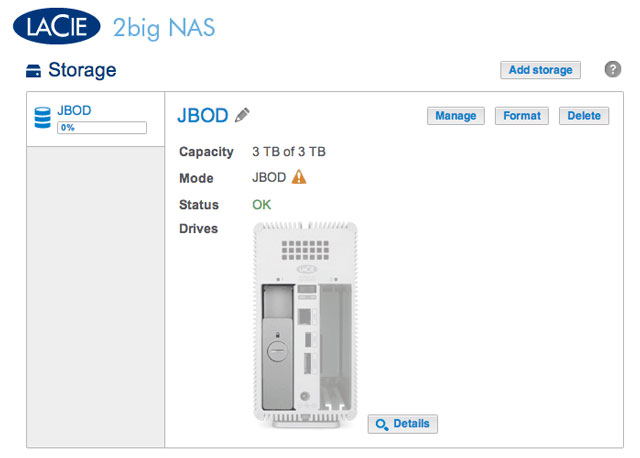
The screenshot above shows a single-disk volume configured for JBOD (for instructions on how to change the name of the volume from the default to JBOD, see Volume Tools). A JBOD volume can be expanded with a new disk added to the LaCie 2big NAS enclosure. Follow the steps below to add a drive to your JBOD volume:
Insert a new hard drive into the available drive slot in your LaCie 2big NAS (see
Remove/Insert a Hard Disk for instructions). Following the disk installation, the
Dashboard > Storage page should display at least one
New hard drive.
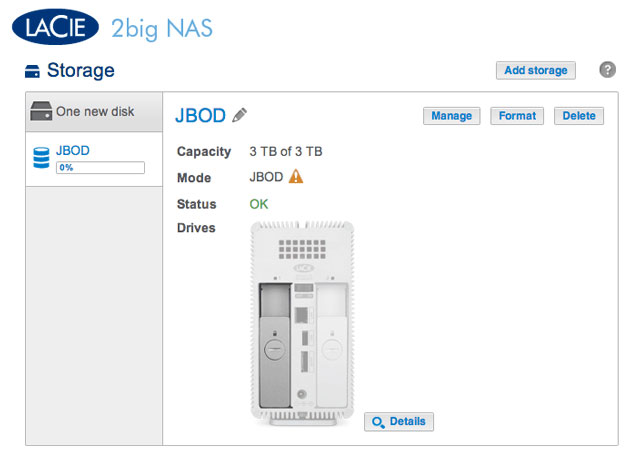
Choose Manage.
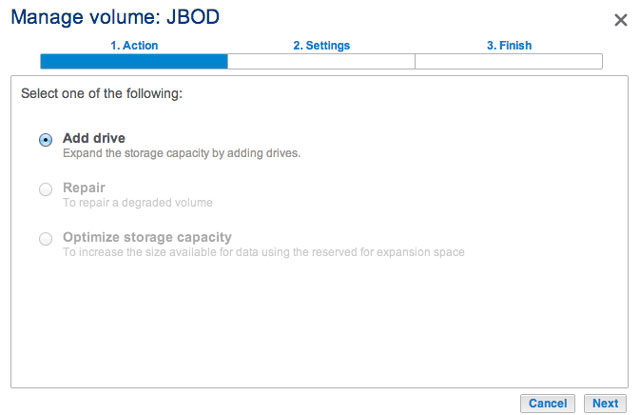
Select
Add drive then choose
Next.
Select the new hard drive(s) then choose
Next.
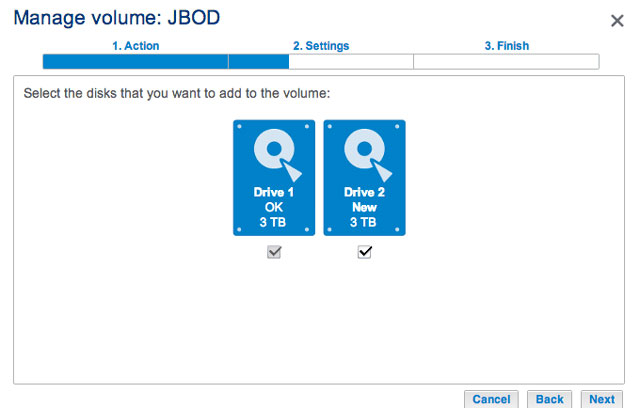
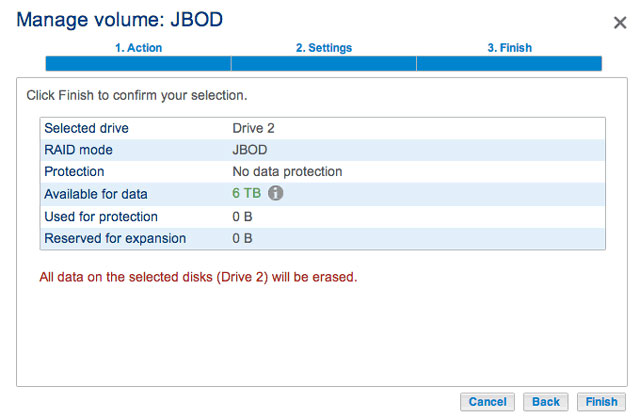
Review the summary page then choose
Finish. Choose
Yes at the prompt to confirm the RAID.
RAID 1
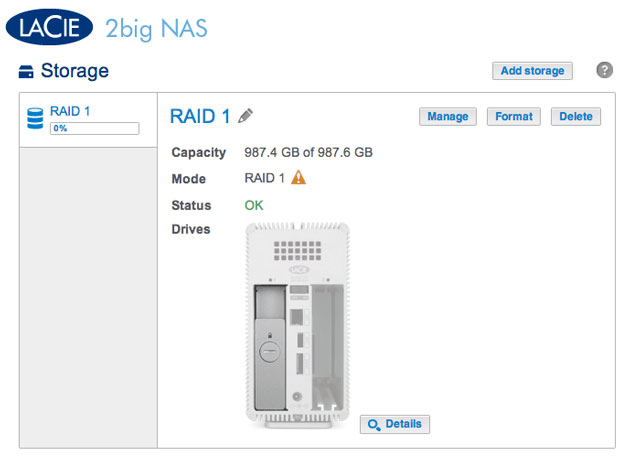
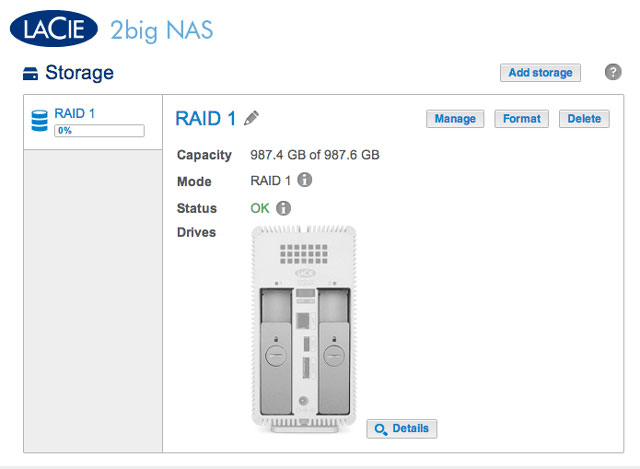
The screenshot above shows a single-disk volume configured for RAID 1 (for instructions on how to change the name of the volume from the default to RAID 1, see Volume Tools). Follow the steps below to add a second drive:
Insert a new hard drive into the available slot in your LaCie 2big NAS (see
Remove/Insert a Hard Disk for instructions). Following the disk installation, the
Dashboard > Storage page should display the
New hard drive.

Choose Manage.
Select
Add drive then choose
Next.

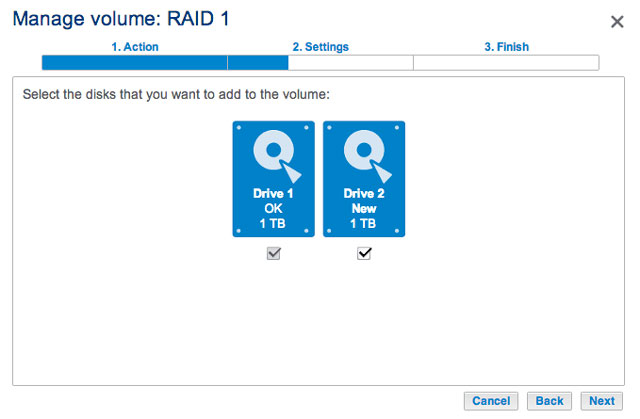
Select the new hard drive then choose
Next.
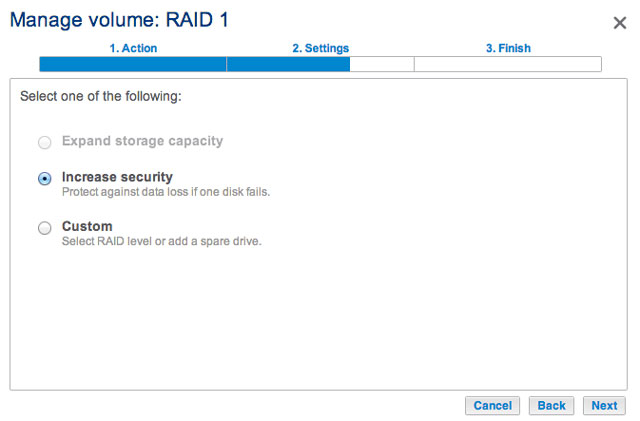
Select
Increase security then choose
Next. IMPORTANT: Choosing
Custom will bring you to the RAID selection menu. Selecting any RAID configuration via the
Custom menu will delete all media stored on the original drive.
Review the summary page then choose
Finish. Choose
Yes at the prompt to confirm the RAID.

You can use the volume during the RAID syntonization.
You can remove one hard disk from a protected volume while the product is turned on without losing data. This process is referred to as “hot-swapping”. It is highly recommended that hot-swapping be performed when replacing or expanding a hard disk that is part of a protected volume. You can experience problems if you shut down the LaCie 2big NAS to replace a hard drive with an “unclean” hard drive (with data) from another LaCie NAS or a third-party NAS. In such a case, the NAS OS may become confused and remain frozen as it boots.
When replacing or expanding hard drives in a protected RAID volume:
RAID 0
A RAID 0 volume cannot be expanded using disks of higher capacity. Attempting to do so can delete all data on the volume. If one of the disks in a RAID 0 volume fail, all data is lost.
Replace the failed disk and see New Storage Volume Wizard for instructions on creating a new volume.
JBOD
A JBOD volume cannot be expanded using disks of higher capacity. Attempting to do so can delete all data on the volume. If one of the disks in a JBOD volume fail, all data is lost.
Replace the failed disk and see New Storage Volume Wizard for instructions on how to create a new volume.
RAID 1
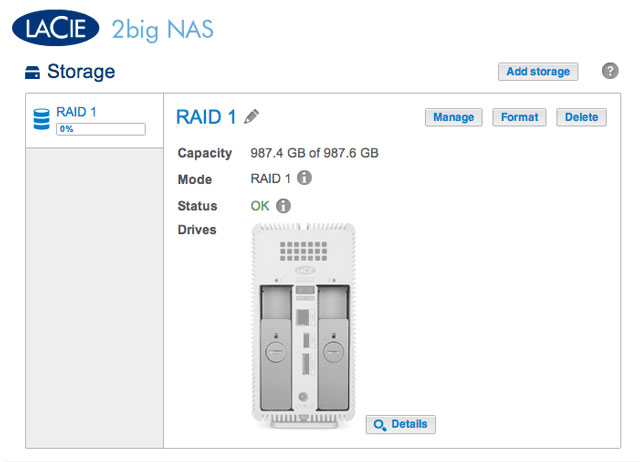
Expand or repair a two-disk volume that has been configured for RAID 1.
The example below will demonstrate how to expand the capacity of a RAID 1 volume from two 1TB hard disks to two 3TB disks. If you are expanding the capacity of your hard disks, make certain to follow all three phases of the update: replace one disk; replace the second disk; and optimize storage capacity. You can also follow the directions to repair a failed hard drive.
Note on RAID expansion and synchronizing: The volume must synchronize twice when expanding capacity on a protected RAID volume.
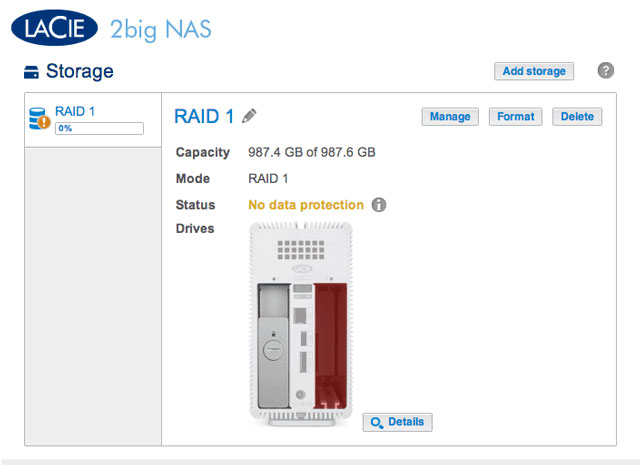
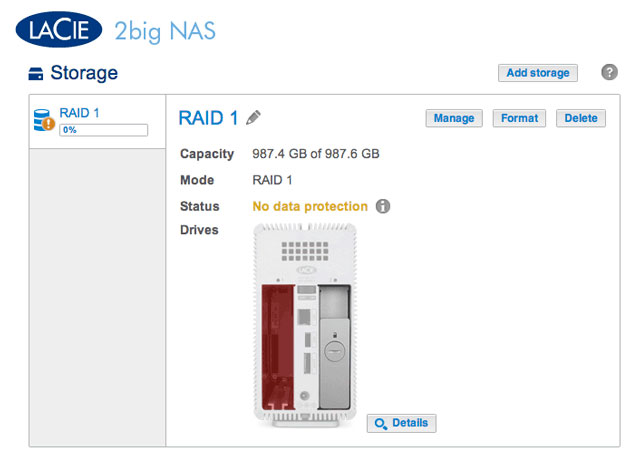
Phase 1: Replace the first disk
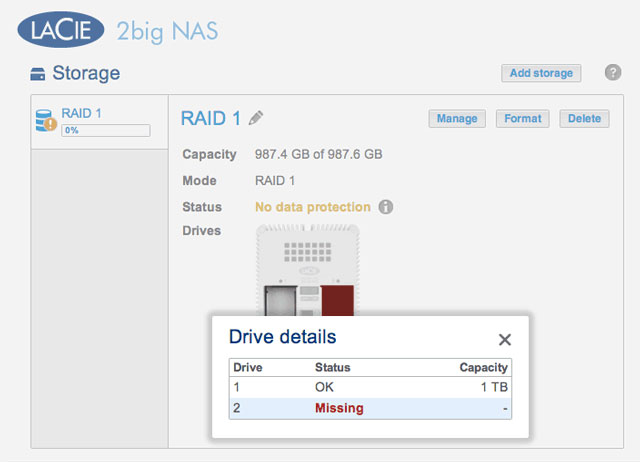
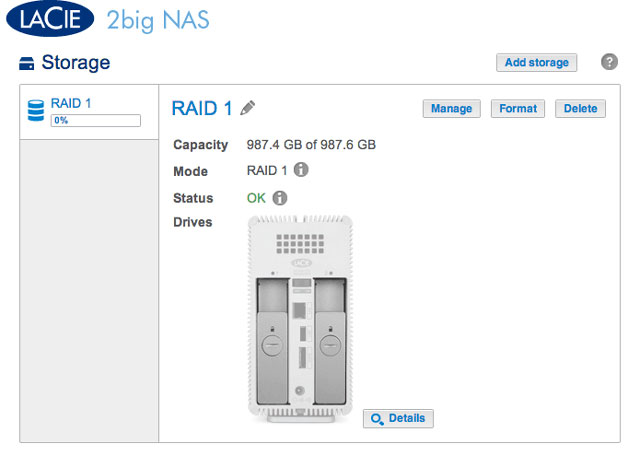
Remove the disk that you want to replace. The Storage page will alert you that the volume is no longer protected.
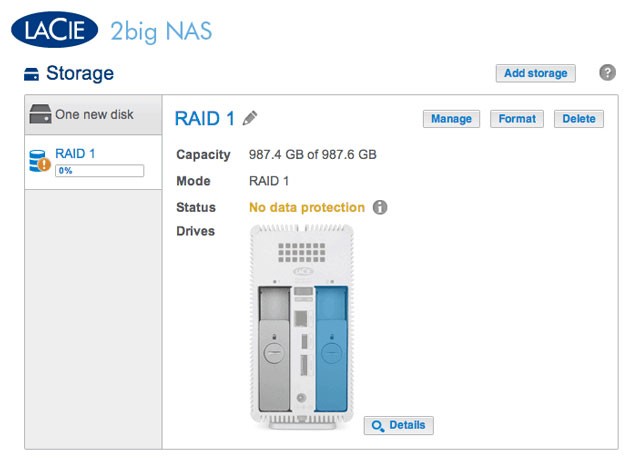
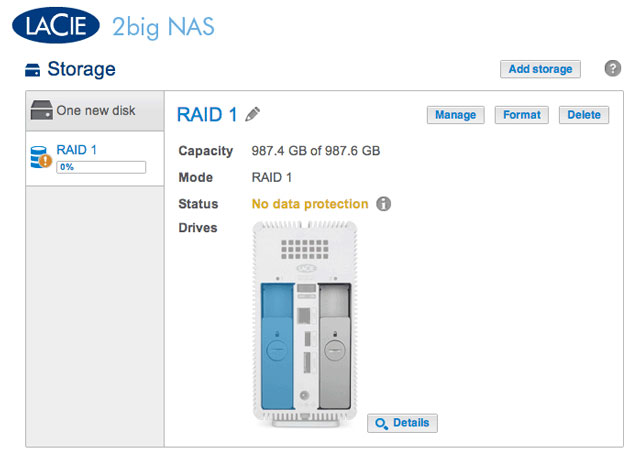
Insert the replacement disk per the instructions provided in
Remove/Insert a Hard Disk. The new drive will be listed on the Storage page.
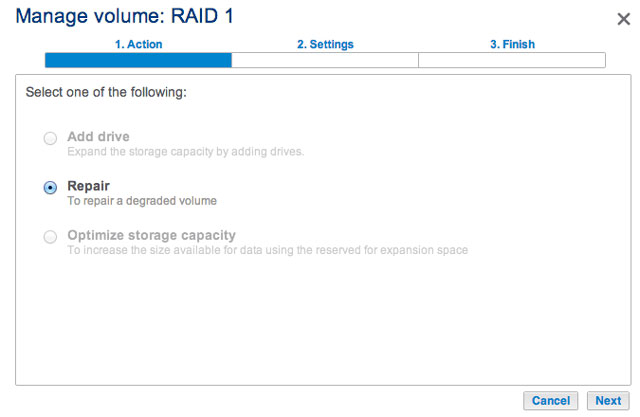
Choose Manage.
Select
Repair and choose
Next.

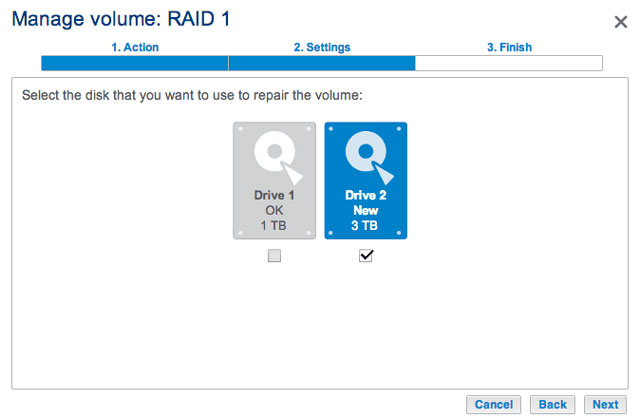
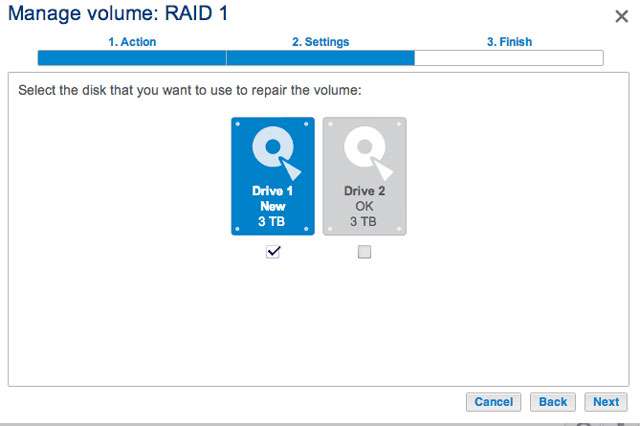
Select the replacement disk then choose
Next.
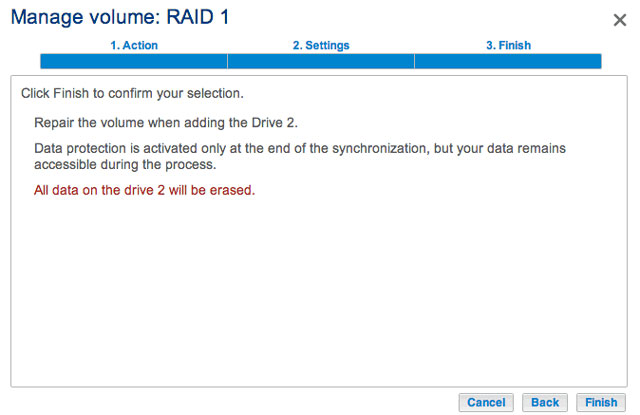
Choose
Finish, then
Yes at the prompt to confirm the replacement disk. The time to synchronize the volume depends upon the amount of disks and the total capacity.
The synchronization is complete once the
Status is
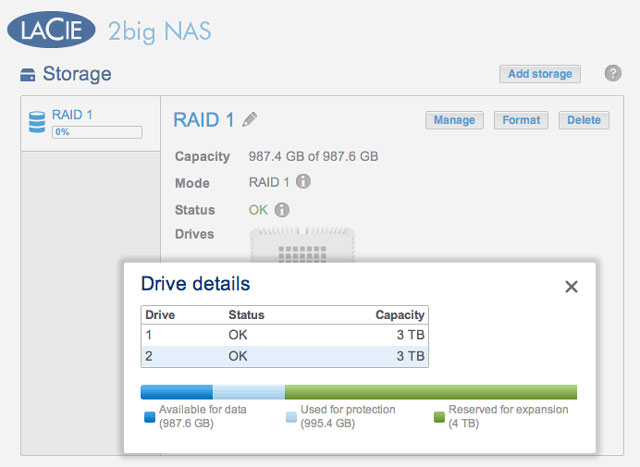
OK. Choosing
Details shows that the storage distribution has been changed. Move on to the next phase.
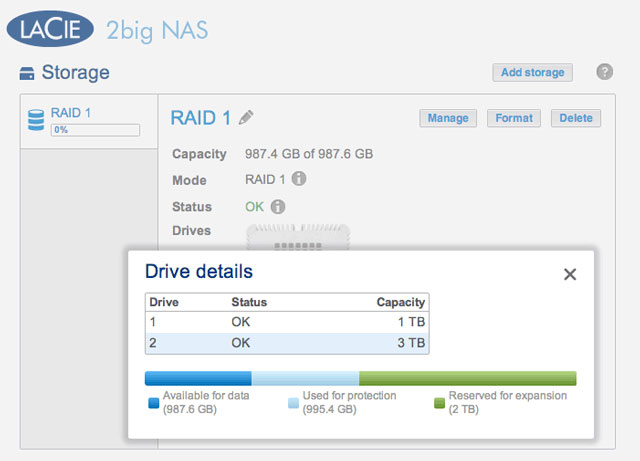
Storage distribution has changed with the new disk
Phase 2: Replace the second disk
Remove the second disk. The Storage page will alert you that the volume is no longer protected.
Insert the replacement disk per the instructions provided in
Remove/Insert a Hard Disk. The new drive will be listed on the Storage page.
Choose Manage.
Select
Repair and choose
Next.
Select the replacement disk then choose
Next.
Choose
Finish, then
Yes at the prompt to confirm the replacement disk. The time to synchronize the volume depends upon the amount of disks and the total capacity.

The synchronization is complete once the
Status is
OK. Move on to the next phase.
Phase 3: Optimize storage capacity
Now that the two drives have been replaced, you can optimize the RAID for the expanded capacity.
The storage capacity must be optimized for the new disks
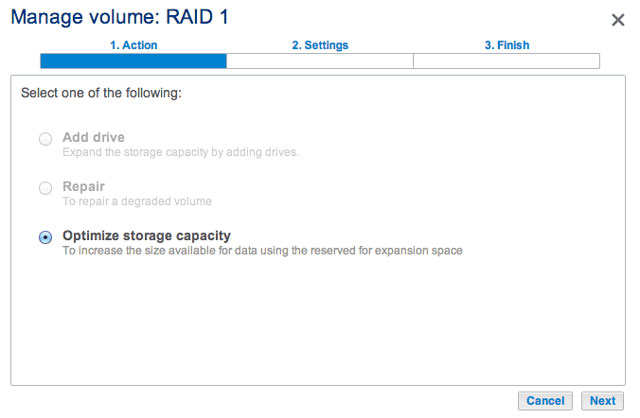
Choose Manage.
Select
Optimize storage capacity and choose
Next.
Choose
Finish.
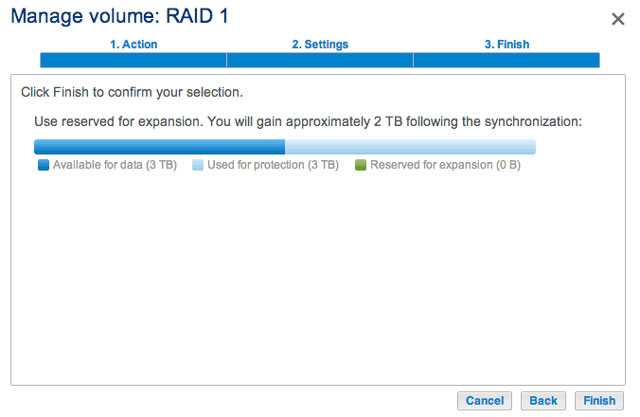
The volume will synchronize once more to update the storage capacity.
You can access files stored on your LaCie NAS during the RAID synchronization.


