User Tools
Site Tools
Table of Contents
Connect to the Network: Diskless LaCie 2big NAS
Users who purchased a LaCie 2big NAS enclosure without hard disks should follow the instructions below.
Choose compatible hard drives
Review the following before adding hard drives to your LaCie 2big NAS:
- The LaCie 2big NAS has been tested and certified for use with select Seagate hard drives. Go to Network Hard Drives to review compatible hard drives.
- LaCie recommends selecting disks that are equal in storage capacity. For example, if the first disk slot has a 1TB hard disk, fill the second slot with a 1TB hard disk.
Installation steps
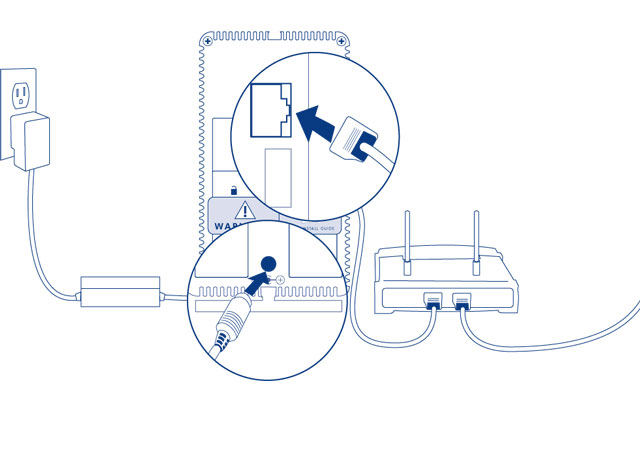
Step 1: Connect and power on the diskless 2big NAS
- Make sure that the disk slots are empty. You will be prompted to insert disks in Step 3.
- Connect the Ethernet cable to the Ethernet port on the back of the product and to an available Ethernet port on your router. Refer to your router’s documentation if necessary.
- Connect the power supply to a wall outlet and to the product.
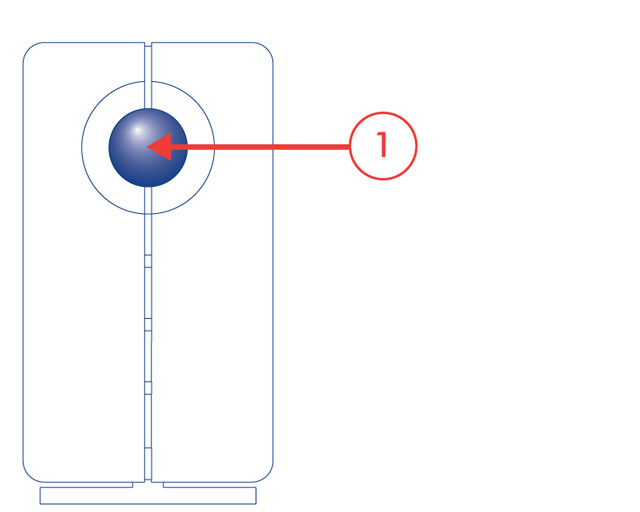
- Push the power button on the back of the device to the ON position. The front LED will turn on and then begin blinking blue. Once the LED stops blinking, move on to the next step.
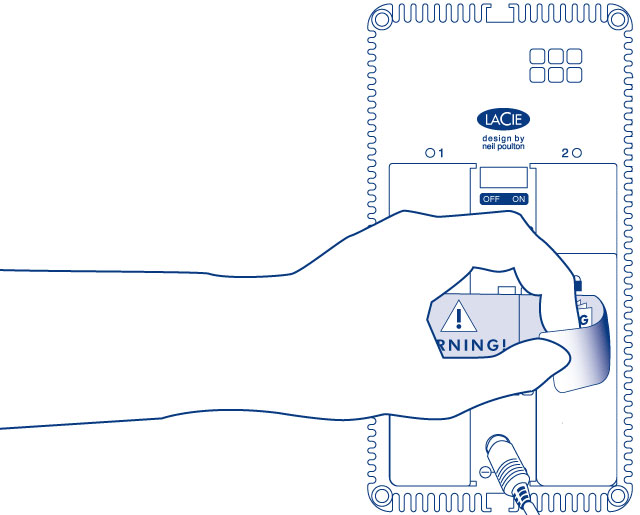
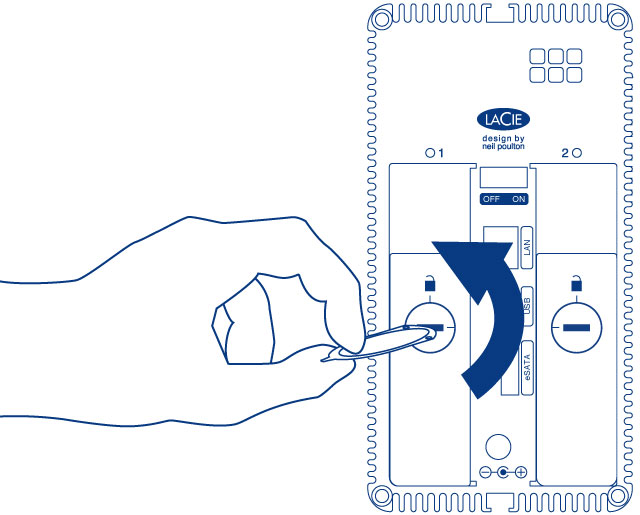
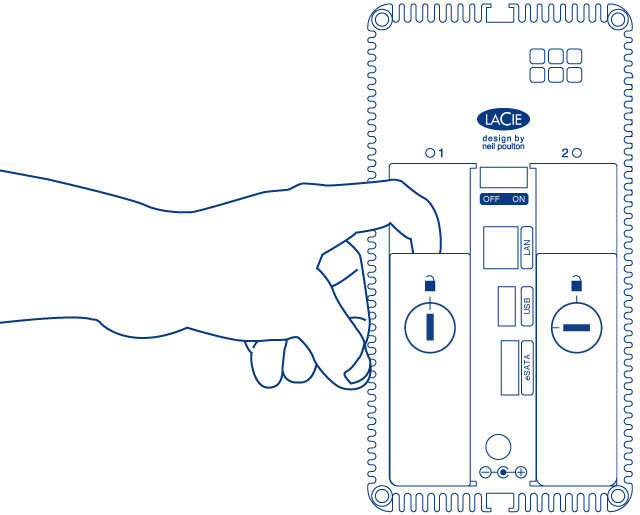
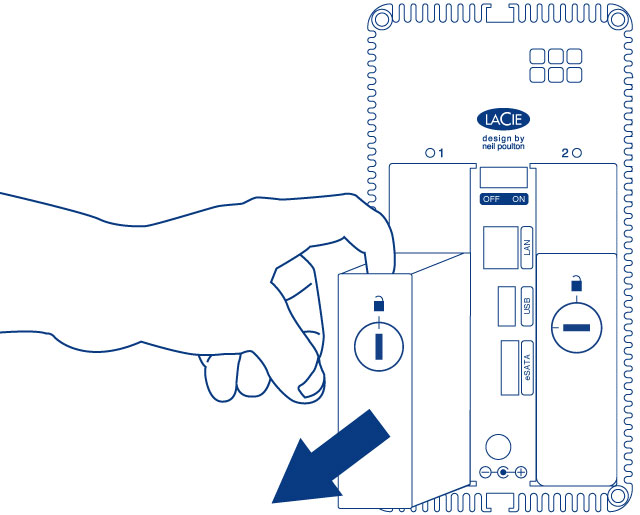
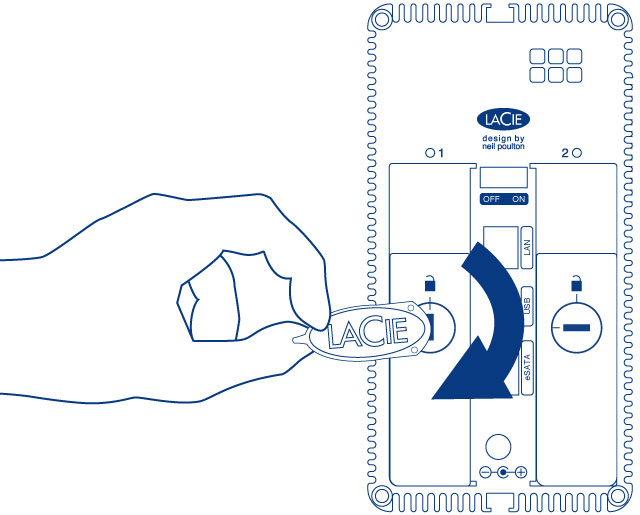
Step 2: Remove the disk tray sticker and empty disk tray(s)
- Repeat the process if you are adding a second disk.
Step 3: Install the disks into the disk trays
Find a suitable work area with adequate space and a flat, even surface. Make certain that all necessary components are available:
- LaCie 2big NAS disk tray
- Hard disk
- Disk tray screws. Use only the screws that are provided with your LaCie NAS.
- Phillips head screwdriver. Make certain that the screwdriver is the correct size for the disk tray screws.
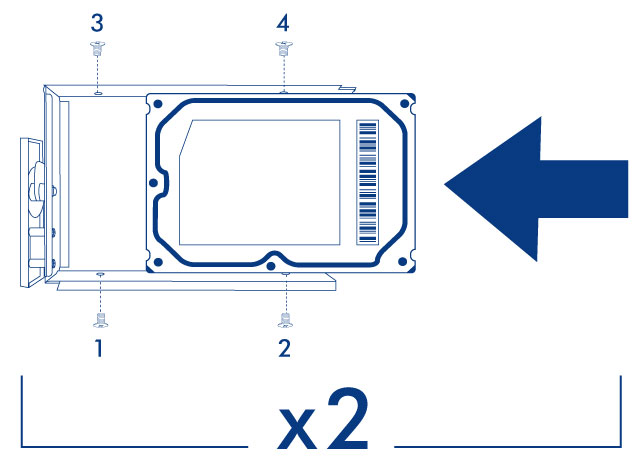
To secure the disk in the disk tray:
- Place the empty disk tray onto the flat work area with the handle on the bottom left.
- Many disks have a label on one side and the printed circuit board on the opposite side. With its label side facing up, gently place the hard disk within the disk tray. Keep the side with the printed circuit board on the work space and the SATA connector facing to the right. The four tray screw slots should align with the disk’s four screw holes.
- Repeat the process if you are installing two disks.
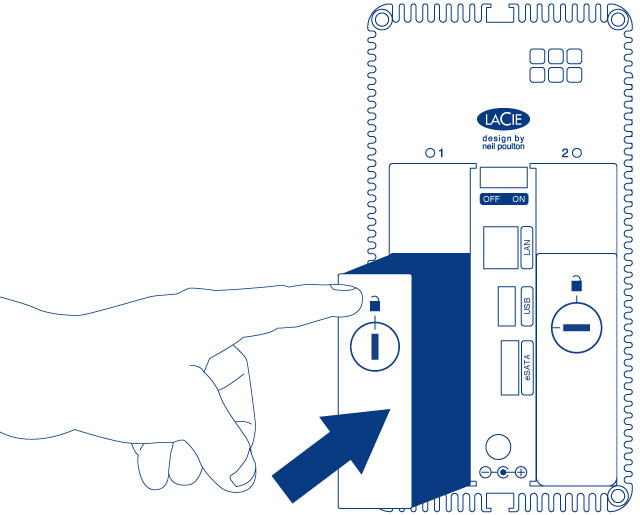
Step 4: Insert the full disk trays
- If you are adding the second disk, insert it next.
- The disk LEDs on the rear of the product will blink blue. Wait a full minute before moving on to the next step.
Step 5: Initialize the new disks
During this process, the hard disks you have inserted into the LaCie NAS will be formatted and all data deleted.
- After a period of 10 to 16 minutes, initialization will have completed. The system is ready once the front LED turns solid blue.
Perform the steps below on a PC/Mac connected to the same network as your LaCie NAS.
- Launch your preferred internet browser and type the default address for the LaCie NAS:
- Windows workstations (no Bonjour) - http://lacie-2big-nas
- Mac OS X and Windows workstations running Bonjour - http://lacie-2big-nas.local
- Enter the MAC addresses for your 2big NAS. It is not necessary to enter the colons.
- Choose Start Install.
- Choose Continue at the prompt to install NAS OS. To accommodate the installation, all data stored on the hard disks will be deleted.
- It takes approximately five minutes to format the hard drives and install NAS OS. Once it is finished, you are prompted to create an administrator password. You can also change:
- The name of the device.
- The administrator login (the default login is admin) and remote access credentials.
- The RAID configuration.
- The time zone.
- Make certain to note your login and password for future use.
- Choose Finish to access the NAS OS Home page. You can remove the key from the device. Keep it in a safe location for future use.
Next steps
- Simplify NAS access: LaCie recommends that you install the software utility Seagate Network Assistant before moving forward with the device configuration. Seagate Network Assistant gives you instant information on your firmware, IP address, and MAC address. It also provides quick access to shares and NAS OS. See Seagate Network Assistant for instructions.
- Configure your NAS: For details on how to configure and use your LaCie NAS, go to Shares: Access and Transfer File and Device Manager.
- Install Sdrive for local and remote access: Sdrive gives you easy access to shares and NAS OS on local and offsite networks. For more information, see Remote Access.

 Print page
 Save page as PDF


