User Tools
Site Tools
Technical Brief: RAID
User Manuals Print page
 Save page as PDF
Table of Contents


Table of Contents
Removing and Installing Disks
Important info: In the event that an individual hard disk fails in the LaCie 5big Office/Office+, contact your LaCie reseller or LaCie Customer Support for technical assistance. If the problem drive was purchased from LaCie and it is within the warranty period, please replace it with a hard drive provided by LaCie. LaCie will not replace a non-LaCie hard drive or any hard drive purchased from a third party.
Please note the following before replacing or adding a hard drive:
- If a disk has failed, make certain to choose the slot with the problem drive.
- The LaCie 5big Office/Office+ drives may be hot after continuous use. Please use caution when removing one or more drives from the enclosure.
- Use care when inserting or removing more than one disk while the 5big Office/Office+ is powered on. If disks are rapidly inserted or removed while the server is turned on, the system may not function properly. For example, the drives will no longer be recognized. You must wait at least 10 seconds between each insertion or removal of disk drives when the server is powered on.
Please read the following sections before purchasing a non-LaCie disk:
Please follow the directions in the following sections when installing a non-LaCie disk or replacing a LaCie 5big drive:
MBR, GPT and the 5big Office/Office+ Operating Systems
Master Boot Record (MBR) partitioning has been the hard drive standard for many years. It supports a maximum of four primary partitions with a size limit of 2TB per partition. To accommodate higher capacity hard drives, Global Unique Identifier Partition Tables (GPT) allows for more partitions that can exceed 2TB. Further, GPT has additional advantages that enhance performance.
The 5big Office and 5big Office+ operating systems must run on disks formatted with MBR. If the operating system is stored on mirrored drives, both disks must be formatted with MBR.
However, LaCie supports using data drives formatted with GPT.
Adjusting the Partition Table Format
Important info: Since adjusting the partition table format is destructive, LaCie recommends that you copy all important data to separate storage drives before making the change.
Switching from MBR to GPT or, conversely, from GPT to MBR, is not difficult:
- Go to your server's Disk Management window.
- Right-click on the disk number to choose GPT or MBR.
Disk Model and Disk Sectors
For optimal performance and to avoid potential conflicts, LaCie recommends that:
- Non-LaCie drives used in a single 5big enclosure are the same model.
- The disk sectors among the 5big enclosure drives are equal.
Non-LaCie disk(s): Please check the specifications of your non-LaCie disk(s) for further information.
Drives with Capacities Greater than 2TB
At the time of this writing, disks larger than 2TB are not tested within the 5big enclosure. Please note that LaCie cannot support disks larger than 2TB without evaluating their performance, integrity, and durability. With greater market adaptation, LaCie will incorporate a wider range of drives into its rigorous qualification model. Please go to our HDD Compatibility List for periodic updates.
The RAID configurations in this Technical Brief assume 1TB or 2TB drives. Further, the examples include disks with the same capacity. Administrators are advised to follow the default or recommended configurations within this Technical Brief and to use two to five disks of equal capacity within the enclosure.
You may experience problems when installing unsupported drives in the 5big enclosure. For example, attempting to use one or two 3TB drives in the system mirror. Since the drive(s) must be formatted with MBR to run Windows Storage Server 2008 R2 Essentials or Windows Home Server 2011, the system only recognizes the first 2TB of storage. The administrator risks losing 1TB to 2TB of storage capacity.
Certainly, larger capacity external drives are ideal for backing up your 5big Office/Office+ data via the USB 2.0 and eSATA ports. Make certain to format drives with capacities greater than 2TB using GPT.
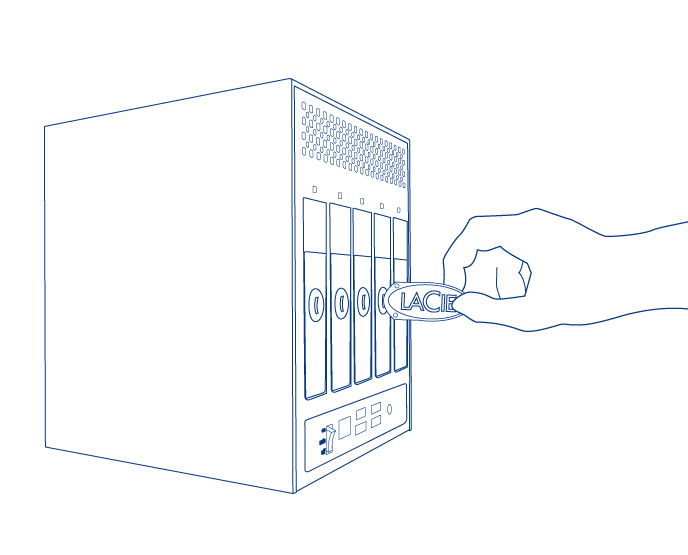
Removing a Disk Tray
The slot order in the 5big enclosure is important. LaCie recommends inserting new drives in the order of the numbered slots, from left to right. For example, if the first slot on the left (Slot 1) contains the sole drive in the enclosure, choose the second slot from the left (Slot 2) for the next drive. It there are disks in Slots 1 and 2, place the next drive in Slot 3, etc.

- Use the included drive lock tool to unlock the drive tray. Turn the lock until it is vertical.
- Place your index finger into the space behind the handle.
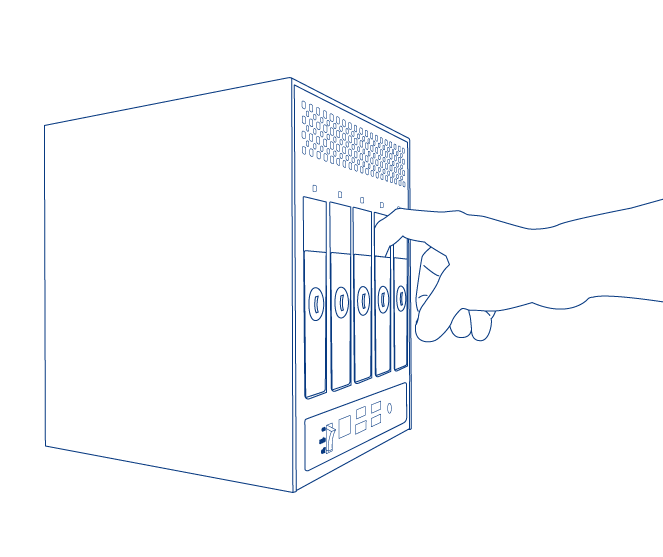
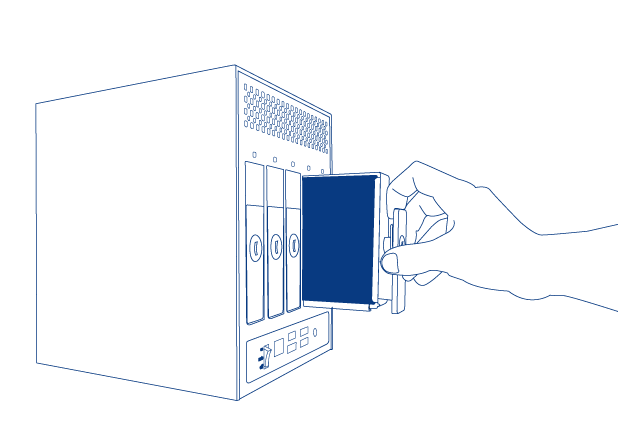
- Draw out the drive tray handle and carefully extract it. Please use caution when removing the drive tray.


Non-LaCie Hard Drives
Note: Drives sold by LaCie are the preferred choice for your 5big Office/Office+. LaCie 5big drives are tested and shipped in a drive tray for easy installation. Additionally, all 5big hard drives include a 3-year warranty.
Please note the following before fastening your non-LaCie hard drive to the drive tray:
- Only 3.5” SATA II drives may be used in the 5big enclosure. Please visit the HDD Compatibility List for drives that have been tested by LaCie. LaCie cannot guarantee performance or compatibility with the 5big Office/Office+ when using non-LaCie drives or drives that have not been tested by LaCie.
- Use only the screws supplied in your packaging when fastening the non-LaCie hard drive to the drive tray.
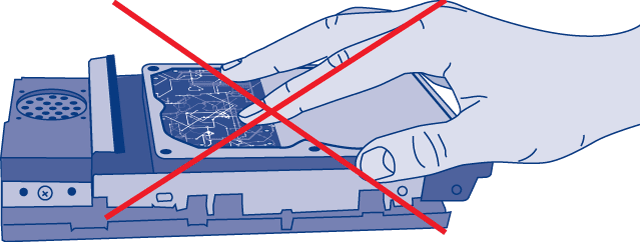
- To avoid potential problems caused by electrostatic discharge (ESD), it is recommended that you do not touch the hard drive’s printed circuit board. As a further precaution against ESD, please use an anti-static wristband or an anti-static mat to ground yourself when handling the hard drive.


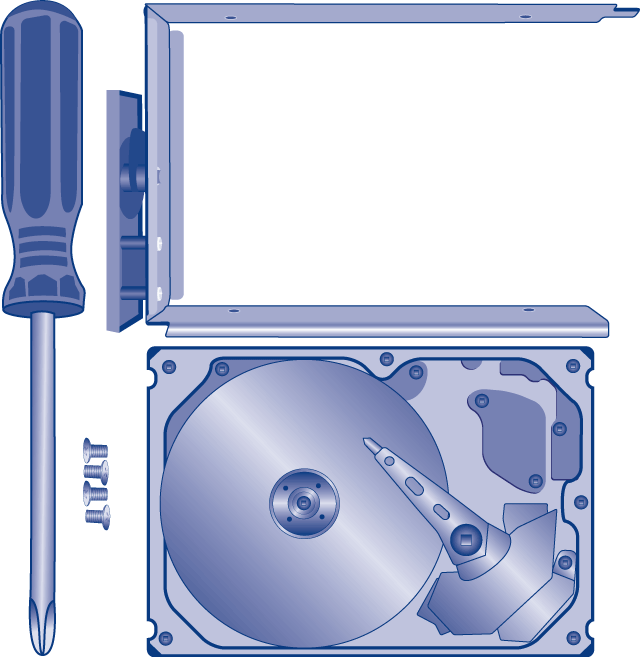
Fastening a disk to the drive tray
- Find a suitable work area with adequate space and a flat, even surface.
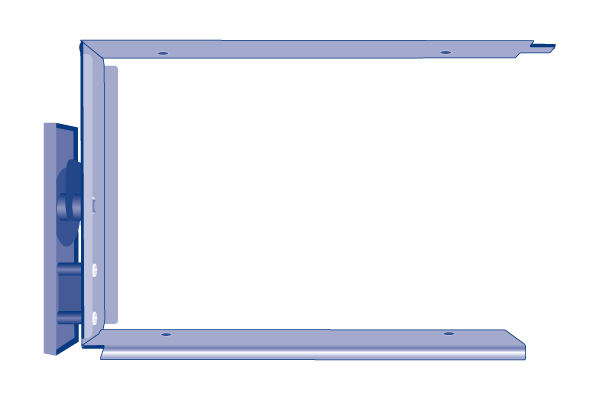
- Locate the empty 5big drive tray and the four drive tray screws included with your packaging. Use ONLY the screws that were provided with your 5big enclosure. Using screws that did not come with your 5big enclosure may damage the drive tray as well as your non-LaCie disk. Make certain that your non-LaCie 3.5” SATA II disk and a Phillips head screwdriver are within reach as well. Please confirm that the head of the screwdriver is the proper size for the drive tray screws provided by LaCie.
- Place the empty drive tray onto the flat work area. The handle should be on the bottom left, with the lock icon pointing away from you.
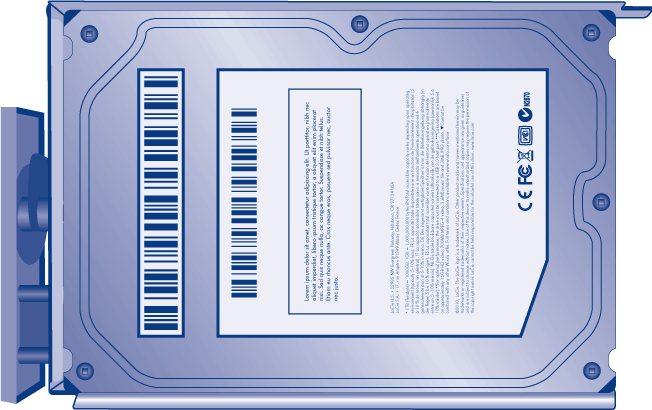
- With its label side facing up, gently place the hard disk within the drive tray. The four tray screw slots should be neatly aligned with the disk’s screw holes. Please note that the printed circuit board will be flat on the work space and the SATA connector facing to the right.
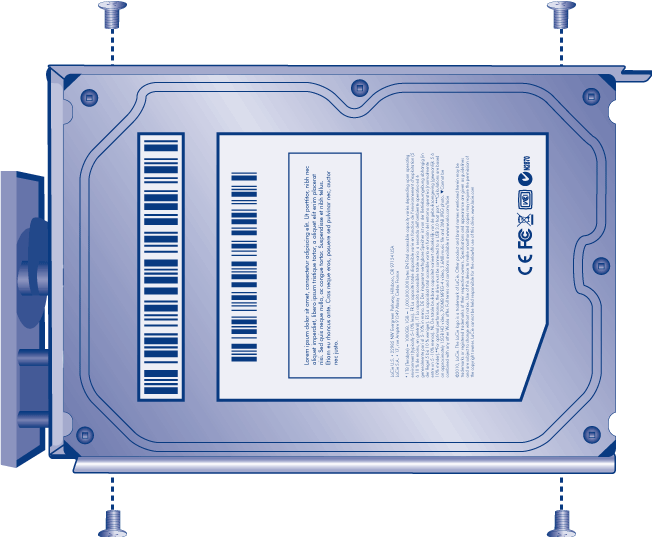
- Using the Phillips head screwdriver, carefully fasten all four screws into their slots. Do not overly tighten the screws. Doing so may negatively affect the integrity of the screw holes on the drive as well as the threads on the screws.


Insert a Disk
- Make certain that the replacement or new drive is securely fastened to the drive tray.
- Carefully insert the drive tray into the empty drive slot. You will feel resistance when the drive tray is most of the way in the bay. Gently push the drive tray handle firmly until you feel the it snap into place. The drive tray handle should be flush with the back of the 5big enclosure.
- Use the drive lock tool to lock the drive in place.
© LaCie 2024
Last modified : Mar 01, 2013