User Tools
Site Tools
Technical Brief: RAID
User Manuals Print page
 Save page as PDF
Table of Contents


Table of Contents
Repairing RAID Configurations
You may need to recreate the Mirrored and/or RAID 5 volumes if a disk should fail.
Important info: In the event that an individual hard disk fails in the 5big Office/Office+, contact your LaCie reseller or LaCie Customer Support for technical assistance. If the problem drive was purchased from LaCie and it is within the warranty period, please replace it with a hard drive provided by LaCie. LaCie will not replace a non-LaCie hard drive or any hard drive purchased from a third party. Please note that the replacement disk capacity should be equal to the original disk. While you may use a disk with more capacity, RAID configurations only recognize the size of the original disk.
Repairing the Mirrored and RAID 5 Volumes After a Disk Failure
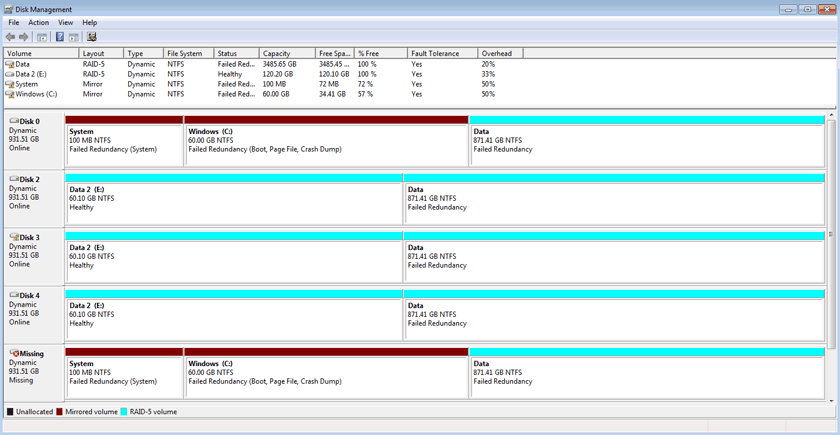
The steps below will illustrate how to repair Mirrored and RAID 5 volumes following disk failure. Partitions from the failed hard drive, Disk 1, had been tied to each volume.
Use Disk Management to repair or change RAID configurations in Windows:
- Launch the Dashboard from a Windows workstation on the same network as your LaCie 5big Office/Office+. Start > All Programs > Windows Home Server 2011/Windows Storage Server 2008 R2 > Windows Home Server 2011 Dashboard/Windows Storage Server 2008 R2 Dashboard
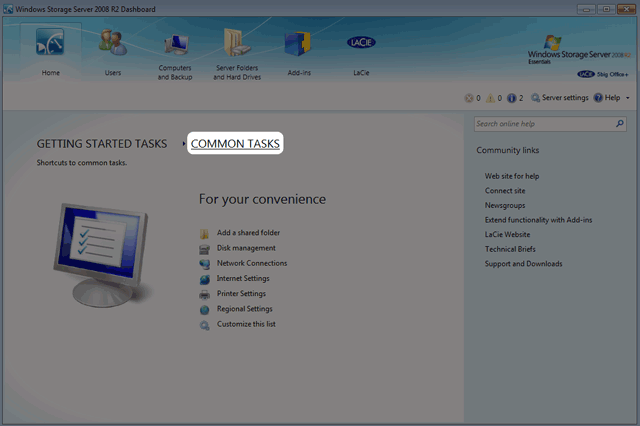
- Select the Home tab.
- Click once on COMMON TASKS.
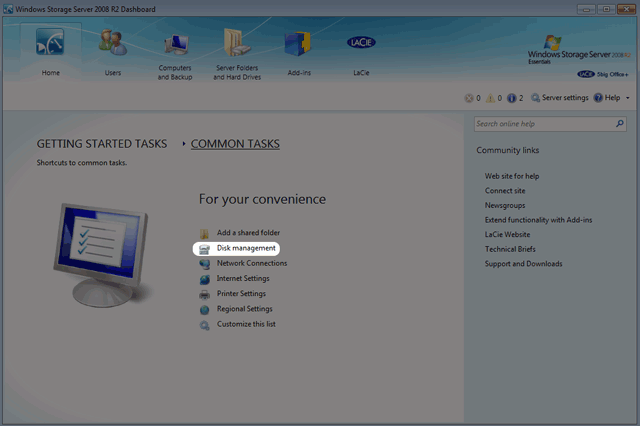
- Click once on Disk Management.
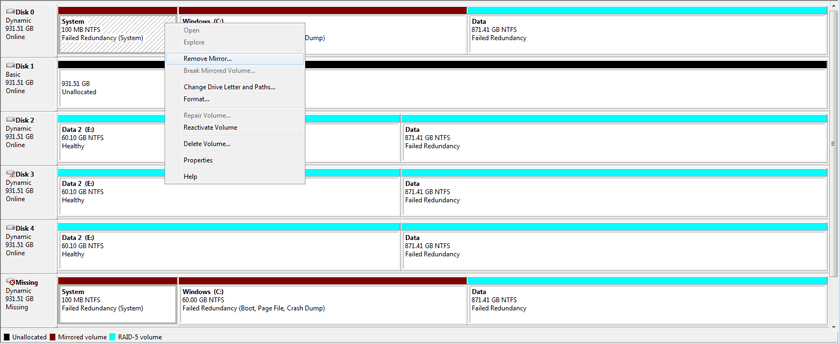
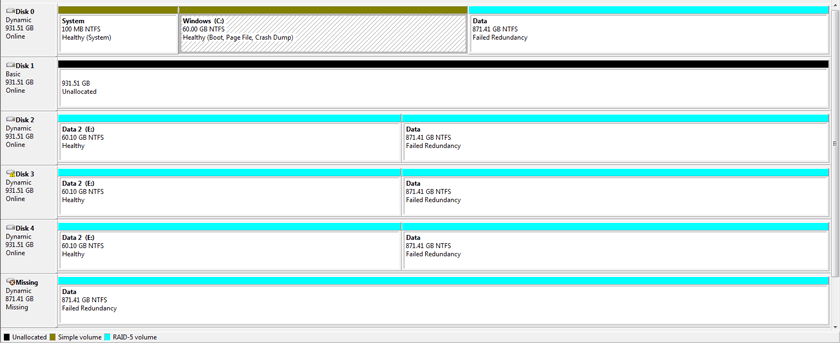
- Note that Disk 1 is Missing and that both the Mirrored and RAID 5 volumes have Failed Redundancy.
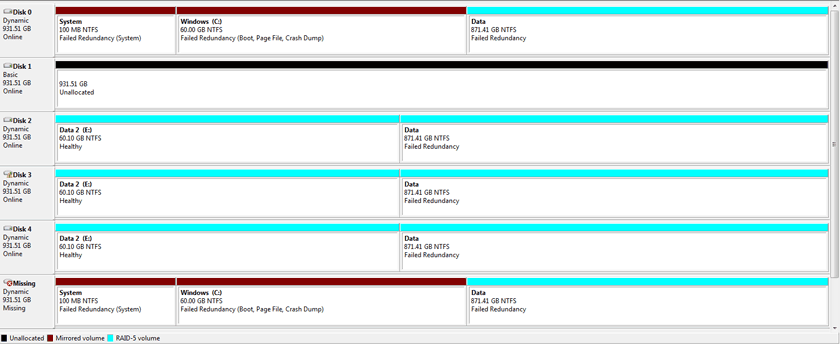
- Remove the failed Disk 1 and insert the replacement. See Removing and Installing Disks for instructions on adding new drives into the 5big enclosure.
- The replacement disk is listed as Unallocated.
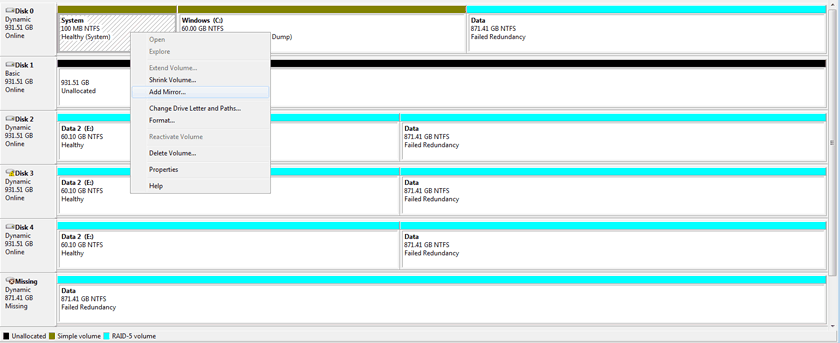
- The mirror must be broken before rebuilding it with the replacement disk. Right-click on the System volume to select Remove Mirror…
 Remove Mirror - System
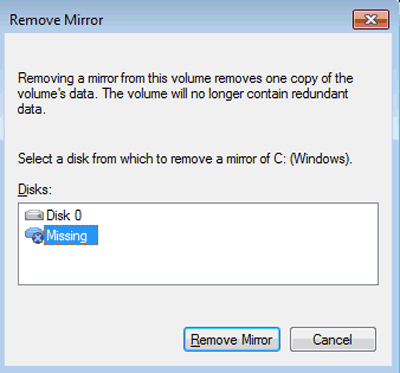
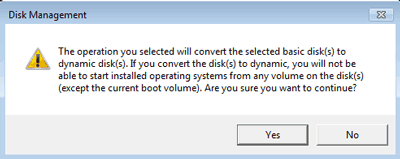
- In the Remove Mirror pop-up window, select Missing. Click Remove Mirror.
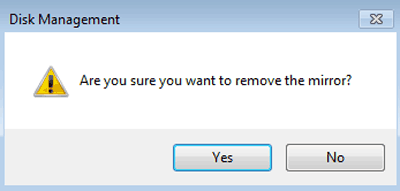
- Click Yes at the Disk Management prompt.
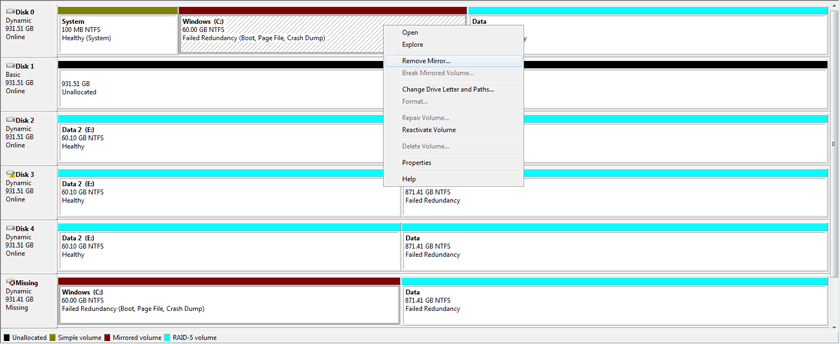
- Right-click on the Windows volume to select Remove Mirror….
 Remove Mirror - Windows
 - In the Remove Mirror pop-up window, select Missing. Click Remove Mirror.
- Click Yes at the Disk Management prompt.
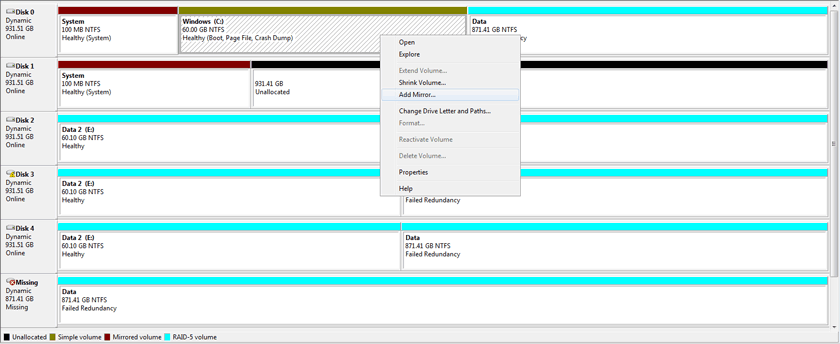
- The mirror has been successfully removed.
- Right-click on the System partition to select Add Mirror…
- From the Add Mirror pop-up window, select your replacement disk (in this example, Disk 1). Click Add Mirror.

- Click Yes at the Disk Management pop-up window.
- Right-click on the Windows partition to select Add Mirror…
- From the Add Mirror pop-up window, select your replacement disk (in this example, Disk 1). Click Add Mirror.
- Disk Management will begin resynching the Windows Mirror. To save time, you may resync the Data RAID 5 volume while the Windows Mirror is building.
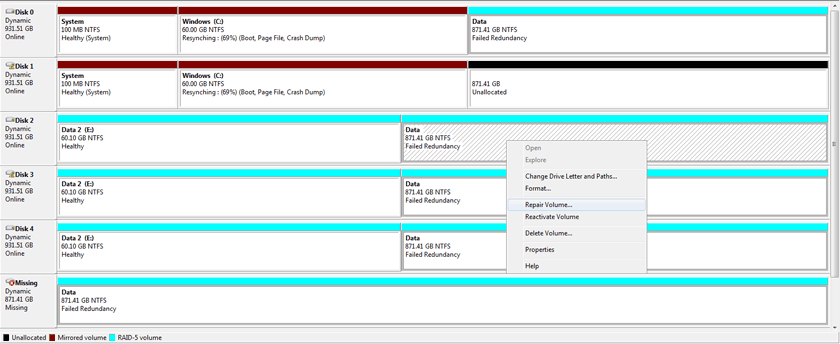
- Right-click on one of the Data partitions (do not use the Missing disk). Choose Repair Volume…
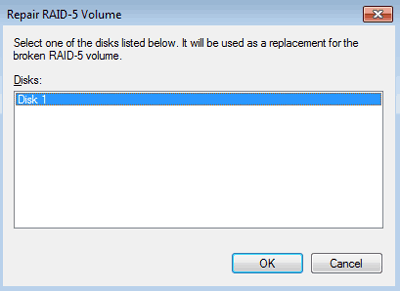
- In the Repair RAID-5 Volume window, choose the disk to repair the Data volume (in our example, Disk 1). Click OK. The Data volume will start resynching. Please be patient since it will take 15 to 40 hours to resync the RAID 5 volume, depending upon the capacity.


Removing the Missing Disk
Disk Management must be told to remove the Missing disk once resynching has begun. Follow the easy steps below to delete the Missing disk from the list of drives.
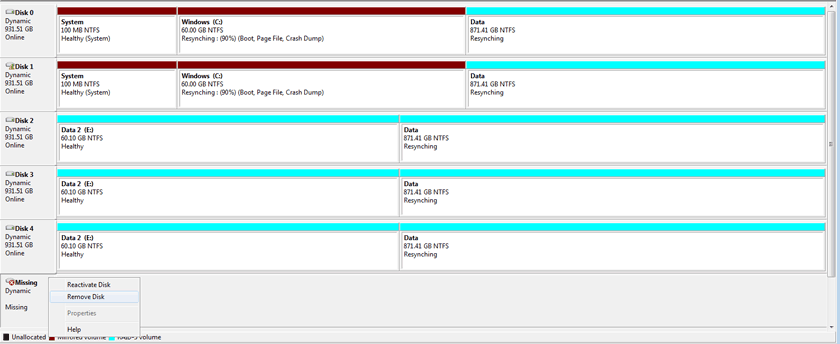
- If you have not closed Disk Management after following the steps to repair the Mirrored and RAID 5 volumes, the Missing disk may be listed as a member of the Data volume.
- Go to the the Action pulldown menu and choose Refresh (Action > Refresh) to refresh the list of drives. If the Missing disk is still listed as Data, exit and relaunch Disk Management.
- The Missing disk will remain in the list of Disk Management disks. However, it should no longer be a part of the Data volume.
- Right-click on Missing to select Remove Disk.
- The Missing disk should now be removed from the Disk Management list.


© LaCie 2024
Last modified : Mar 01, 2013