User Tools
Site Tools
Technical Brief: 4big Rack Office RAID
User Manuals Print page
 Save page as PDF
Table of Contents


Table of Contents
RAID - Creating Multiple Volumes (Optional)
Administrators who wish to use Windows Backup with the 4big Rack Office should follow the instructions in this section to create partitions that do not exceed 2TB. To revise the default RAID configuration, the Data1 [D:] volume will be deleted in order to create multiple volumes. Please note that all data stored on Data1 [D:] will also be deleted. You must back up all data stored on Data1 [D:] before deleting it.
Note: The following instructions use the LaCie 5big Office/Office+ with five drives. While your RAID configuration may not exactly match the screenshots below, you can still use the instructions as a guide to delete existing volumes and create new partitions.
Delete an existing RAID volume
Important info: Deleting volumes and creating RAID arrays are data destructive operations. Please make certain that all data has been backed up and that all Shared Folders have been moved to other volumes before performing either operation.
Use Disk Management to delete a volume:
- Launch the Dashboard from a Windows workstation on the same network as your LaCie 5big Office/Office+ or 4big Rack Office. Start > All Programs > Windows Home Server 2011/Windows Storage Server 2008 R2 > Windows Home Server 2011 Dashboard/Windows Storage Server 2008 R2 Dashboard
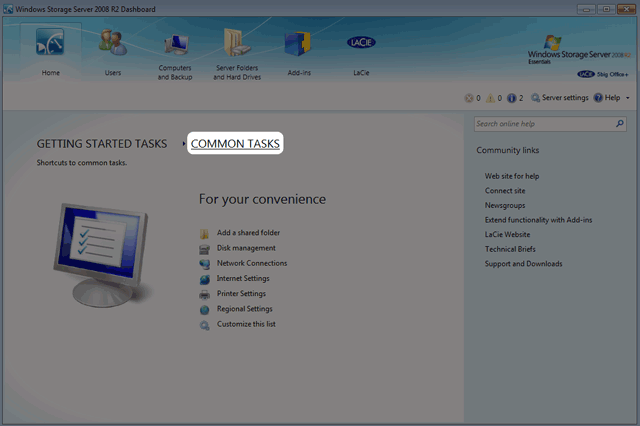
- Select the Home tab.
- Click once on COMMON TASKS.
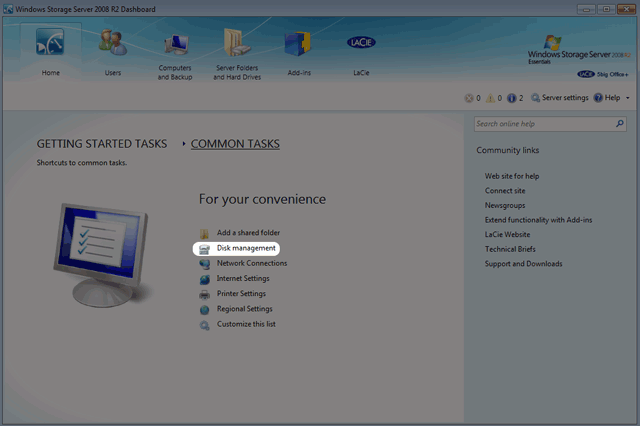
- Click once on Disk Management.
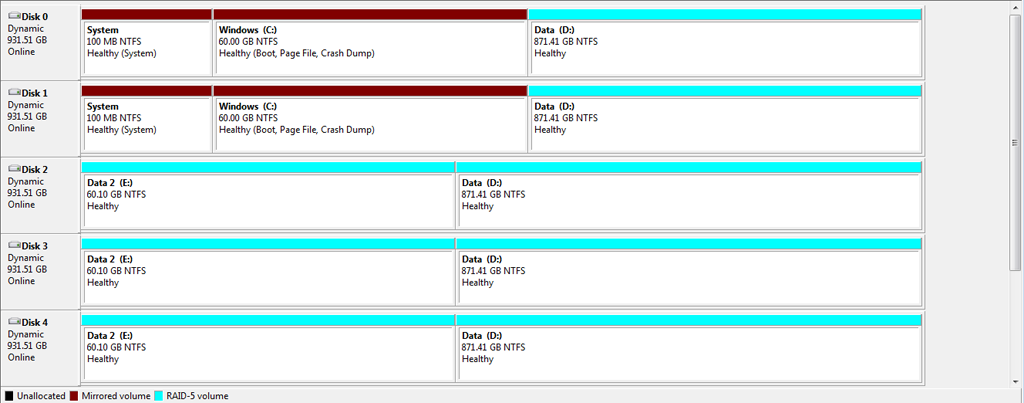
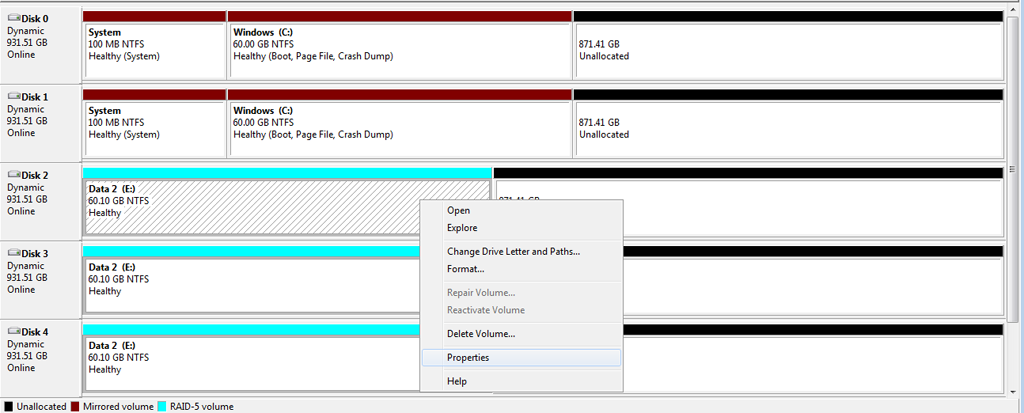
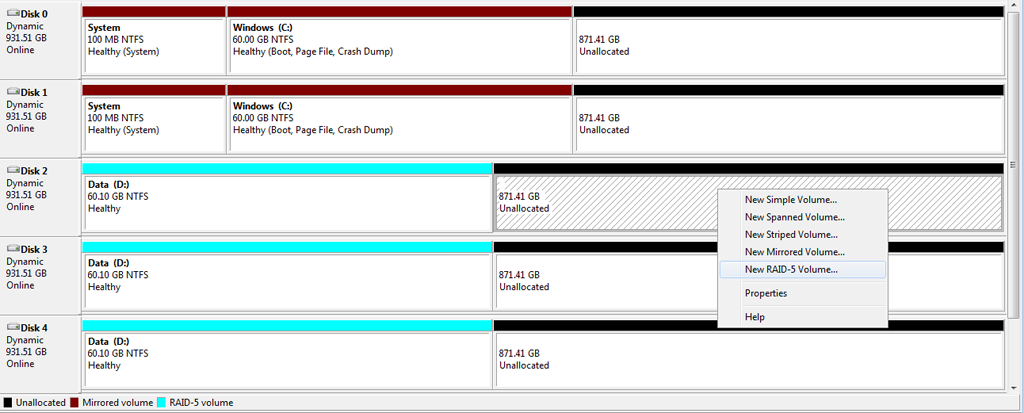
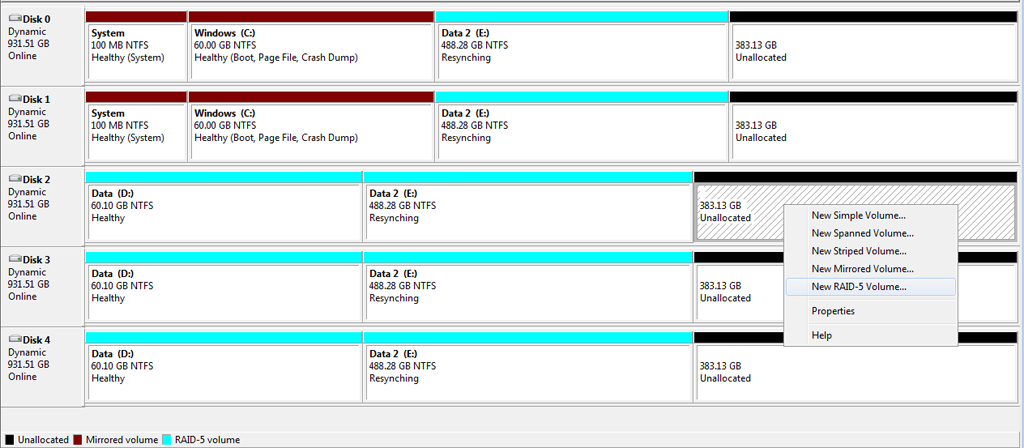
- The screenshot below shows the default RAID configuration for a 5big Office/Office+ with five hard drives. Before creating volumes that do not surpass 2TB, we will delete the largest partition, Data [D].
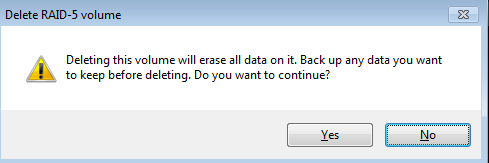
- Right click on the Data1 [D:] volume. You may right click on any of its five disks. Select Delete Volume…
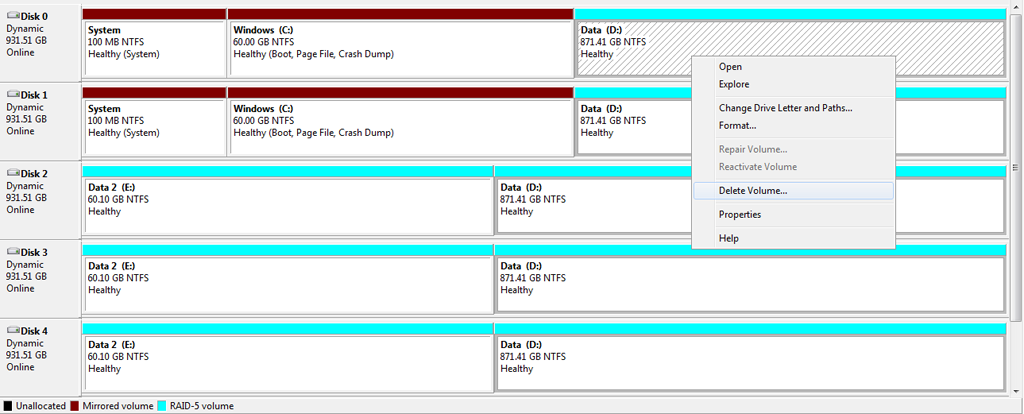
- If you have backed up all data and moved all Shared Folders stored on Data1 [D:], click Yes.
- The volume Data1 [D:] has been deleted.


Optional name change
Adjusting the size and order of the partitions will add more volumes to Disk Management. Consequently, the disks will no longer appear in the same order as the default RAID configuration. For organizational purposes, it may be easier to change the name and letter of Data2 [E:] so that the Data drives are listed in numerical order in Disk Management, from left to right. This step is optional and may be skipped.
Important info: Editing the name of the volume will have little effect upon the links to Shared Folders on the server. However, changing the drive letter of a volume will require that you revise the location of Shared Folders on the server.
To change the name and volume letter:
- Right click on any drive in the Data2 [E:] volume. Select Properties.
- The name of the volume, Data2, is highlighted in the General tab.
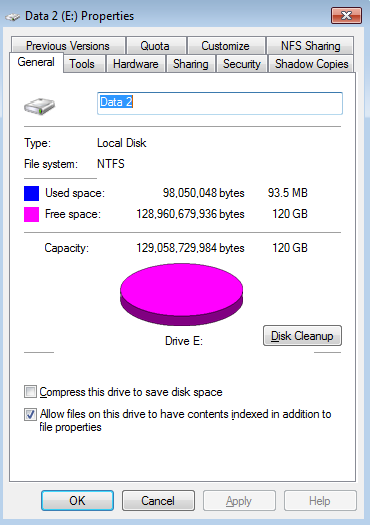
- In this example, we are changing the name from Data2 to Data1. You may use any name that suits your environment. Click OK.

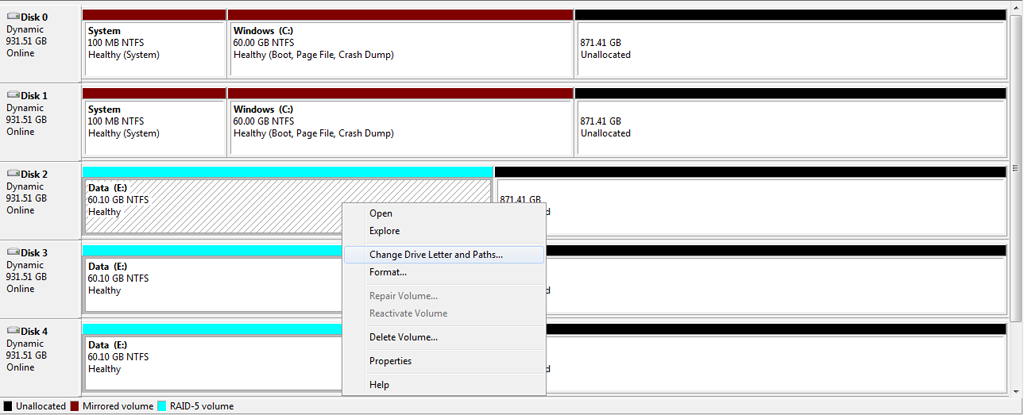
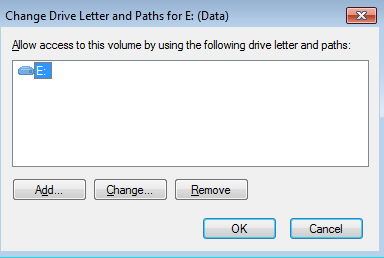
- Right click on any drive in the new Data2 [E:] volume. Select Change Drive Letter and Paths…
- In the pop-up window, click on Change…
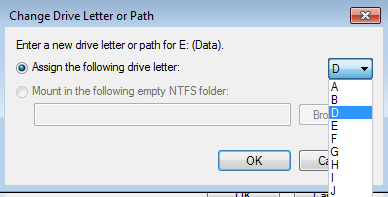
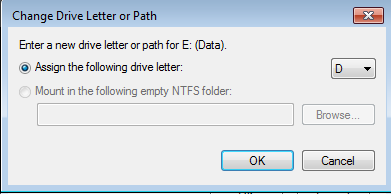
- Click on the pulldown menu to choose the next letter in alphabetical order. In this case, D. Click OK.
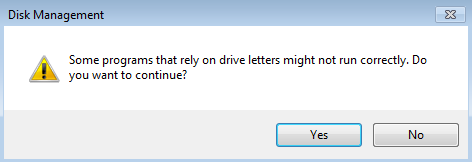
- Click Yes at the prompt.
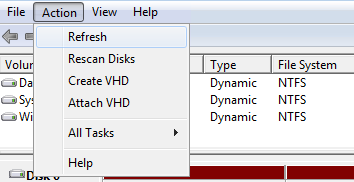
- If the change in letter assignment does not take effect immediately, go to the the pulldown menu at the top of Disk Management to select Action > Refresh.
- The volume should now be listed as Data1 [D:].


Creating Multiple RAID 5 Volumes
In this example using the 5big Office/Office+, there are five disks and we do not want any of the volumes to exceed 2TB (2TB = 2000000MB). RAID 5 remains an optimal solution to protect data while maintaining a high percentage of the available storage. Before configuring the RAID 5 volumes, we must know the amount of storage to assign each disk in the array. To determine the capacity in MB, use the following formula:
2000000MB/N-1 (N equals the number of disks.)
5big Office/Office+: 2000000/(5-1) = 2000000/4 = 500000
4big Rack Office: 2000000/(4-1) = 2000000/3 = 666000 (Do not round up to 667000 as it will create volumes larger than 2TB).
Technical note: We have used a denominator of N-1 since RAID 5 uses one disk for parity. This will offer 80% capacity in a five disk array and 75% capacity in a four disk array.
Follow the directions below to create the volumes.
- The example below shows a five-disk array (5big Office/5big Office+) with the operating system mirrored on Disks 0 and 1. Due to the operating system, right clicking on Disk 0 or Disk 1 will not give us the option to create a RAID 5 volume. Therefore, the example demonstrates a right click on an Unallocated partition on Disk 2 to select New RAID-5 Volume…. Right clicking on Disk 3 or Disk 4 would work as well. The 4big Rack Office operating system is mirrored on Disks 2 and 3. Therefore, right click on the Unallocated partitions on Disk 0 or Disk 1 when creating RAID 5 volumes on the 4big Rack Office.
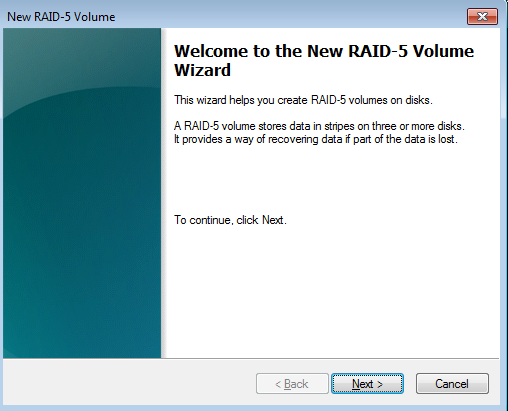
- The New RAID-5 Volume Wizard will appear. Click Next.
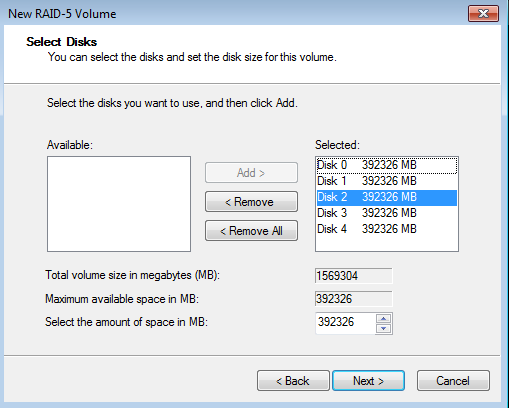
- Select all the disks listed under Available.
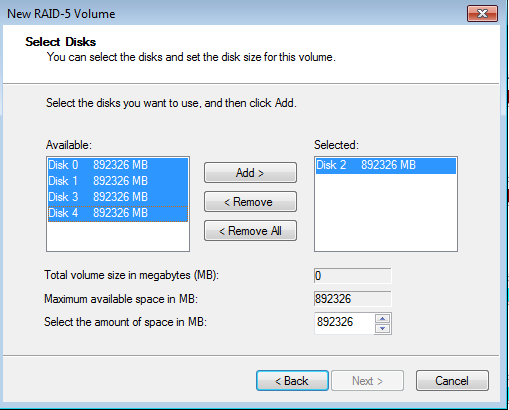
- Click Add. All the disks will be moved to the column Selected.

- In the field for Select the amount of space in MB, type 500000 on a 5big Office/Office+ and 666000 on a 4big Rack Office.
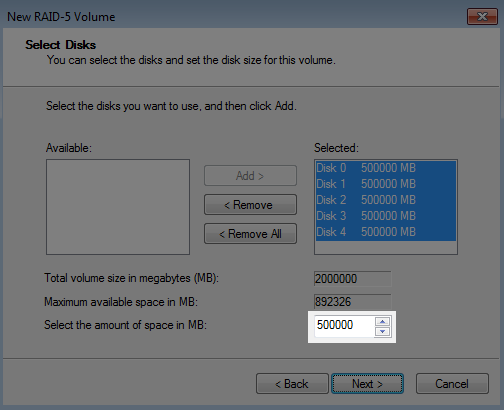
- Click Next.
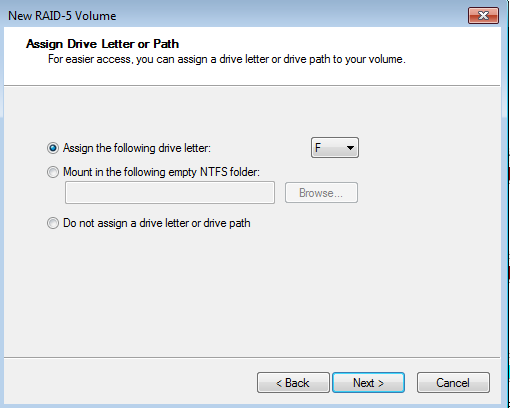
- Assign a drive letter. In this example, we have selected the next letter in alphabetical order, “E”.

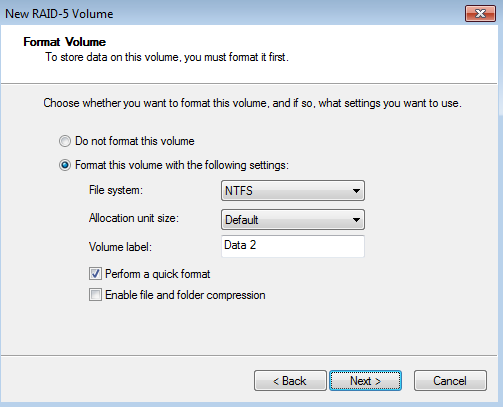
- You may name the volume. In this example, we have named the volume Data 2 or Data2. LaCie recommends keeping the defaults NTFS (file system) and Perform a quick format. Click Next.
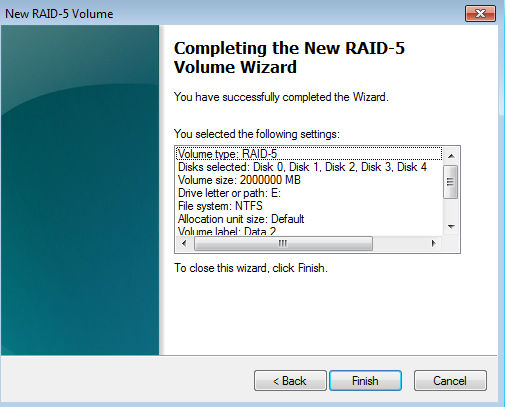
- Review your choices then click Finish.


You may create the next RAID 5 volume while Data 2 is resynching:
- Right click on the Unallocated partition for Disk 2, Disk 3, or Disk 4 on a 5big. On a 4big Rack Office, click on Disk 0 or Disk 1. Select New RAID-5 Volume…
- The New RAID-5 Volume Wizard will appear. Click Next.
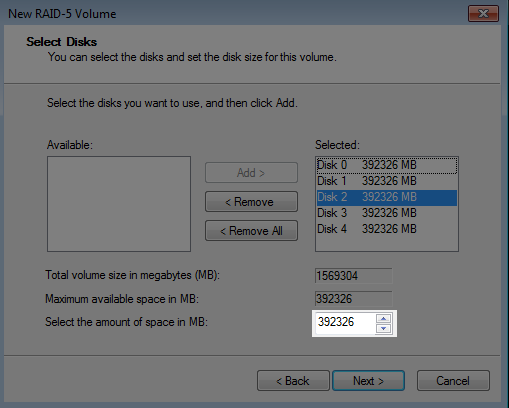
- Select all the disks listed under Available and click Add. All the disks will be moved to the Selected column.
- Please make certain that the amount of space assigned to each disk does not exceed 500000 on a 5big Office/Office+ and 666000 on a 4big Rack Office. Click Next to move to the next step.
- Assign a drive letter. In this example, we have selected the next letter in alphabetical order, “F”.
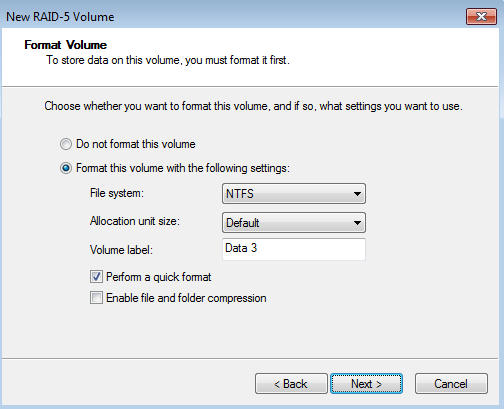
- You may name the volume. In this example, we have named the volume Data 3 or Data3. LaCie recommends keeping the defaults NTFS (file system) and Perform a quick format. Click Next.
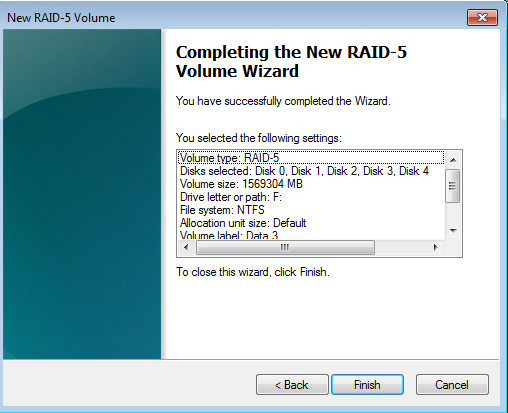
- Review your choices then click Finish.


Note on Shared Folders: Data2 [E:] and Data3 [F:] offer more capacity than the Windows Mirror and Data [D:] volumes. LaCie recommends using Data 2 and Data 3 for your Shared Folders.
Note: Please keep the following in mind as Mirrored and/or RAID 5 volumes resync:
- Rebooting the server while Disk Management is Resynching a Mirrored or RAID 5 volume will not harm the configuration or its data. However, since the process was interrupted, Disk Management will restart the resync at 0% once the server has rebooted.
- Due to the capacity of the RAID 5 volume, rebooting while a resync is in progress could extend the operation for many hours.
- Users can access a volume during a resync, including reading files, writing files, or moving Shared Folders. However, performance will be degraded while Windows is resynching Mirrored and/or RAID 5 volumes.
© LaCie 2024
Last modified : Mar 01, 2013