User Tools
Site Tools
8big Rack Thunderbolt 2
User Manuals Print page
 Save page as PDF
Table of Contents


Table of Contents
Setting Up - Mac
The LaCie 8big Rack Thunderbolt 2 is shipped with the following installation components:
- Rack rail kit for a standard 19-inch rack
- Inner rack rails (A1, A2)
- Outer rack rails (B1, B2)
- Screws and washers for the rack rails
- Inner rack rail M4x4 screws (8)
- Outer rack rail M5x10 screws (8)
- Washers (8)
- Cable management arm kit
- Power supply cables (certain models are shipped with one power supply cable)
- Thunderbolt cable (2m)
- Hard drives (the amount of hard drives can vary by model)
- LaCie 8big Rack Thunderbolt 2 enclosure
An additional plastic bag with screws has been provided to fasten hard drives to the hard drive drawers. If you must secure hard drives to the hard drive trays, make certain to use the included screws.
The instructions below are also available on the Quick Start Guide included with the LaCie 8big.
Before installation: Choose compatible hard drives
If your LaCie 8big shipped with eight hard drives, you can skip this section and move to Step 1. If your LaCie 8big shipped with empty hard drive slots, consider the following:
- When adding new hard drives to empty slots, LaCie highly recommends using hard drives that have been tested and approved for the LaCie 8big. For a list of compatible hard drives, visit LaCie 8big Rack Thunderbolt 2 hard drives.
- LaCie cannot guarantee performance or functionality when using hard drives that do not appear on the list of compatible hard drives.
Step 1 - Download and install LaCie RAID Manager
Important info regarding LaCie RAID Manager and LaCie Desktop Manager: Older versions of LaCie Desktop Manager may conflict with LaCie RAID Manager. If you are using LaCie Desktop Manager, go to LaCie support to download and install the latest version. It is recommended that you install the new version before following the steps below.
The software utility LaCie RAID Manager gives you:
- The driver to mount the LaCie 8big storage
- LaCie RAID Manager to monitor and manage the storage
The LaCie 8big hard drives are preconfigured as RAID 5 and formatted for Mac (HFS+). Use LaCie RAID Manager to confirm the health of the hard drives or to change the RAID configuration:
- Download the installer at http://www.lacie.com/support/raid/8big-rack-thunderbolt-2-ec/.
- Launch the installer on the computer that will connect to the LaCie 8big.
- Follow the on-screen instructions to complete the installation.
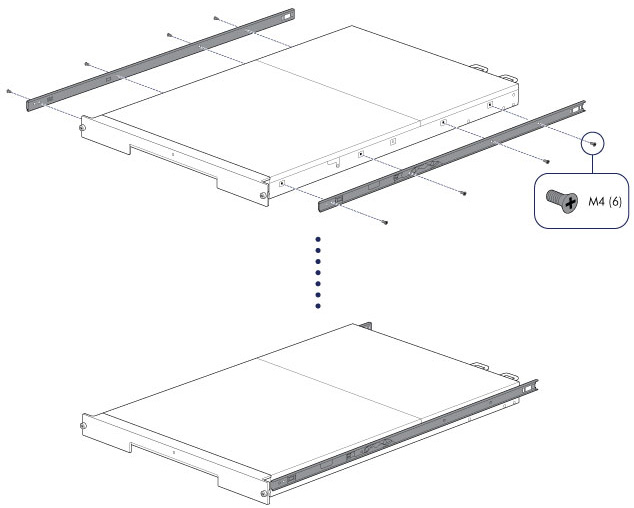
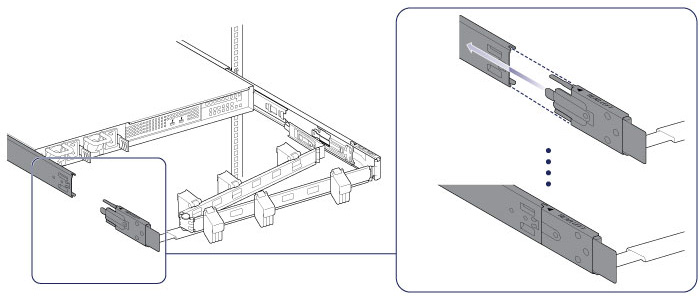
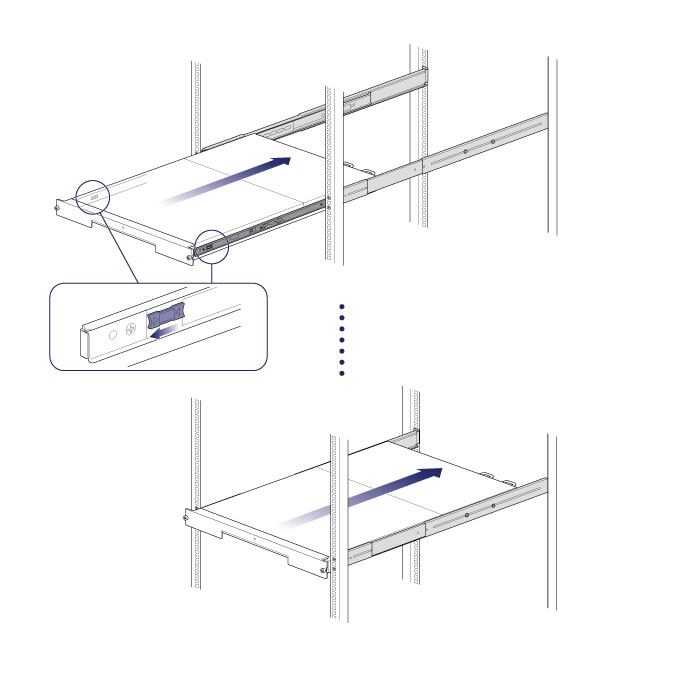
Step 2 - Rack rails
- Attach the inner rack rails to the LaCie 8big using four screws on each side.
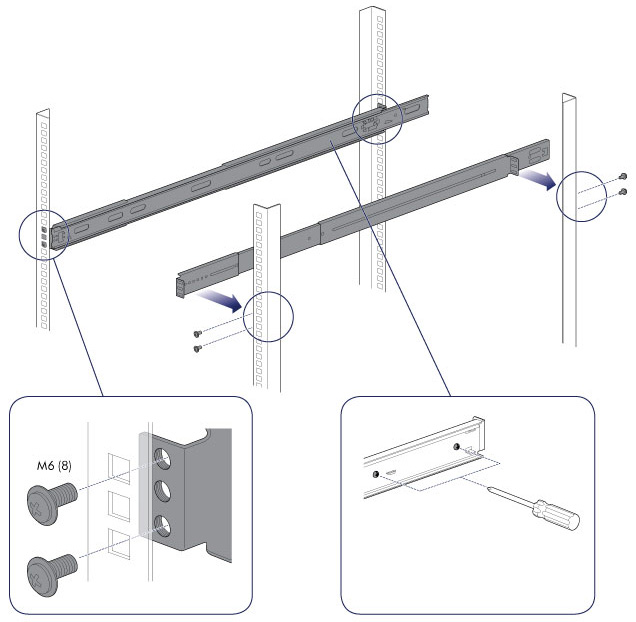
- Attach the outer rack rails to the rack. If necessary, unlock the rear screws on the outer rack rails to extend the sliding brackets.
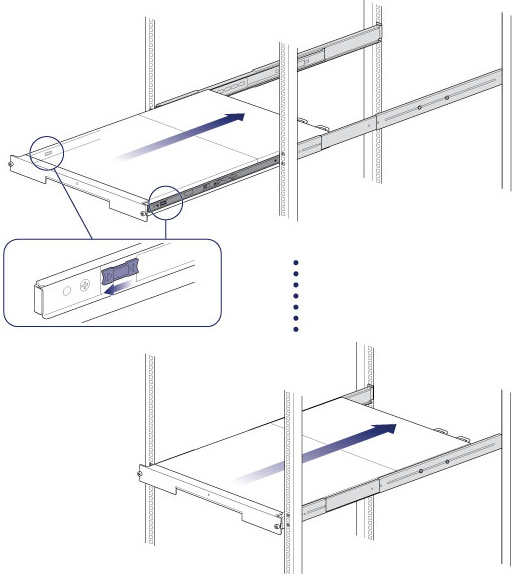
- Slide the LaCie 8big into the rack. To unlock the rails, pull the rail fasteners on each side toward you. An audible click indicates that the LaCie 8big is securely fastened to the rack.


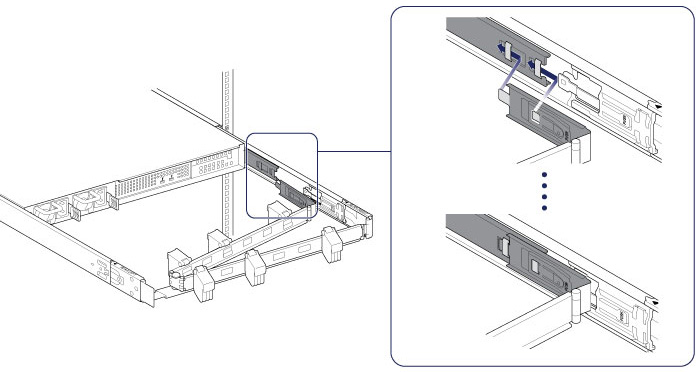
Step 3 - Cable management arm
Attach the cable management arm to the back of the rack rails.
- Snap the right outer connection into the outside rail.
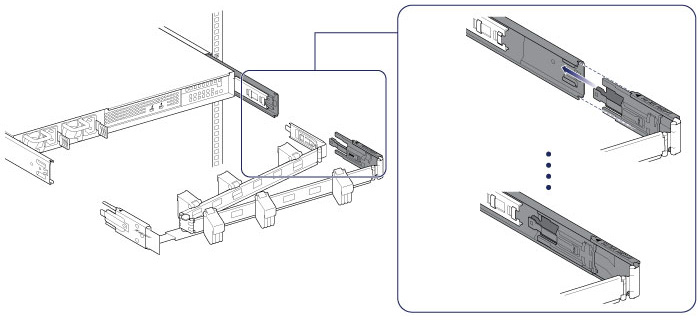
- Snap the left connection into the outside rail.
- Guide the right inner connection into the inner rack rail.


Step 4 - Cables
Connections

- Thunderbolt cable
- Power cables
Note regarding a Thunderbolt daisy chain: You can also connect a second Thunderbolt cable to daisy chain compatible devices to the LaCie 8big. A Thunderbolt daisy chain supports up to seven devices, including the computer. See Daisy Chain for further information.
Notes on power supplies: Certain LaCie 8big models are shipped with one power supply, which is sufficient for normal operation. LaCie 8big models shipped with two power supplies offer redundancy in case one should fail. When inserting two power supplies into the LaCie 8big, make certain to plug them both into active power supplies. The enclosure will sound the alarm if it senses two power supplies but only one is connected to an active power supply.
Placement
- Open the panels on the cable management arm and thread the cables. Allow slack for external connections and sliding the LaCie 8big on its rails.
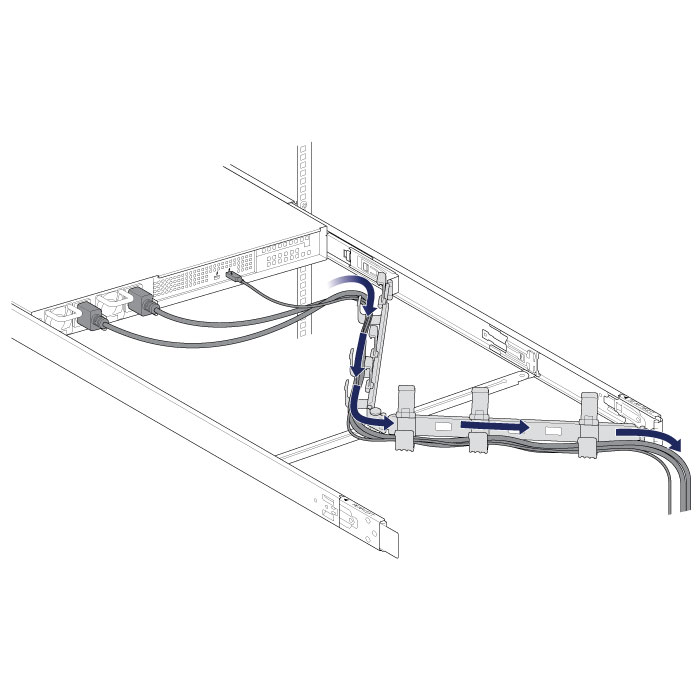
- Close the panels.

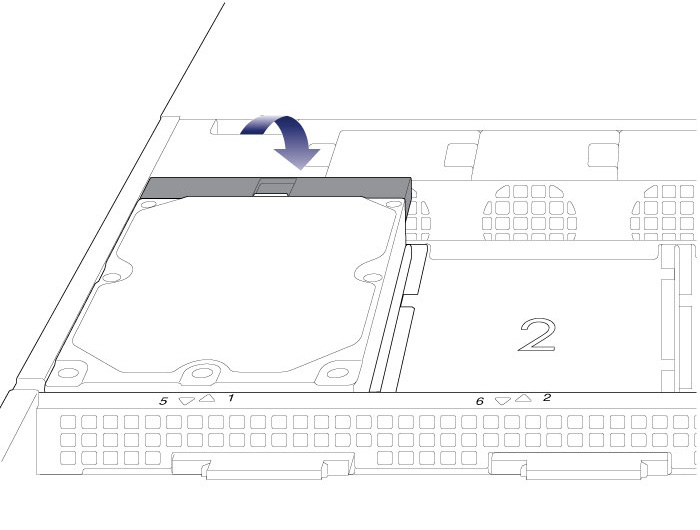
Step 5 - Hard drives
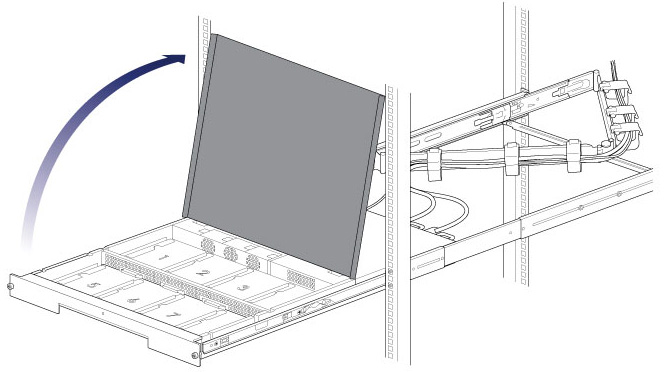
Remove the cover
- Slide the LaCie 8big toward you until it locks into position.
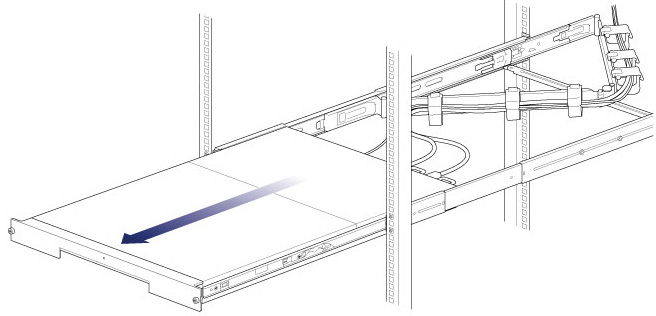
- Release the cover by simultaneously pushing both front latches toward you.
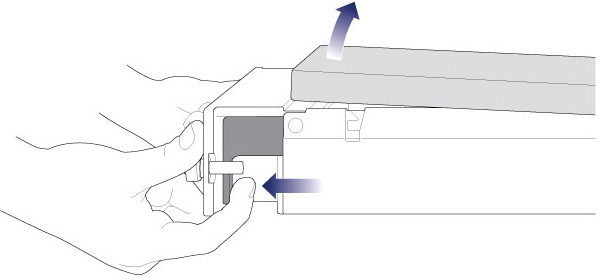
- Lift the cover.


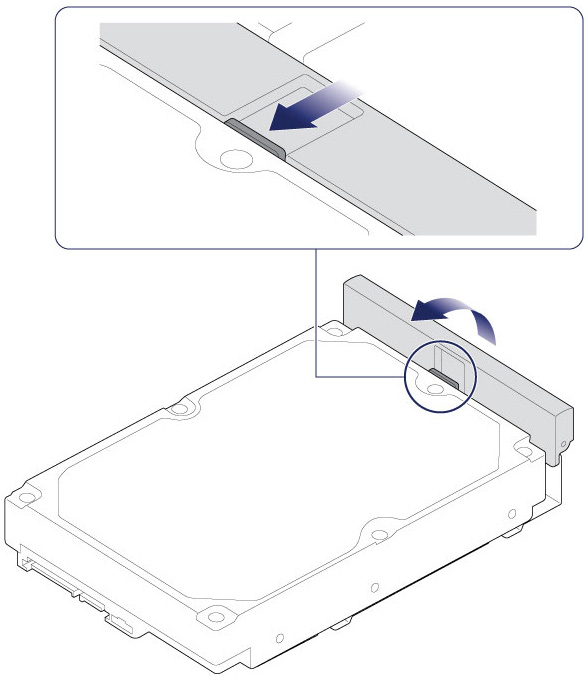
Insert the hard drives
Important info: Make certain that you are properly grounded before touching the hard drives.
- Push the hard drive’s lock button to open the latch.
- Place the hard drive on the LaCie 8big’s hard drive guides. Confirm that the hard drive is correctly aligned on the guides by gently pushing it away from the SATA connection.
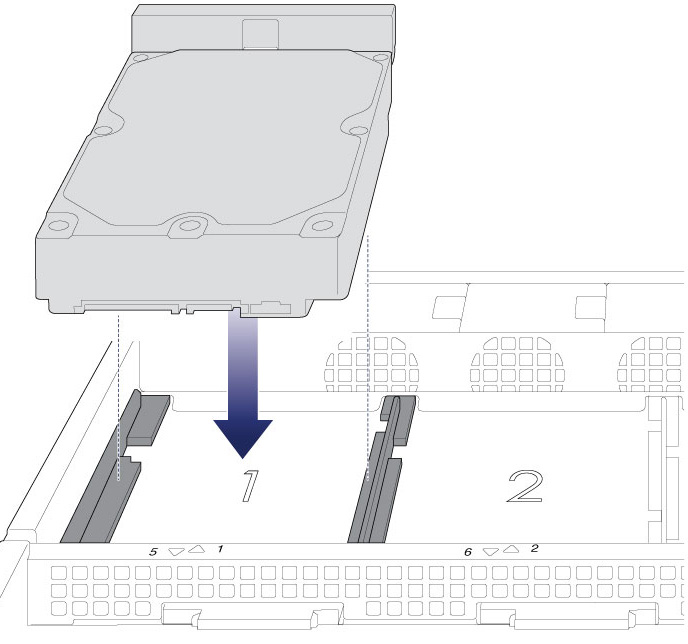
- Slide the hard drive into the SATA connection.

- Close the hard drive’s latch.
- Repeat the steps for each hard drive.
- Close the cover and slide the LaCie 8big into the rack. To unlock the rails, pull the rail fasteners on each side toward you. Secure the LaCie 8big to the rack using the two front screws.


Step 6 - Computer and power connections

- Connect the power cables to active outlets.
- Connect the Thunderbolt cable to your computer.
Step 5 - Start the hard drives

See the LaCie RAID Manager User Manual for instructions on how to manage the hard drives.
© LaCie 2024
Last modified : Nov 17, 2015