User Tools
Site Tools
8big Rack Thunderbolt 2
User Manuals Print page
 Save page as PDF
Table of Contents


Table of Contents
Hardware Maintenance
The LaCie 8big Rack Thunderbolt 2 has a front chassis and rear chassis, each with its own cover. Review the details below for hardware module locations and, where applicable, replacement.
Important info: Refer to the product's Warranty Information before performing any hardware repairs or maintenance that is not described in this manual.
Precautions
- “Hot-swapping” means that you can perform maintenance or upgrade hardware while the LaCie 8big Rack Thunderbolt 2 is powered on. The LaCie 8big features three hot-swappable parts: hard drives; fans; and power supply units.
- During operation, all provided hardware (including the installed hard drives in their frames) should remain in place for optimal air flow. Users with less than eight hard drives are not required to install empty hard drive trays in the enclosure. Airflow and fan performance are regulated by temperature.
- Observe all conventional ESD precautions when handling the LaCie 8big parts.
- Apart from hot-swapping operations, the front top cover should be removed only when the unit has been turned off and allowed to cool down. Potential hazards of opening the cover while the product is powered on includes, but is not limited to, hot surfaces and exposed parts.
- The rear of the LaCie 8big features parts integral to operation. However, none of the parts are hot-swappable or serviceable by users. Removing the rear cover without the express permission of LaCie technical support will void the warranty for the LaCie 8big Rack Thunderbolt 2.
Important info: Your LaCie professional DAS gives you instant updates on the health of the enclosure and its hard drives. In addition to LED status indications, you can configure the system to send you email alerts (see the user manual for LaCie RAID Manager). Further, the enclosure will sound an alarm should a serious error occur (see System Overview). It is highly recommended that you address all warnings and alerts immediately. Ignoring a potential problem or urgent hardware alert can lead to irreparable damage to the DAS and a serious loss of data.
Replacing a power supply unit (PSU)
For optimal power management, the power load for the LaCie 8big can be shared between the two PSU. If one should fail, all power will automatically run from the active PSU, guaranteeing continuous operation. To help extend the lifetime of your hardware, make certain to replace a failed PSU as soon as possible.
Follow the instructions below to replace a PSU:
- Locate the PSU on the rear of the enclosure.
- Unlock the PSU by pushing its latch toward the handle.
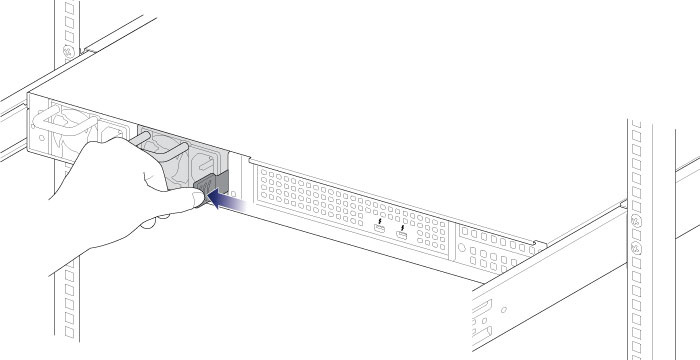
- Remove the PSU by pulling the handle away from the LaCie 8big.

- Insert the replacement PSU into the empty PSU slot.


Note regarding power supplies: Certain LaCie 8big models are shipped with one power supply.
Front chassis
Removing the front cover
Make certain that the LaCie 8big is not being accessing before following the steps below.
- (Skip this step if you are hot-swapping hard drives or fans.) Eject the LaCie 8big volumes from the computer and apply a short push on the power button. Wait for the components to completely cool before moving to Step 2.
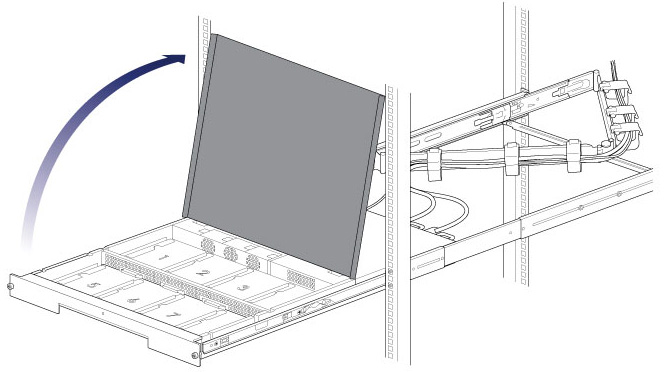
- Slide the enclosure toward you until it locks into position.
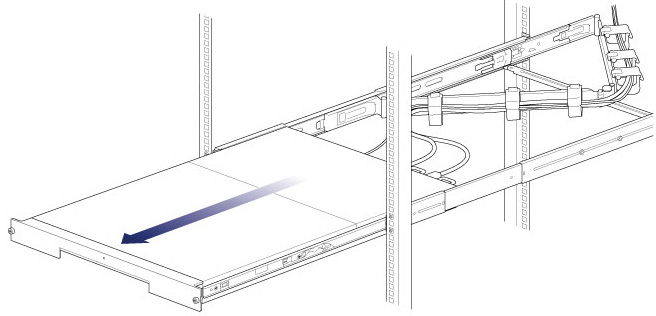
- Release the cover by simultaneously pushing both front latches toward you.
- Lift the cover and remove it from the enclosure.


Front chassis components

- Fans (x3)
- Frame 1, hard drives 1 - 4
- Hard drive LEDs; SATA connections
- Frame 2, hard drives 5 - 8
Replacing a hard drive
If a failed hard drive is under warranty, make certain to contact LaCie Technical Support to receive a replacement hard drive (see Getting Help for contact information). When adding or replacing hard drives, consider using Seagate Desktop HDD that are optimized for use with your LaCie 8big. For further information on compatible hard drives, visit LaCie Technical Support.
Important info:
Replace a faulty hard drive with a hard drive of equal or greater capacity.
For a list of compatible hard drives, visit LaCie 8big Rack Thunderbolt 2 hard drives.
When handling hard drives, make sure that they are placed and stored on a cushioned surface.
Replace a faulty hard drive with a hard drive of equal or greater capacity.
For a list of compatible hard drives, visit LaCie 8big Rack Thunderbolt 2 hard drives.
When handling hard drives, make sure that they are placed and stored on a cushioned surface.
Important info: When following the instructions below, make certain to place the new or replacement hard drive on the hard drive guides before connecting the ends to the SATA connection. Attaching the hard drive to the SATA connection before placing it on the guides will damage the SATA connection.
- Remove the cover as described above.
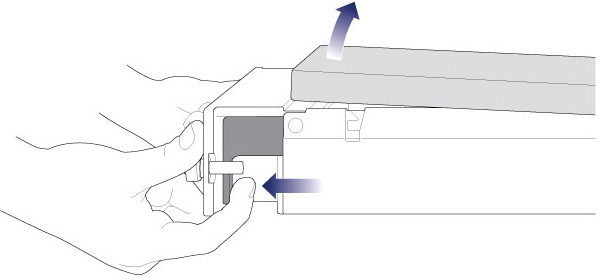
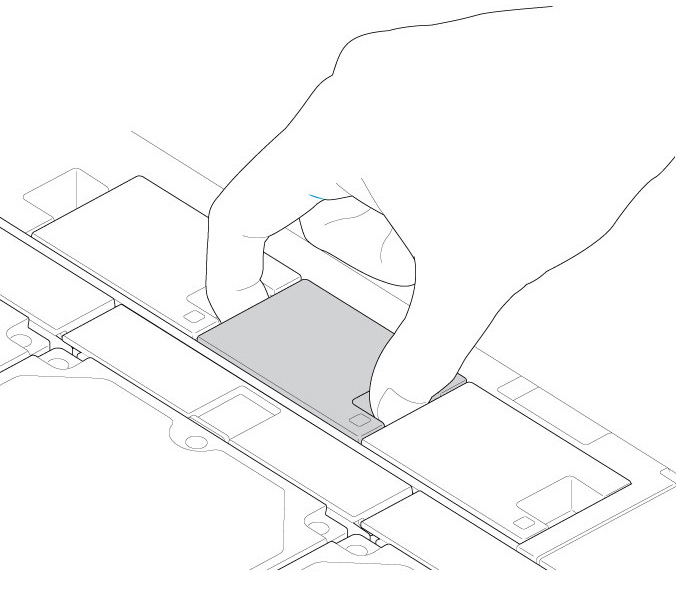
- Locate the hard drive that you want to replace and push its lock button to open the latch.
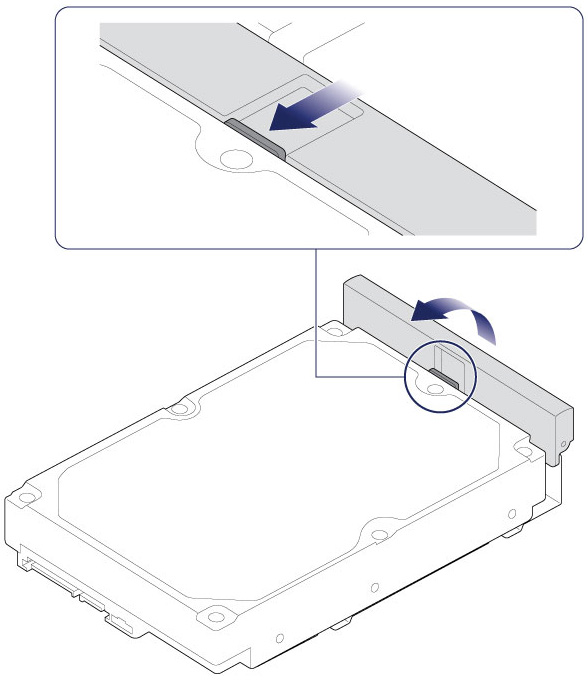
- Slide the hard drive away from its SATA connection and lift it from the slot.
- If applicable, remove the old hard drive from the tray and replace it with the new hard drive. Make certain to use the same four screws when fixing the new hard drive to the tray.
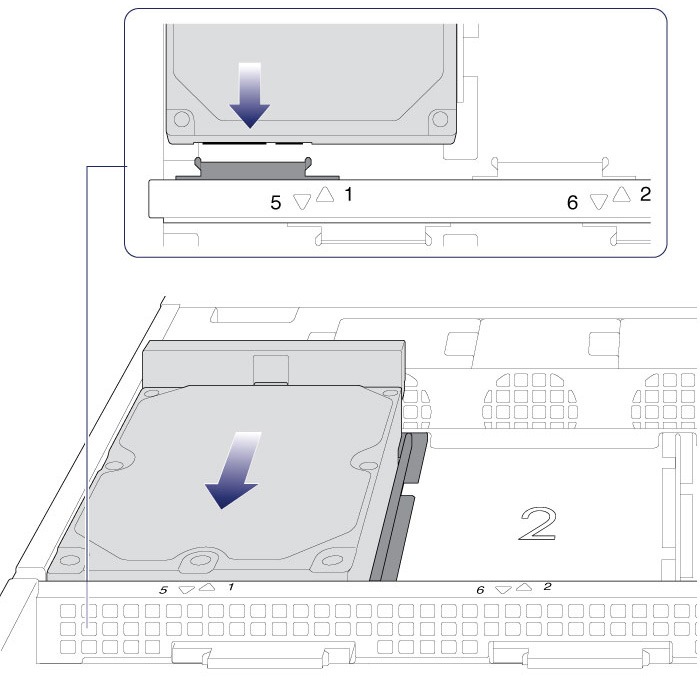
- Place the hard drive on the hard drive guides. Confirm that the hard drive is correctly aligned on the guides by gently pushing it away from the SATA connection.
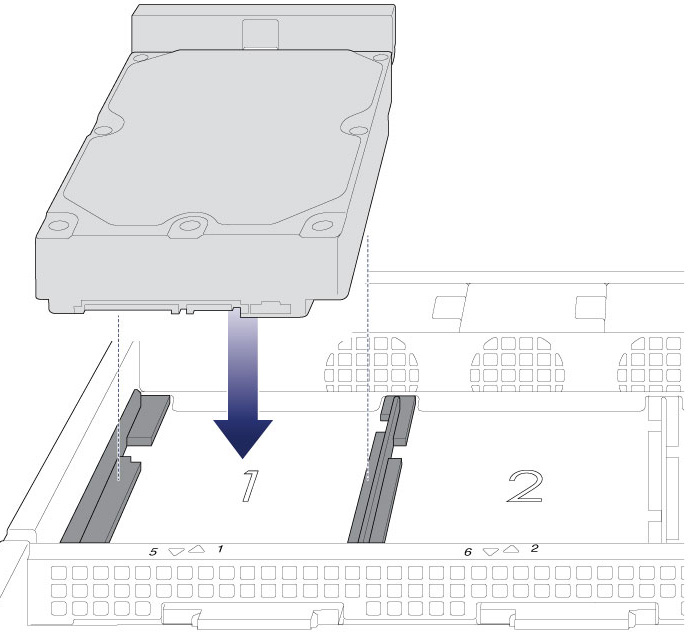
- Slide the hard drive into the SATA connection.
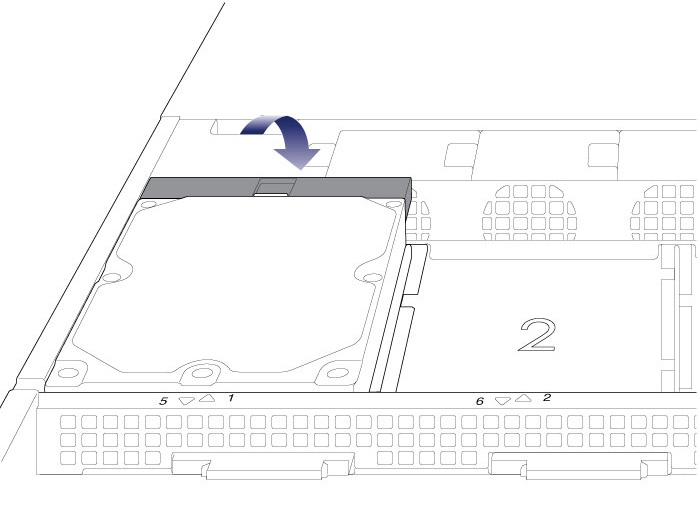
- Close the hard drive’s latch.
- Repeat the steps for each hard drive.
- Replace the cover and slide the enclosure into the rack. To unlock the rails, pull the rail fasteners on each side toward you. Secure the DAS to the rack using the two front screws.


When replacing hard drives that are members of an active RAID configuration, the hard drive LEDs will blink red and blue indicating that the RAID is synchronizing data. You can continue to use the LaCie 8big storage but performance will be reduced until the synchronization is complete.
Replacing a fan
Caution: The fans are hot-swappable and can be replaced when the LaCie 8big is powered on. You must use caution when removing a fan. In most instances, the fan will stop rotating once it is removed from its slot. It is highly recommended that you use extreme caution with the fans since moving parts can cause severe damage to your hands and body.
Important info: The LaCie 8big is temperature controlled via an internal sensor. When removing one of the three fans, the other two will turn faster to maintain the required operational temperature. The faster rotation will be sudden and can become loud. If your fans appear to be louder than normal, confirm that the room's temperature is within operational range (see Safety Guidelines).
- Remove the cover as described above.
- Using your forefinger and thumb, pinch the clips that secure the fan to its slot.
- Lift the fan from its slot. Show caution when removing the fan since moving parts can cause severe damage. The fan should stop rotating once it is removed from its slot.
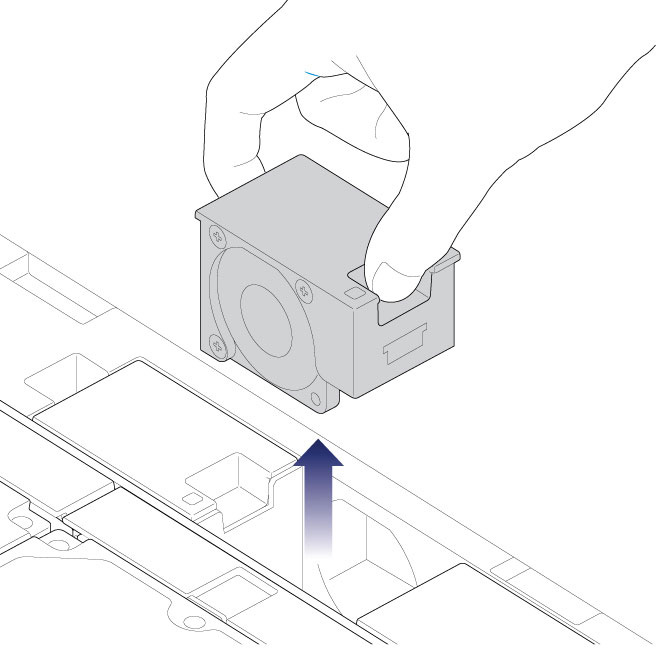
- Insert the replacement fan into the empty slot.


Rear chassis: non-serviecable components
The components in the rear chassis are NOT hot-swappable and are NOT serviceable at any location outside of LaCie-approved service centers. Removing the rear cover without permission from LaCie technical support will void your product’s warranty. Additionally, removing, replacing, or changing any part in the rear chassis or, performing any action that involves the components in the rear chassis, will void the product’s warranty. If you are experiencing hardware errors or failure, contact LaCie technical support for assistance (see Getting Help for contact information).
Rear chassis components
- Thunderbolt 2 controller (20Gb/s)
- RAID controller (RAID on Chip)
- DDR3 SDRAM
© LaCie 2024
Last modified : Dec 17, 2014