User Tools
Site Tools
CloudBox
User Manuals Print page
 Save page as PDF
Table of Contents


Table of Contents
6.d Mount LaCie CloudBox Folders Using the Operating System
Windows
- In an Explorer window address field, type \\[machine name] or \\[IP address] and hit Enter.
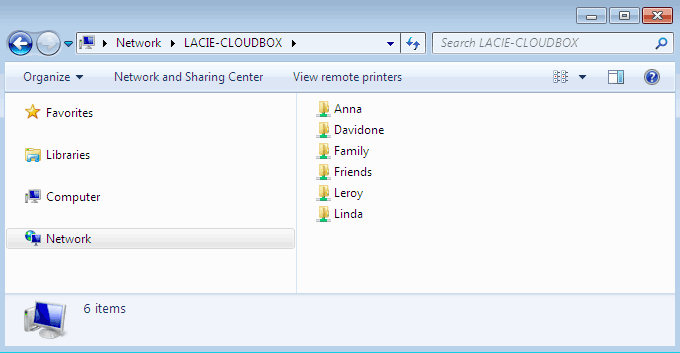
- Click twice on Family or your personal folder. You will be prompted for the Username and Password when clicking twice on your user folder.

Technical note: To find the IP address of your LaCie storage device, open LaCie Network Assistant (see LaCie Network Assistant) and choose the Configuration tab. The address will be listed.
Mac Users
- In your Finder, navigate to Go > Connect to Server.
- In the dialogue window that opens, type one of the following:
afp://[machine name].local
smb://[machine name].local
afp://[IP address]
smb://[IP address] - Click Connect.
- Select Guest to view the Family folder only; or, select Registered User to enter the administrator/user Username and Password to see the Family and personal folders.
Auto-Mount a Folder Using the Operating System
Windows
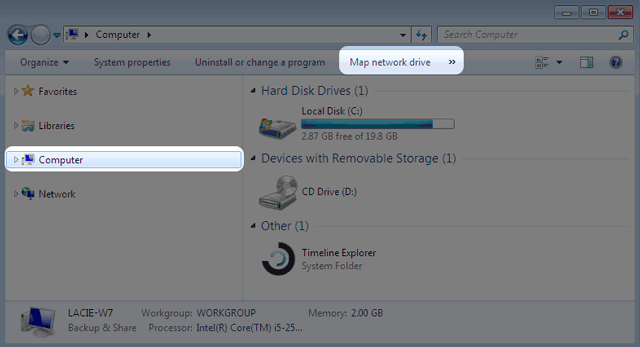
- From an Explorer window in Windows XP, select Tools > Map Network Drive. For Windows Vista and Windows 7, navigate to Computer in an Explorer window to click Map Network Drive.
- Browse to and select the folder you wish to auto mount (Family or personal). You will be prompted for a User name and password.
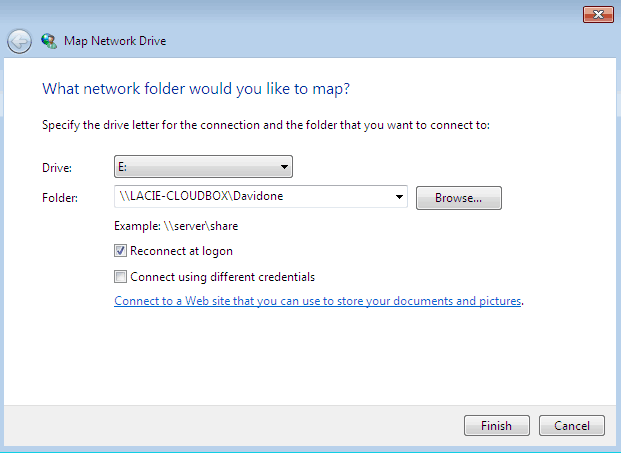
- a. Choose a free letter from the Drive pulldown menu.
- b. Browse the network for the share you wish to mount
- c. Keeping the box next to Reconnect at logon will mount the folder each time you boot your computer. This will allow anyone who uses the PC to access the folder, even if it is a personal folder.
- Repeat the steps for other shares.


Mac Users
Mount
- Open a new Finder window. On the left of the window, navigate to SHARED > LaCie-CloudBox > Family/personal folder. The Family folder will be available to all users on the network.
- For access to a personal folder:
- Select the LaCie CloudBox in SHARED.
- Select Connect As… to enter the Name and Password for a personal folder.
- The folder will mount.
Auto Mount
Your share can be available each time you log onto your Mac:
- Follow the directions above to mount the share you wish to configure. The share must be available to the operating system in order to begin the setup for auto mounting.
- From the Apple icon in the menu bar, select System Preferences…
- Select System > Accounts.
- Select the tab Login Items.
- Click the + symbol.
- Navigate to the folder and click ADD.
- The folder(s) will be available each time you log onto the Mac. If you do not want the window for the folder to open each time you log into your Mac, select the checkbox for Hide next to the share.
Technical note: If you wish to have the shares mount on the desktop, go to Finder > Preferences. Select the General tab and check the box next to Connected servers.
© LaCie 2024
Last modified : Jul 22, 2014