User Tools
Site Tools
CloudBox
User Manuals Print page
 Save page as PDF
Table of Contents


Table of Contents
6.a Access your LaCie CloudBox Dashboard Anywhere using LaCie MyNAS
LaCie MyNAS lets you access the Dashboard anywhere with a connection to the internet. Once you have configured your LaCie CloudBox MyNAS address on the Dashboard Network page, you can log onto the Dashboard from remote locations.
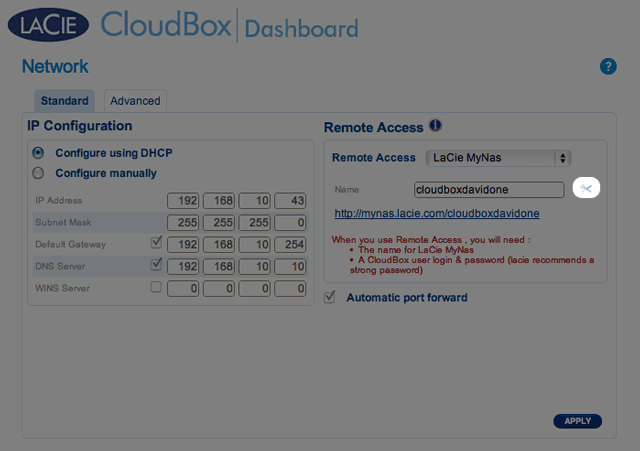
Configure your LaCie CloudBox MyNAS Address
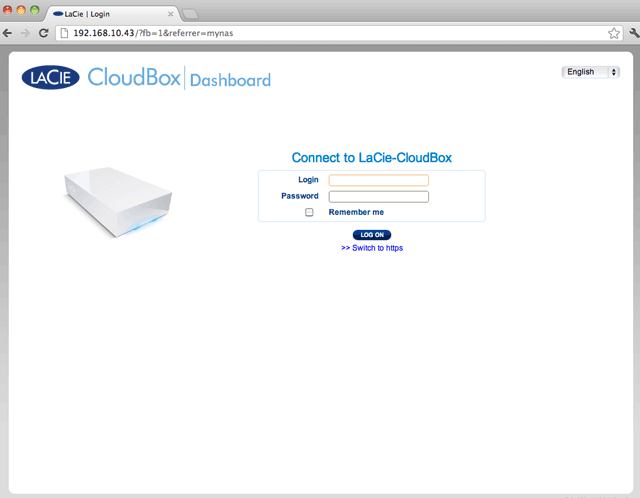
- Log on to the LaCie CloudBox Dashboard as the administrator (Log On to the CloudBox Dashboard).
- Go to the Dashboard Network page.
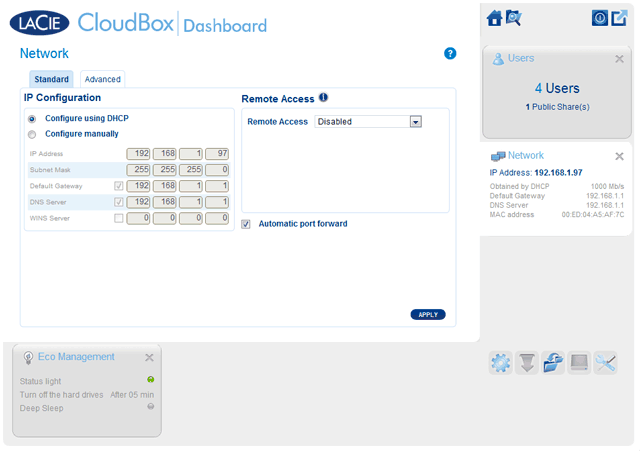
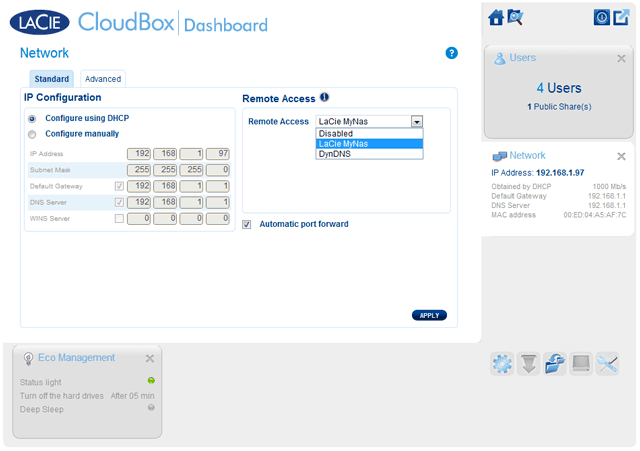
- Click on the Remote Access pulldown menu to select MyNAS by LaCie.
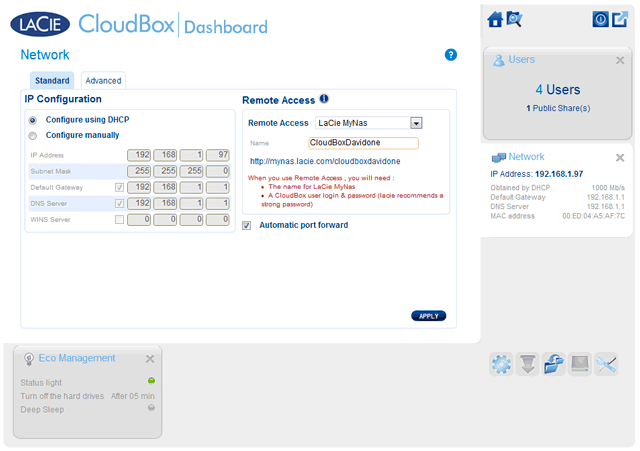
- Enter a name that you would like to use for your LaCie CloudBox MyNAS remote address. The name you enter here will follow mynas.lacie.com in your internet address bar. For example, mynas.lacie.com/cloudboxdavidone.
 }
}
- Click APPLY.
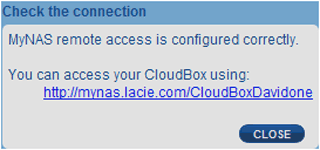
- MyNAS will confirm the address for your LaCie CloudBox. Please note the address to access your CloudBox in the office, on the road, or anywhere with a connection to the internet.
 }
}


Failed Connection
If you receive an error that your LaCie CloudBox is unable to connect to the internet, you may need to:
- Configure port forwarding on your router.
- Confirm that you are not using a proxy server to connect to the internet since it can interfere with LaCie MyNAS. Please note that most home users do not require a proxy server.
If the issue is related to your home network, use the router's administration page to forward a port for LaCie MyNAS. By default, LaCie MyNAS uses port 8080 to access the internet but you can choose a port that suits your network. Refer to your router's documentation for details.
Once you have opened the port on your router, follow the directions below:
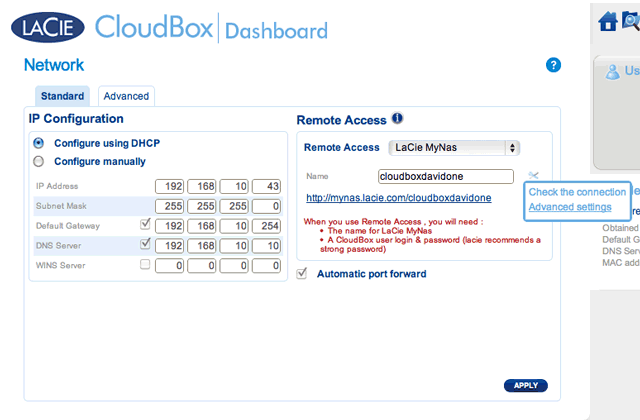
- Navigate to the Dashboard > Network page.
- Next to the Name field, click on the configuration icon, then select Advanced settings. (If you do not see the configuration icon next to the Name field, first type a name and then click Apply, and the icon will appear.)
- In the dialogue window that appears, click Manual and type the port number that your router will forward.
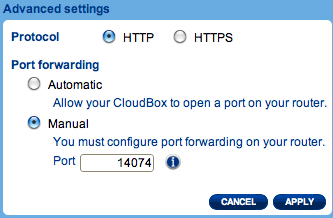
- Click Apply.


Access LaCie MyNAS at a Remote Location
- Launch an internet browser on a computer that is connected to a network separate from your CloudBox. For example, your friend's PC.
- Enter your MyNAS name in the available field then click on the arrow.
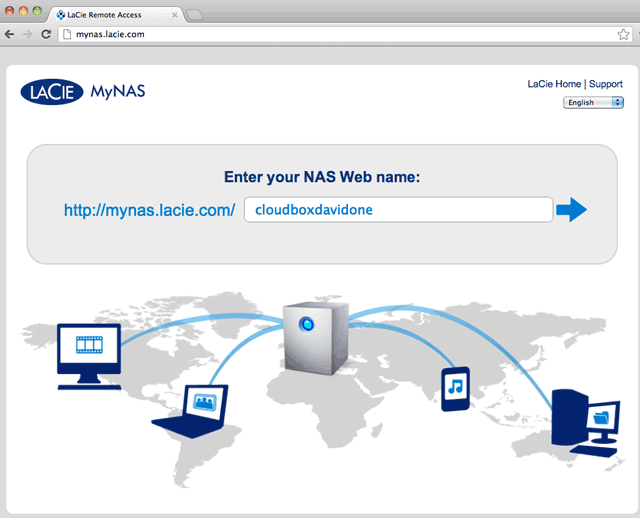
- Enter your login name and password for the Dashboard.


A more direct alternative to logging into LaCie MyNAS is to include your CloudBox nickname in the address bar: mynas.lacie.com/nickname. The nickname is the name that you assigned to your LaCie CloudBox when configuring MyNAS in the Dashboard. In this example: mynas.lacie.com/cloudboxdavidone.

Note on MyNAS and Users: Any CloudBox user can view and download their files from remote locations using LaCie MyNAS. Each user will have access to his personal folder and the Family folder. A user may also change his password using the Dashboard.
Share Large Files Without Revealing Your Administrator Password
As described in the Tutorial Share Large Files, LaCie MyNAS makes it easy to share photos and videos with family and friends outside the home. To avoid sending your administrator login and password, you can create a unique user and password in the Dashboard. When sending the LaCie MyNAS credentials, your family and friends will receive the login and password of the unique user with rights similar to other members of household. Therefore, access to your Dashboard settings will be limited and you can select the files you wish to share with those outside of the home.
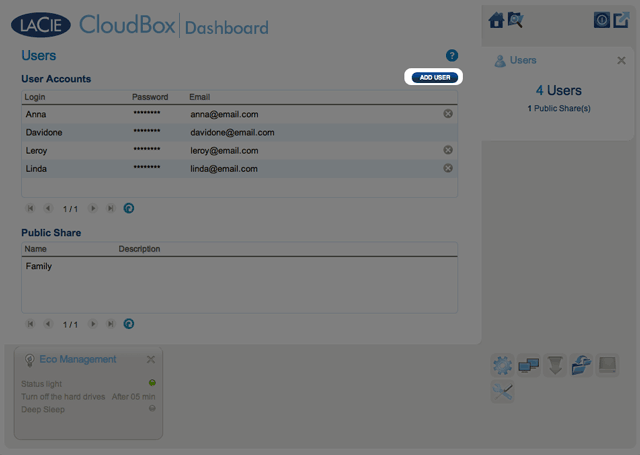
Step 1: Create a special user in the LaCie CloudBox Dashboard
- Log on to the LaCie CloudBox Dashboard as the administrator (Log On To the CloudBox Dashboard).
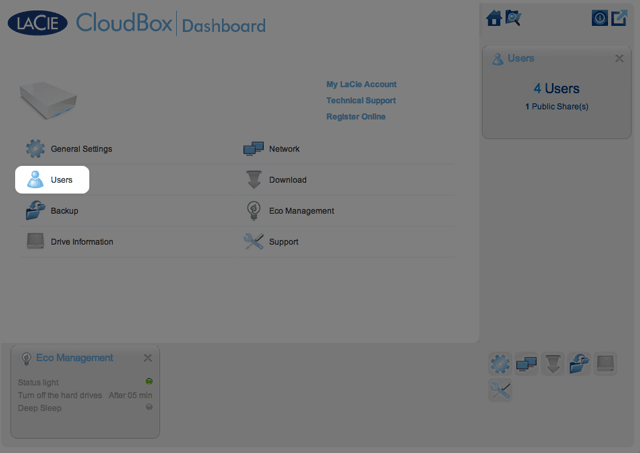
- Click on Users.
- Click ADD USER.
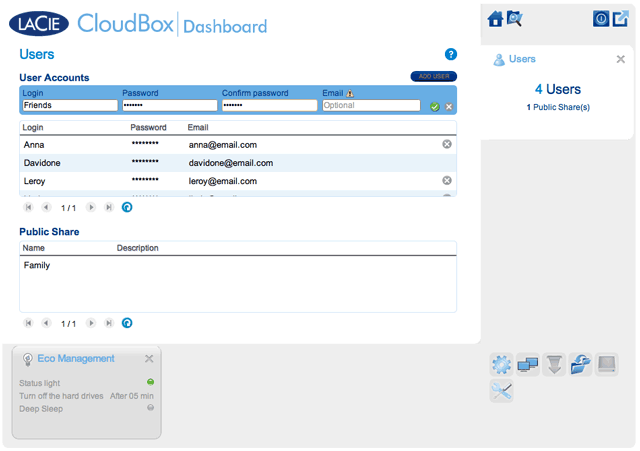
- Add the user name and password that you want to forward to your friends and family to share photos, videos, etc. In this example the name and password are the same, Friends. Please note that passwords are case-sensitive. Click the green check mark to add the user.


Step 2: Copy photos and videos that you wish to share
- From any computer in your home, open the LaCie CloudBox folder that you will share with friends and family (In this example, Friends). You will be prompted for the user name and password to open the folder.
- Copy the photos, videos, and other files that you wish to share.
Step 3: Send your friends and family the link and login information to LaCie MyNAS
- Configure LaCie MyNAS as explained earlier in this section.
- Send your family and friends your LaCie MyNAS link. For example, mynas.lacie.com/davidonecloudbox. davidonecloudbox is the MyNAS nickname given to the LaCie CloudBox in the earlier example. Your link should include the nickname that you used. You must also provide the login and password to the folder they will access. In this example, Friends is both the login and and the password.
- Using the LaCie MyNAS link, your family and friends can log on to the Dashboard File Browser for immediate access to all its contents.
LaCie MyNAS and the LaCie CloudBox Public IP Address
Configuring LaCie MyNAS for your LaCie CloudBox can help you discover its public IP address. Once your LaCie CloudBox has been setup for MyNAS remote access, see the steps below to find your public IP address:
- On a separate network, access your LaCie CloudBox Dashboard using LaCie MyNAS.
- Once you have successfully logged onto your Dashboard, look at the web address (URL) field. The IP address listed in the URL is your LaCie CloudBox's public IP address.
DynDNS
You may also choose DynDNS for remote access. For more information on creating an account with DynDNS, please see their website.
© LaCie 2024
Last modified : Jul 22, 2014