User Tools
Site Tools
5big Thunderbolt 2
User Manuals Print page
 Save page as PDF
Table of Contents


Table of Contents
Hard Drive Maintenance
Important info: Refer to the product's Warranty Information before performing any hardware repairs or maintenance that is not described in this manual.
Precautions
- “Hot-swapping” means that you can perform maintenance or upgrade hardware while the DAS is powered on. The LaCie 5big Thunderbolt 2 features hot-swappable hard drives.
- During operation, the hard drives should remain in their slots for optimal air flow. Airflow and fan performance are regulated by temperature.
- Observe all conventional ESD precautions when handling hard drives.
Replacing a hard drive
You can replace a hard drive if:
- You want to expand the available storage space by adding a hard drive with a larger capacity.
- The hard drive has failed.
If a failed hard drive is under warranty, make certain to contact LaCie support to receive a replacement disk (see Getting Help for contact information). When adding or replacing hard drives, consider using Seagate Desktop HDD that are optimized for use with your LaCie 5big Thunderbolt 2. For further information on compatible hard drives, visit LaCie support.
Important info:
Replace a faulty hard drive with a hard drive of equal or greater capacity.
For a list of compatible hard drives, visit LaCie 5big Thunderbolt 2 hard drives.
When handling hard drives, make sure that they are placed and stored on a cushioned surface.
Replace a faulty hard drive with a hard drive of equal or greater capacity.
For a list of compatible hard drives, visit LaCie 5big Thunderbolt 2 hard drives.
When handling hard drives, make sure that they are placed and stored on a cushioned surface.
Since the LaCie 5big supports hot swapping hard drives, replacing a single disk usually does not require that you power down the device before following the steps below.
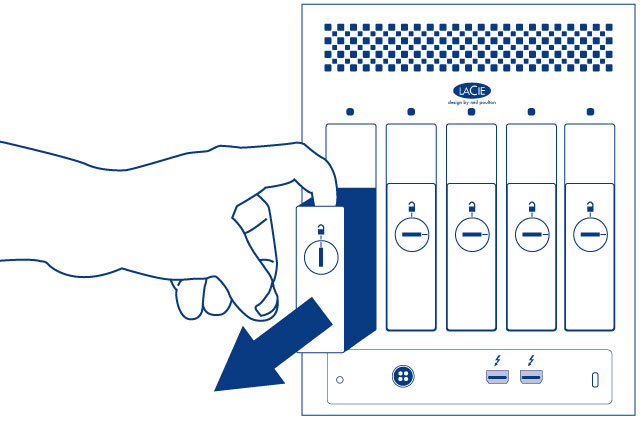
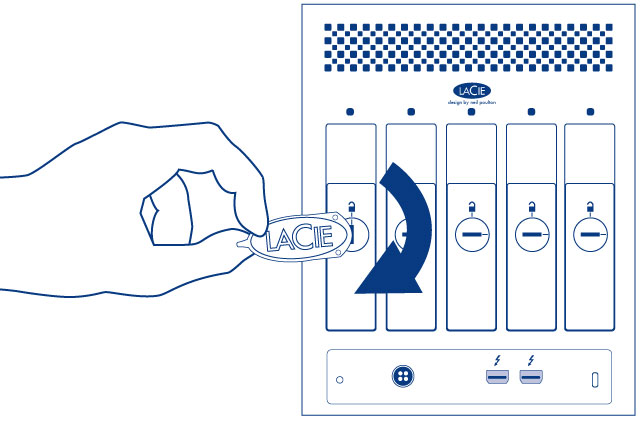
- Remove the disk tray for the hard drive that you will replace. To unlock the disk tray, use the included disk drawer key to rotate the lock.

- Remove the disk tray by inserting your finger into the space behind the disk tray handle and pulling. Repeat the process if you are replacing multiple disks.
- If you are replacing a failed hard drive with a full disk tray, skip to Step 5. Continue here if you replacing the hard drive using the same disk tray:
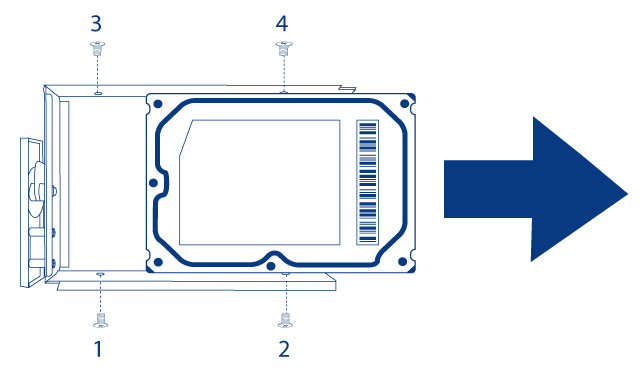
- Using a Phillips head screwdriver, carefully unfasten all four screws from the four tray slots and slide the disk out of the tray. Repeat the process if you are installing multiple disks.
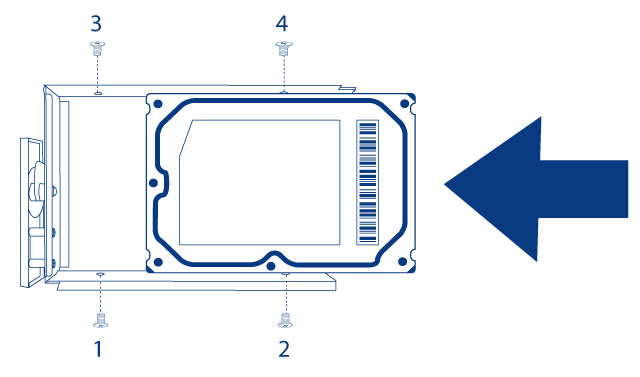
- Install the new hard drive into the disk tray:
- Place the empty disk tray onto the flat work area with the handle on the bottom left.
- Many disks have a label on one side and the printed circuit board on the opposite side. With its label side facing up, gently place the hard disk within the disk tray. Keep the side with the printed circuit board on the work space and the SATA connector facing to the right. The four tray screw slots should align with the disk’s four screw holes.
- Using a Phillips head screwdriver, carefully fasten all four screws into the four tray slots. Do not over tighten the screws. Repeat the process if you are installing multiple disks.
- Carefully insert the full disk tray into the empty disk slot. Gently push the disk tray handle firmly until you feel it snap into place. The disk tray handle should be flush with the back of the enclosure. Repeat if you are adding multiple disks.
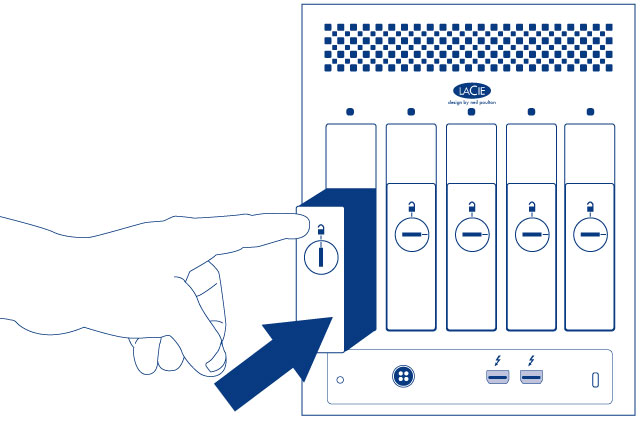
- Use the disk lock tool to lock the disk(s) in place.
- See the LaCie RAID Manager User Manual for instructions on how to manage the LaCie 5big storage.


When replacing disks that are members of an active RAID configuration, the disk LEDs will blink red and blue indicating that the RAID is synchronizing data. You can continue to use the LaCie 5big storage but performance will be reduced until the synchronization is complete.
LaCie 5big enclosure: non-serviceable components
The components inside the chassis are NOT hot-swappable and are NOT serviceable at any location outside of LaCie-approved service centers. Removing the cover will void your product’s warranty. Additionally, removing, replacing, or changing any part in the enclosure or, performing any action that involves the components in the enclosure, will void the product’s warranty. If you are experiencing hardware errors or failure, contact LaCie support for assistance (see Getting Help for contact information).
© LaCie 2024
Last modified : Dec 17, 2014