User Tools
Site Tools
Table of Contents
Table of Contents
7.d Update the LaCie CloudBox Firmware
LaCie may update and improve your CloudBox firmware, adding new features over time. This chapter explains how to update your LaCie CloudBox firmware (LaCie NAS OS) via the Dashboard or LaCie Network Assistant.
Update Using the Dashboard
- Launch the Dashboard as described in Log On to the Dashboard and navigate to the Support page.
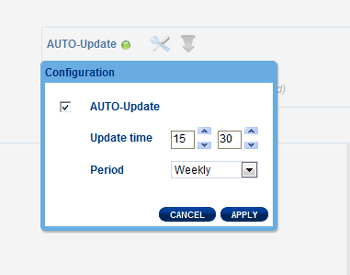
- By default, the LaCie CloudBox will automatically check for updates once a week. You can change the frequency and time of day:
- Click on the configuration icon (intertwined screwdriver and wrench) next to AUTO-Update.
- The Dashboard will prompt you if a new update is available.
- To check for an update manually:
- Click the grey, downward arrow.
- If a link appears, click it to begin the download.
- Follow the onscreen instructions to complete the update.
- During an update, the device will reboot and disappear from the network temporarily. When it reappears, you can verify the new software version on the Dashboard Support page.
Update Using LaCie Network Assistant
Important info: Before proceeding:
- Connect your PC or Mac to the network using an Ethernet cable (turn off all wireless connections).
- Make sure users have stopped data transfers to the LaCie CloudBox.
- Turn off other storage devices on the network except for the LaCie CloudBox.
- Disconnect all computers from the LaCie CloudBox folders.
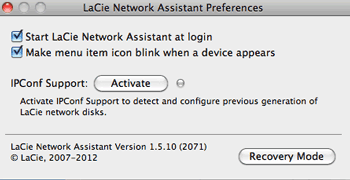
- Click here to confirm that you are using the latest version of LaCie Network Assistant. If you download a newer version, make sure to uninstall previous versions before installing the update.
- Download the latest software update for your product from here. Keep it in a known location on your computer as you will be prompted to browse for it in step 9.
- Launch LaCie Network Assistant.
- Click the Configuration tab.
- If you have more than one LaCie network storage device on your network, select the LaCie CloudBox from the list on the left.
- Click on the Update your NAS… button.
- Enter your administrator username and password.
- Browse to and load the update package (.capsule file) that you downloaded from the LaCie website.
- Click on Continue… to begin the update. Mac users may be prompted to enter the computer's administrator username and password.
- Once the update is complete, verify the update on the Dashboard Support page or LaCie Network Assistant:
- Go to LaCie Network Assistant and choose Open LaCie Network Assistant….
- Select the Configuration tab.
- The system version will be listed.
© LaCie 2024
Last modified : Jul 22, 2014

 Print page
 Save page as PDF


