User Tools
Site Tools
CloudBox
User Manuals Print page
 Save page as PDF
Table of Contents


Table of Contents
The CloudBox Setup Wizard - First Install
To properly configure your CloudBox, please run the Setup Wizard to completion. Though the CloudBox may be listed on your network, the storage will not be accessible until the Setup Wizard has been completed. The Setup Wizard can be started via LaCie Network Assistant or directly in your web browser.
Launch the Setup Wizard via LaCie Network Assistant (recommended)
- Open LaCie Network Assistant.
- Windows Users: Select LaCie Network Assistant in Start > All Programs. The LaCie Network Assistant icon will appear in the system tray.
- Mac Users: Select LaCie Network Assistant in your Applications folder. The LaCie Network Assistant icon will appear in the menu bar.
- Click on the icon in the system tray (Windows) or menu bar (Mac) and select CloudBox > Web Access…
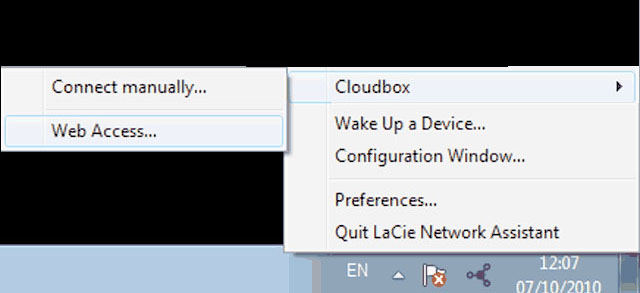

LaCie Network Assistant - Windows
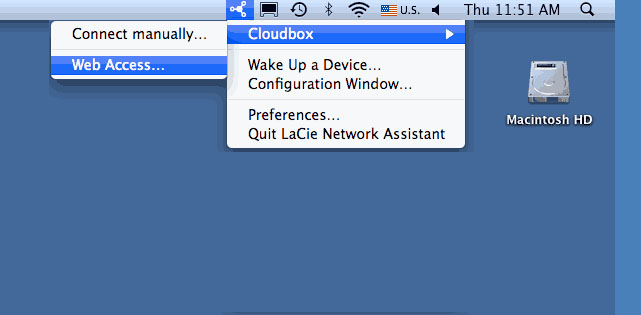
LaCie Network Assistant - Mac


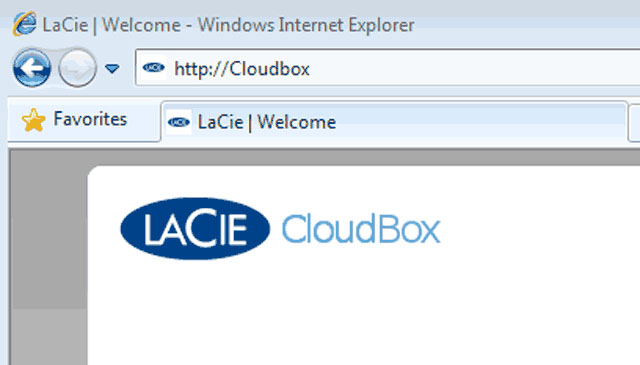
Launch the Setup Wizard directly in a web browser
- Open your Internet browser (Firefox, Internet Explorer, or Safari)
- Type the default device name in the browser’s address bar. Depending upon your operating system and browser, you can use http://CloudBox or http://CloudBox.local.

Completing the CloudBox Setup Wizard
The Setup Wizard will guide you through the installation, from creating an account to configuring the CloudBox settings.
Please locate the leaflet with your 1-Year Online Backup contract number before continuing with the Setup Wizard. You will be asked for the contract number during the setup.
Administrator and Users - A Quick Note Before Starting
The Username you enter during the Setup Wizard will become the default administrator of the CloudBox. Please note your Username and Password on paper for future reference since the information cannot be recovered.
An administrator may add up to nine more users to the CloudBox to store and backup data. Further, the administrator can revise or remove users. While user names may be edited at any time, the administrator Username remains the same once it is created during the Setup Wizard.
Important note: If you are unsure of your IP settings, please contact the person or company responsible for managing the network. For example, home users should contact their Internet Service Provider (ISP).
Important note: The Username and Password entered during the Setup act as the default login for the CloudBox administrator. For security reasons, they cannot be recovered. Therefore, LaCie highly recommends that you mark your Username and Password on paper. Keep the information in a safe, convenient location so that you can easily recall your Username and Password.
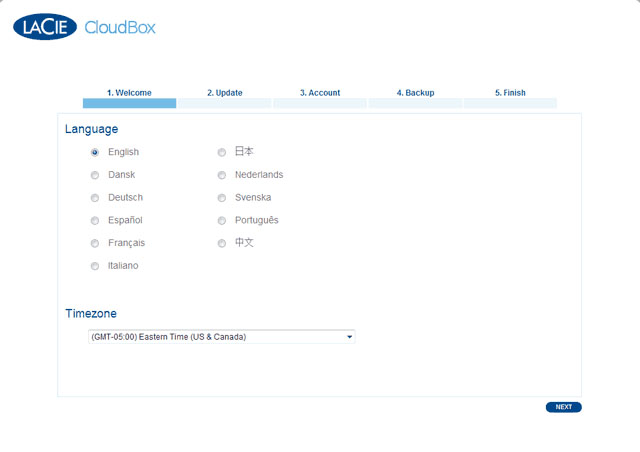
- Welcome:
- Select your language and time zone.
- Network: Please make certain that your switch or router supports DHCP. You may adjust the IP settings on your CloudBox once the Setup Wizard is complete.
- Standard DHCP Network: The Setup Wizard will begin to configure the CloudBox on your network. Click NEXT.
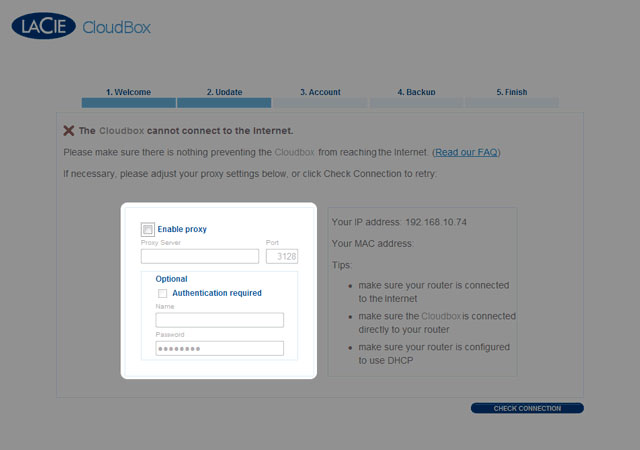
- Proxy Server: If the CloudBox cannot connect to the Internet, the Setup will ask for a proxy server. Enter the proxy server IP address and the password (if necessary). Click NEXT.
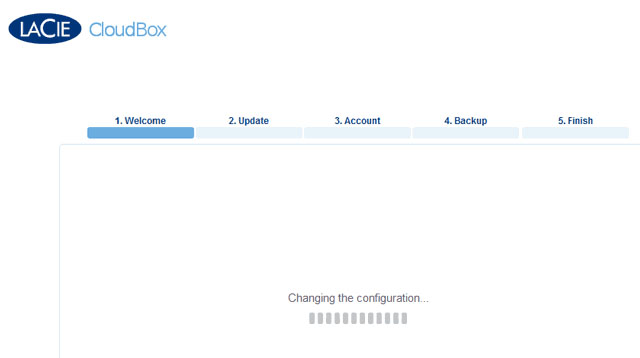
Before moving to the next step, the Setup Wizard will search for a more recent version of software.
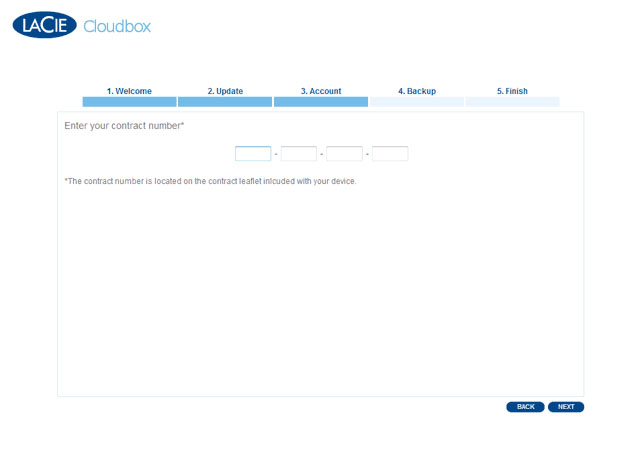
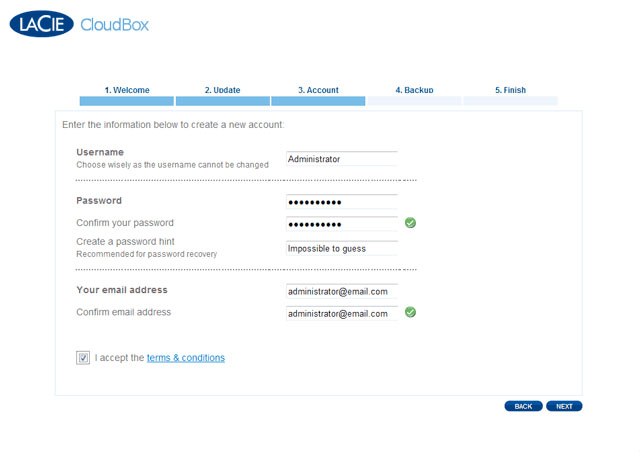
- Account:
- Locate the leaflet with your CloudBox 1-Year Online Backup Contract number.
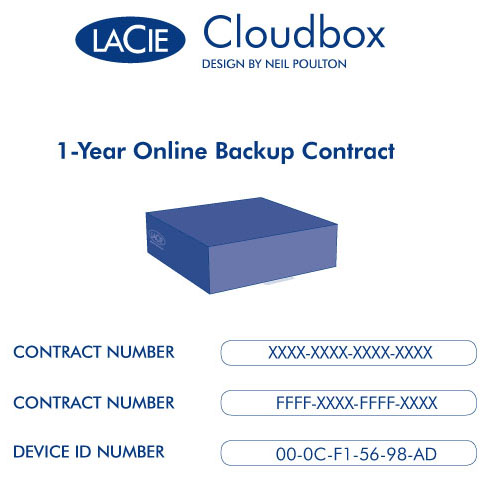
- In the Setup Wizard, enter the contract number provided on the leaflet. The contract number is case-sensitive. Click NEXT.
- Enter a Username and Password. The Username can run from 1 to 20 characters. It is case-sensitive and does not support symbols.
- As the first user, the name entered during this step becomes the sole administrator of the CloudBox.
- This is the only user name that cannot be changed once the CloudBox setup is complete.
- It is very important to make note of the administrator Username and Password. To protect Online Backup accounts from unauthorized access, administrator Usernames and Passwords cannot be recovered. Of course, non-administrator Usernames and Passwords may be recovered by the CloudBox administrator.
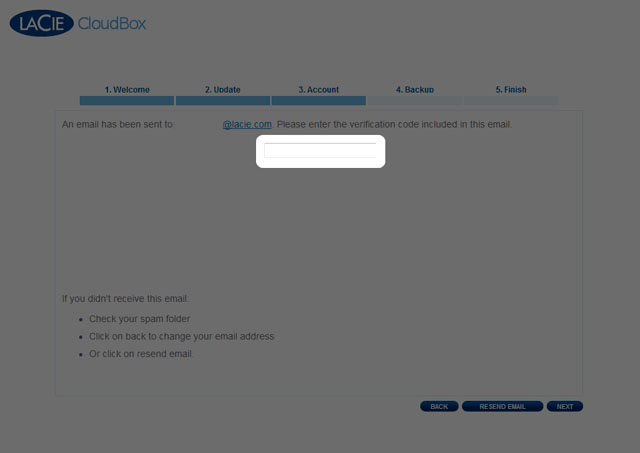
- Enter an email address to receive your CloudBox Online Backup verification code. The verification code will allow you to continue with the Setup Wizard. Click NEXT.
- Check your email for the verification code.
- Enter the verification code into the Setup Wizard. Please remember that the code is case-sensitive. Click NEXT.
- Finish: Your CloudBox account has been configured and you are now ready for online backup. Any files you copy onto the CloudBox will be automatically backed up to your online storage. Click FINISH to launch the Dashboard administration tool.
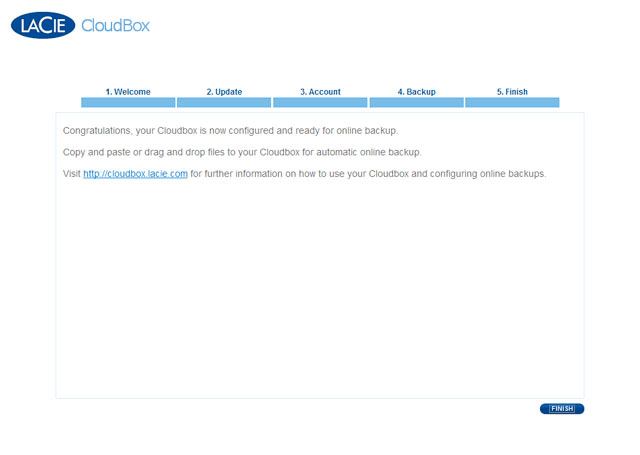
You will receive an email confirming your CloudBox Online Backup account.
Proceed to Administering Your LaCie CloudBox for further information on using and managing your LaCie CloudBox. You can also visit http://cloudbox.lacie.com for product details and updates.


© LaCie 2024
Last modified : Mar 01, 2013