User Tools
Site Tools
Table of Contents
Formatting
The two drives within the 2big Thunderbolt Series and the Little Big Disk Thunderbolt Series are pre-formatted as HFS+ Journaled for your Macintosh computer. Further, the disks have been preconfigured as a Striped RAID Set (RAID 0) for optimal performance.
RAID:
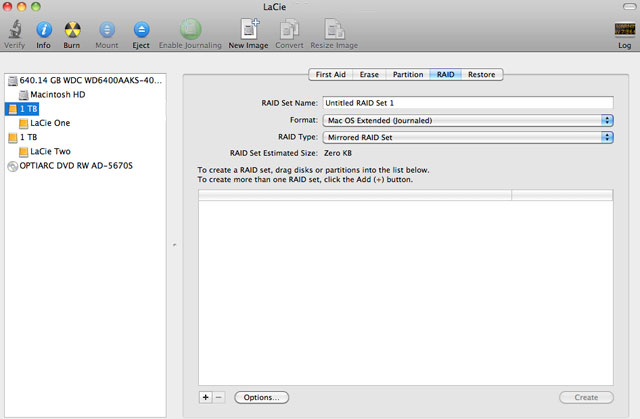
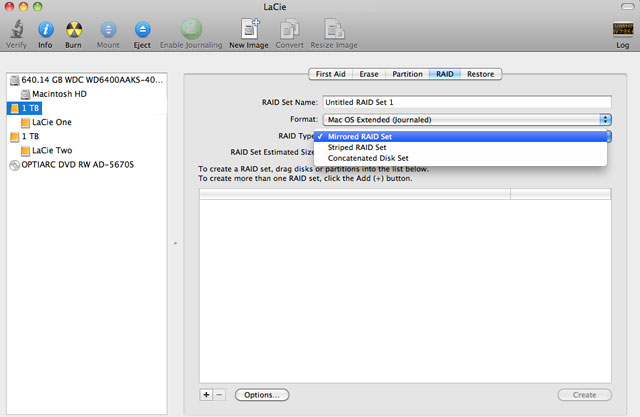
You have the option to adjust the RAID configuration as a Mirrored RAID Set for data protection using the Mac OS X Disk Utility. Please note that a Mirrored RAID Set copies the same files to each disk, affecting the transfer rate speed and reducing the available disk capacity by half.
Striped RAID Set (RAID 0)
A Striped RAID Set pairs the two drives within the enclosure for enhanced transfer rates. Data is stored across both disks in a striped pair, allowing them to share the demands of reading and writing files. Unlike a Mirrored Striped Set (RAID 1), the available capacities of each disk are added together for maximum storage availability.
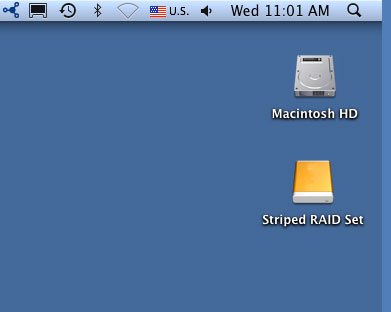
With its improved read/write seek rates and maximum storage capacity, a Striped RAID Set is a great complement to the extraordinary performance already offered by the Thunderbolt technology. Data is easy to access since a stripe creates one logical volume that mounts on the desktop.
One disadvantage of a Striped RAID Set is the lack of built-in data security. In the event that one disk fails, all the files become inaccessible since parts of each string of data are written across the striped pair. Therefore, LaCie highly recommends backing up data stored on a Striped RAID Set at least once a day. You can back up the data to your computer’s internal disk or another hard drive with sufficient capacity.
Mirrored RAID Set (RAID 1)
In a Mirrored RAID Set, the two physical disks are mirrored together so that one single logical volume mounts on the desktop. Please note that the combined storage will not exceed the available capacity of the lowest-capacity single disk. All data is saved simultaneously on each disk which means that files will not be lost if one drive should fail.
Configuring a RAID Set
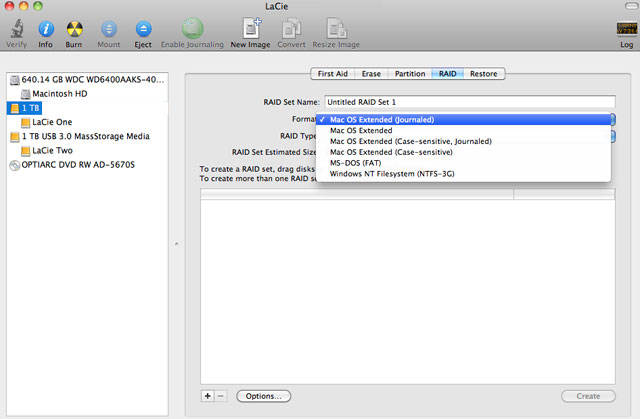
Follow the directions below when reformatting the Thunderbolt Series hard drives.
- Connect the LaCie Thunderbolt Series enclosure to your compatible Macintosh computer.
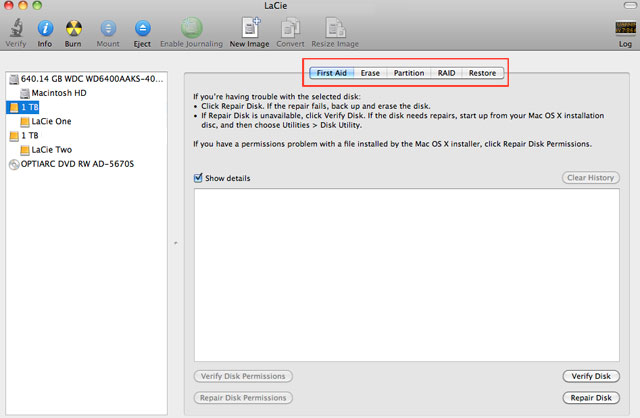
- The drives will appear on the desktop as a single icon if they are still configured as a Striped RAID Set or individual icons if they have been reformatted.
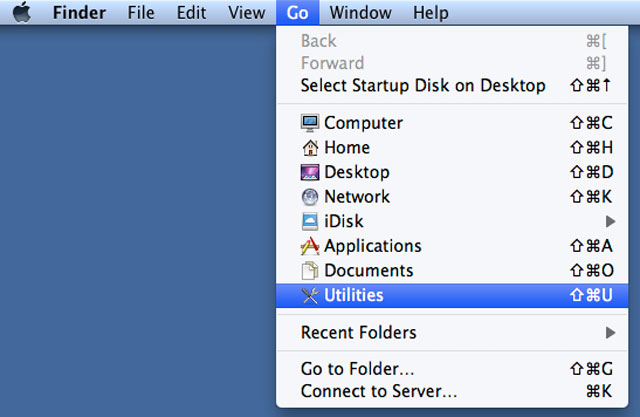
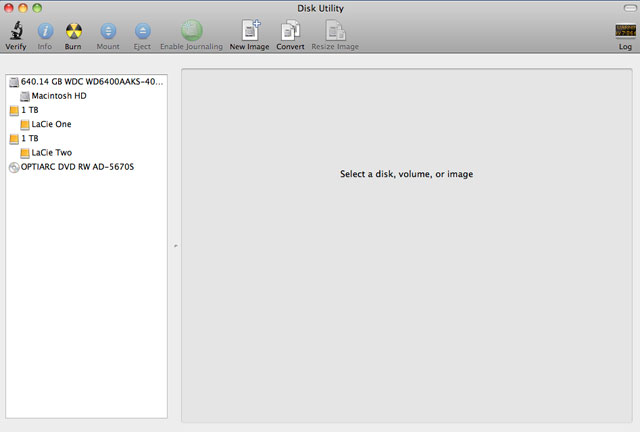
- The Utilities window will open. Click twice on the application Disk Utility.app.
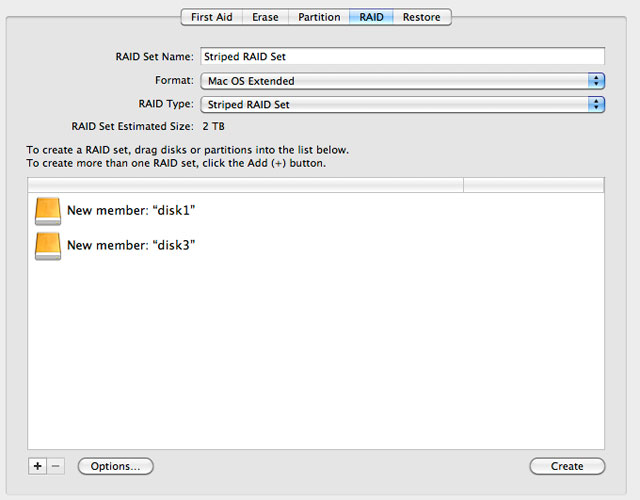
- To change the RAID Block Size, click the Options… button on bottom of the window. While this example shows the default, you may want to choose a higher RAID Block Size if you will be working with larger files (i.e. high-end video and audio). Please see your software's user manual for the recommended RAID Block Size. Once you have chosen a RAID Block Size, click OK.
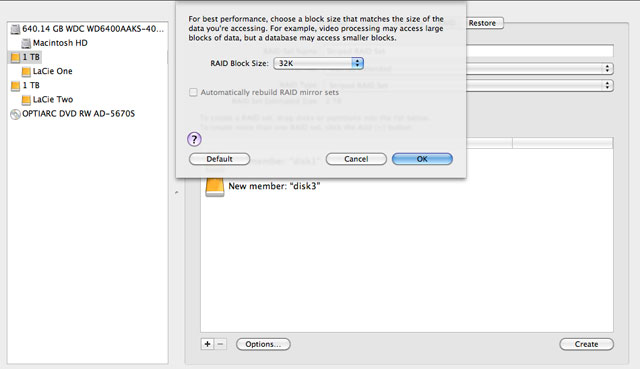
- Click Create on the bottom of the window to begin building the RAID.
- Click Create in the pop-up window.

 Print page
 Save page as PDF


