Table of Contents
General Settings
General tab
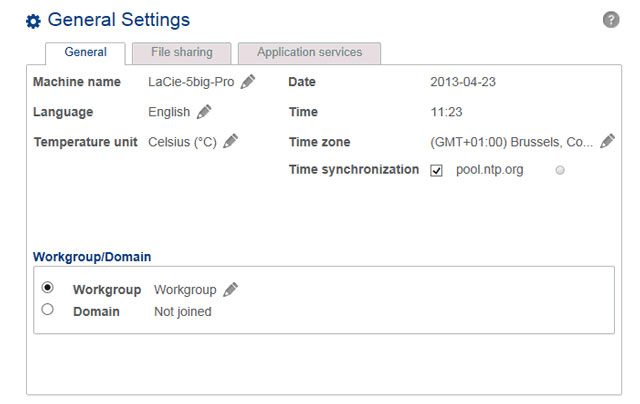
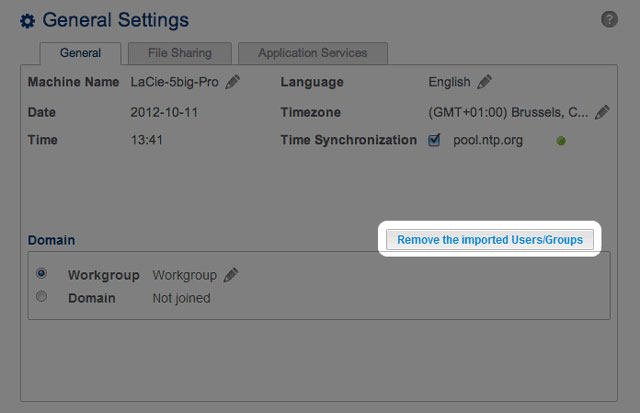
- Machine Name: The machine name identifies your LaCie NAS on your network. You can change it from the default by choosing the pencil icon and typing a new one. If a duplicate name exists on the network, alternate names are automatically created to avoid conflicts. For example, a second LaCie 5big NAS Pro on your network will automatically be called LaCie-5big-P-1. The machine name is limited to 15 characters and case-sensitive. You must also use alphanumeric characters without spaces or symbols.
- Date: The date and time are set automatically if you assign an NTP server (see below). If not, select the pencil icon and choose a day from the calendar.
- Language: Choose the pencil icon to change the Dashboard language.
- Time: If the time is not set by the NTP server, select the pencil icon and choose the proper time.
- Temperature unit: Select the pencil icon to choose Celsius or Fahrenheit.
- Time zone: Select the pencil icon for the listed time zone, then choose your timezone from the drop-down window.
- Time synchronization: Sync the time and date with an NTP (network time protocol) server. NTP will automatically adjust the time settings for daylight savings.
Domain
You LaCie NAS can join a Windows Workgroup or a Windows Active Directory:
- Workgroup: Select the radio button for Workgroup and choose the pencil icon to type its name (use from 1 to 15 alphanumeric characters).
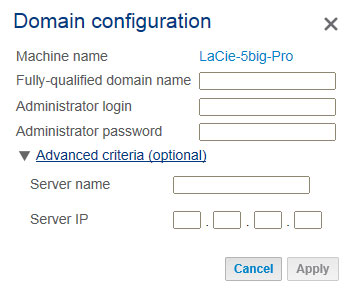
- Domain: Select the radio button for Domain if you intend to join a Windows Active Directory (see the next paragraph for instructions on entering your Active Directory credentials). When joining an Active Directory, existing users/passwords in the domain are respected by the LaCie NAS and treated exactly as if they were created in the Dashboard. Once you have joined the Active Directory, domain users may be assigned access to the LaCie NAS's shares.
Connect to an Active Directory
- Select the Domain radio button.
- Once connected, you can import users from the domain at Users.
Synchronize Users/Groups
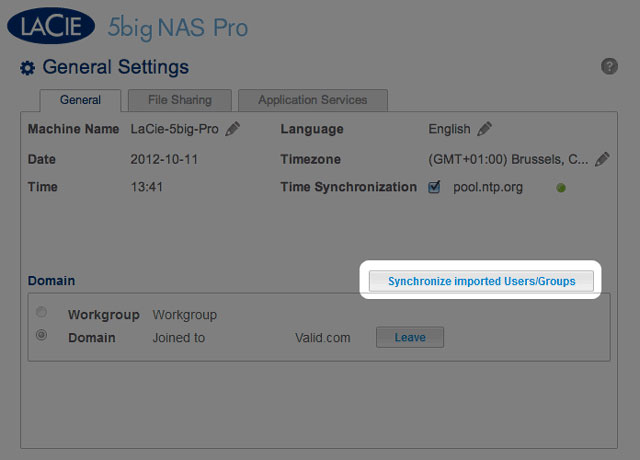
Except for access rights to shares on the LaCie NAS, users and groups imported from a domain are managed by the domain's administrator. If a user's/group's account has been changed by the domain administrator within the Windows Active Directory server (e.g. password revision, deleted from the domain, etc.), you can update the account on the LaCie NAS by choosing on the button Synchronize imported users/groups.
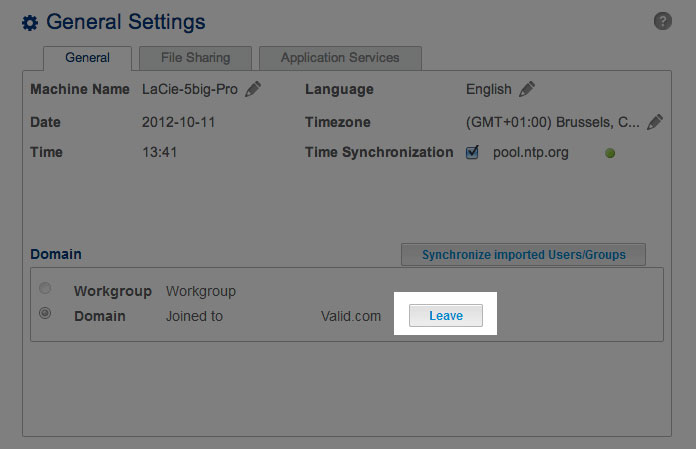
Leave the domain
To remove the LaCie NAS's connection to a domain:
- Authenticate by inputting the domain administrator's username and password.
Services
File sharing tab
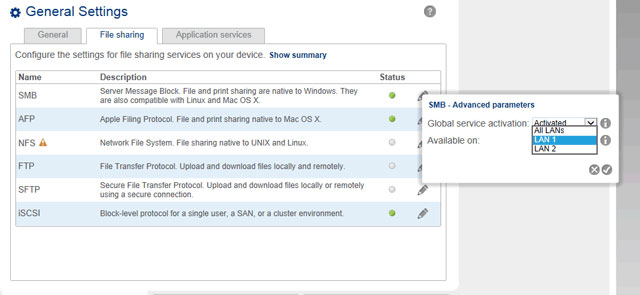
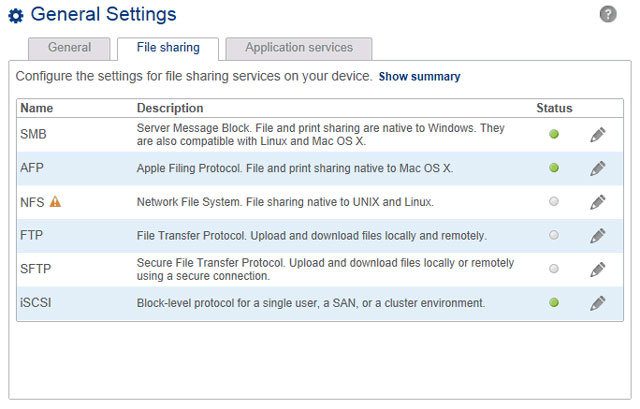
The File sharing tab offers a list of file protocols available to the LaCie NAS. Based upon the needs of computers and workstations on the network, the administrator can choose to maintain certain services while leaving others turned off. Examples:
- The administrator may wish to turn AFP (Apple Filing Protocol) off if there are no Macintosh computers on the network.
- The administrator can enable the FTP service in order to provide access to the LaCie NAS via a third-party FTP application. See Accessing Shares via FTP for details.
iSCSI: iSNS servers and LAN
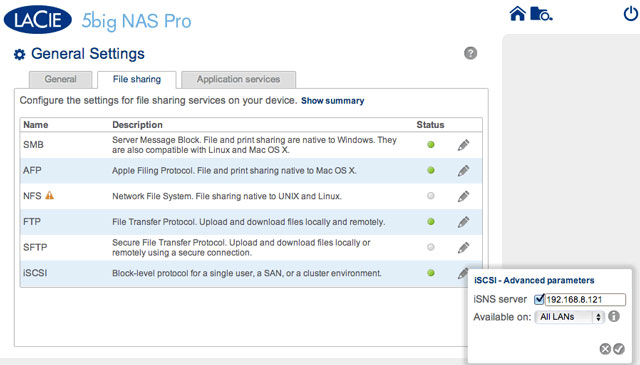
The iSCSI service should be used to direct iSCSI target volumes to an iSNS (Internet Storage Name Service) server on the network. Doing so will allow workstations (initiators) to discover the LaCie NAS's iSCSI volume(s) via the iSNS server rather than using a direct connection. Using an iSNS server is ideal when managing multiple iSCSI volumes (targets) and compatible workstations (initiators). To enter the iSNS server IP address:
- Go to Dashboard > General Settings > File sharing.
- Select the configuration icon for iSCSI and then Advanced parameters.
For instructions on creating iSCSI volumes on your LaCie NAS, see iSCSI Target.
You can also limit the iSCSI service to a single LAN:
- Go to Dashboard > General Settings > File sharing.
- Select the configuration icon for iSCSI and then Advanced parameters.
- Select the pull-down menu choose LAN 1 or LAN 2.
Application services tab
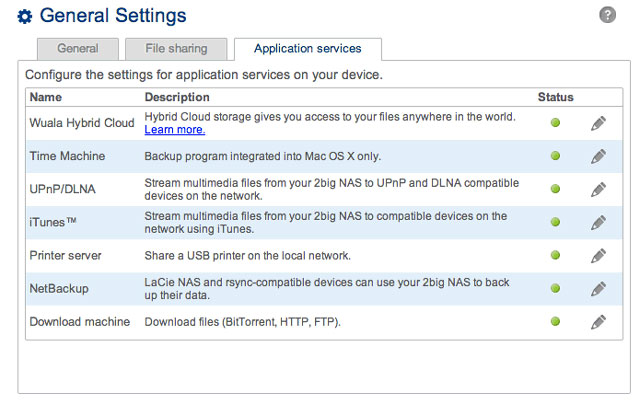
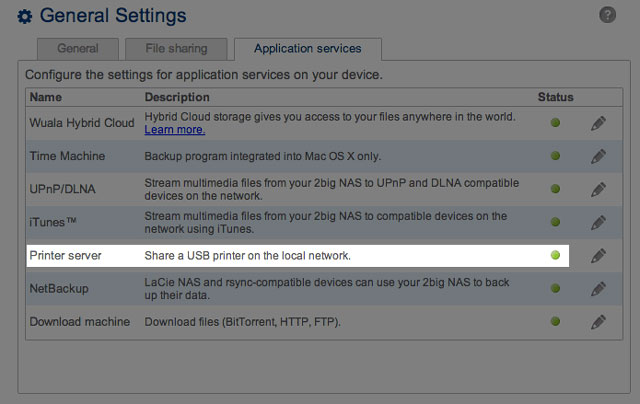
The Application services tab provides a list of services that may be used with the Dashboard or third-party programs.
- Time Machine: See Backup: LaCie NAS and PC/Mac for details.
- UPnP/DLNA: See Media (UPnP/DLNA) Servers for details.
- iTunes: See Media (UPnP/DLNA) Servers for details.
- Network Backup: See Remote Backups: Enable Network Backup Server for details. Activating Network Backup server will disable SFTP in the File sharing tab.
- Download machine: See Download Machine for details.
Printer server
Your LaCie NAS features a printer server. Follow the directions below to share a printer on the network via the LaCie NAS:
- Connect your printer to a USB port on your LaCie NAS.
Computer(s) on your network may require specific drivers to use the printer. See the user manual for your printer for details.
In addition, only PostScript printers are supported. If your printer does not display in the Application services tab, it is likely that the printer does not support PostScript printing. This is frequently the case with multi-function and photo printers. LaCie cannot guarantee that your printer supports the proper protocols to make it a networked printer.
Service activation
There are three levels of service activation: enable/disable, global service activation, and share protocols. The File Sharing and Application Services tabs allow you to manage the settings for enable/disable and global service activation. The share protocols are managed per share on the Shares page.
In all cases, enabling/disabling a service will override global service activation and share protocols. If a service is enabled, a green light will be listed in the Status column. Not all services are enabled by default.
To Disable a service, select the configuration icon for the service.
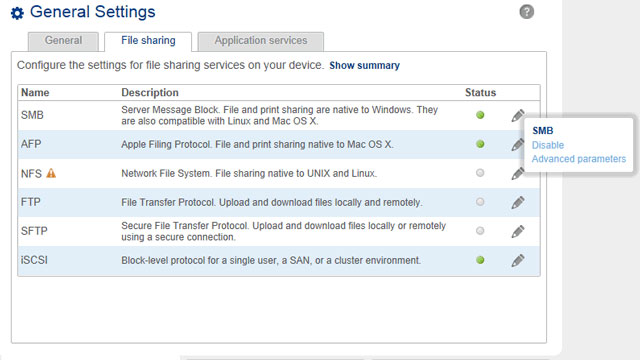
Perform the same action to Enable a service.
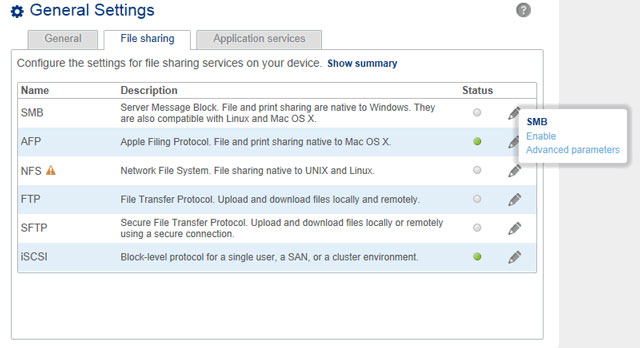
To view the Global service value, select the configuration icon for Advanced parameters. The pulldown menu allows you to deactivate/activate the global service value.
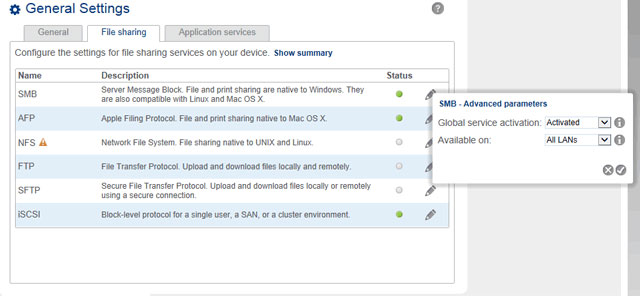
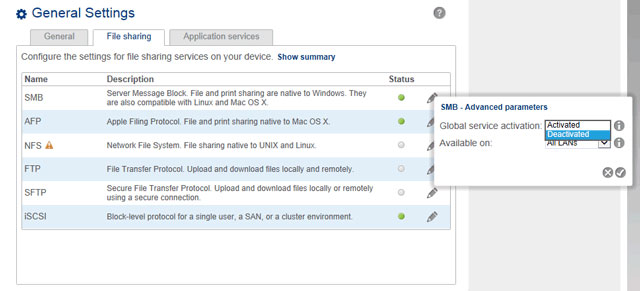
The global service level is, by default, set to Activated. This means that the service is ready for use by all shares as long as it is enabled. An administrator can also choose to deactivate a service at the global service activation level while enabling it. Doing so allows the administrator to limit the service to individual shares by adjusting the protocol value in Shares. For example, the administrator may wish to limit the Time Machine service to a single share that is only available to Macintosh computers on the network.
See the table below for examples of service settings:
| Enable/Disable | Global Service Value | Share Protocols | Use |
|---|---|---|---|
| Enable | Activated | Set to Global. | The service is ready for use. |
| Disable | Activated | Set to Global. | The service is not available. |
| Enable | Deactivated | Set to Activated. | The service is available to the specific share. |
| Enable | Activated | Set to Deactivated. | The service is not available to the specific share. |
See Shares for instructions on adjusting the settings for share protocols.
Ethernet ports (LAN) and services (5big NAS Pro only)
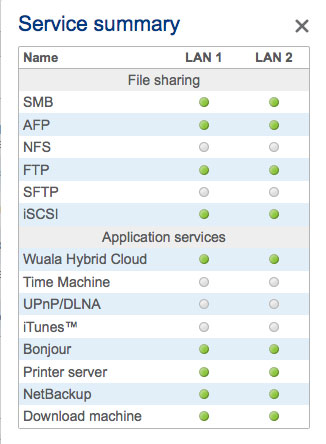
The administrator can limit certain services to a LAN port by selecting the configuration icon and then Advanced parameters. Use the pulldown menu to select the preferred LAN port for the service.
