User Tools
Site Tools
4big Rack Office
User Manuals Print page
 Save page as PDF
Table of Contents


Table of Contents
Hardware Maintenance
Please refer to Warranty Information before performing any hardware repairs or maintenance that is not described in this manual.
Precautions
- Prior to performing any hardware maintenance, power off the product and disconnect the power from the power supply, by either the power button or by physically removing the power source.
- During operation, all provided hardware (including the four drives in their frames) must be in place for the air to flow correctly around the product.
- Observe all conventional ESD precautions when handling 4big Rack Office modules. Avoid contact with backplane components and module connectors, etc.
- Whenever replacing a drive, never leave an empty bay – obtain a replacement before removing the problem drive. Never run the 4big with less than four hard drives installed.
- The top cover should be removed only when the unit has been turned off and allowed to cool down. Potential hazards include rotating fans and hot surfaces.
Removing the Top Panel
- Power down, unplug the power supply, then wait for components to completely cool.
- Release the product's top cover by unscrewing the three screws at the rear.
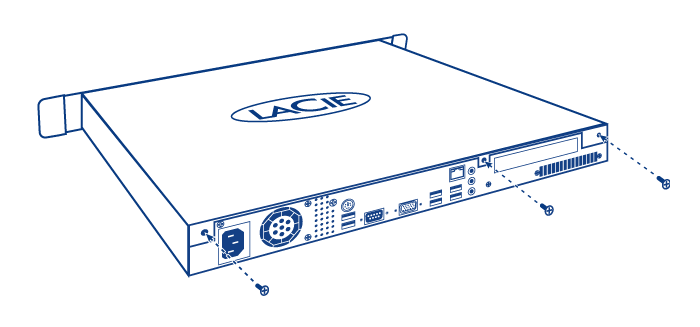
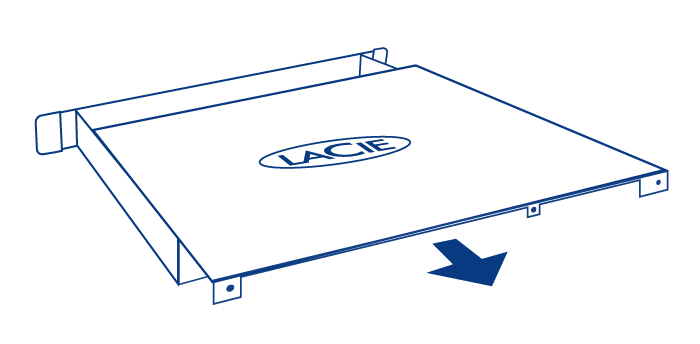
- To remove the cover, slide and lift at the same time.


Replacing a Drive
Important Info:
Replace a faulty drive with a drive of equal capacity. Adding a drive with greater capacity is supported but LaCie cannot guarantee that the additional storage will be available.
When handling drives, make sure that they are placed (and stored) on a cushioned surface.
When the 4big is powered on, all drive slots must be filled to ensure sufficient cooling.
Compatible Drives
Important Info: LaCie has certified the following drive models for this product. In order to avoid potential problems, LaCie recommends using only drives included in this table.
Refer here for a list.
Replacement Steps
- Power down the system, unplug the power supply, and remove the top panel as described above.
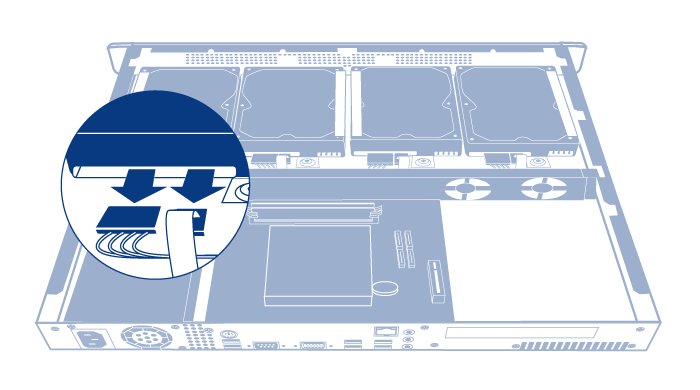
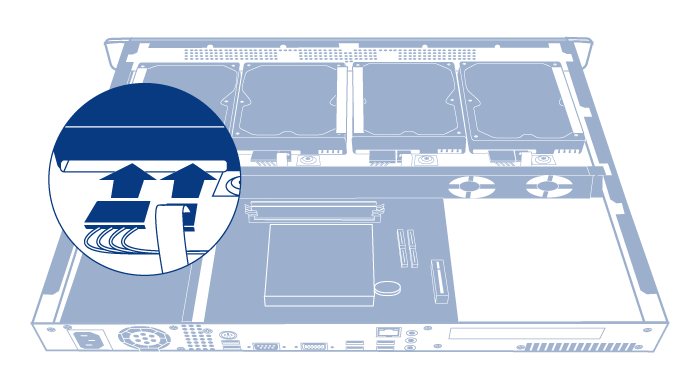
- Disconnect the SATA and power cables from the two drives of the drive frame.
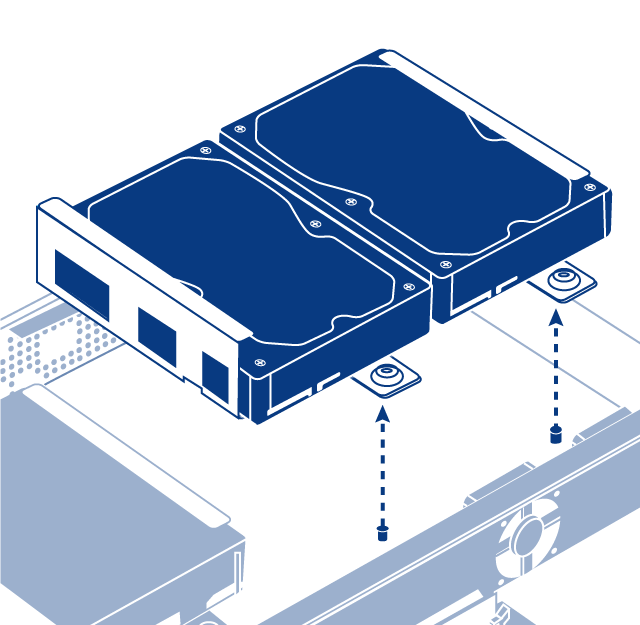
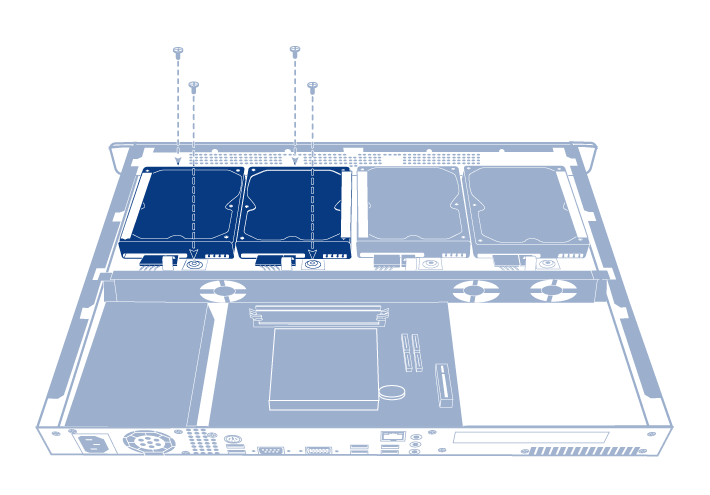
- Unscrew the four screws securing the drive frame to the chassis.
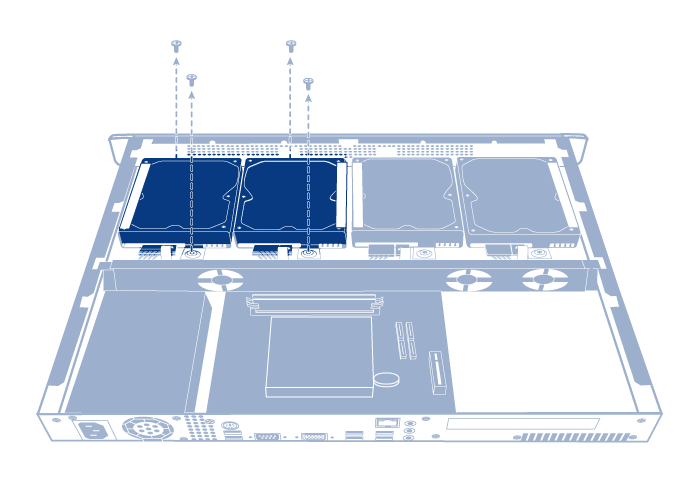
- Lift the drive frame out of the chassis.
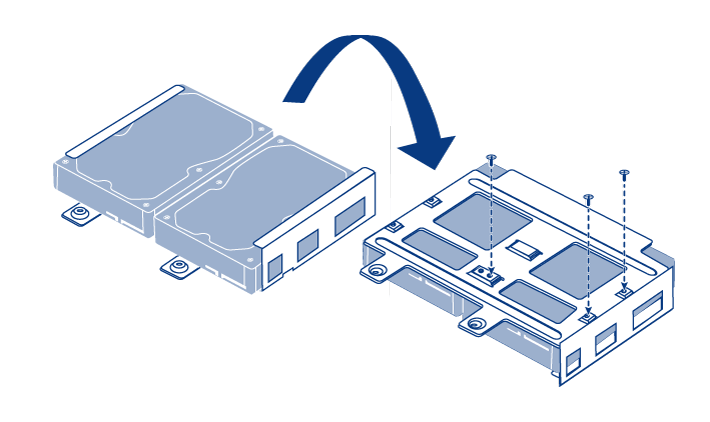
- Turn the drive frame over. While supporting the drive with one hand, remove the three screws securing the drive to the drive frame.
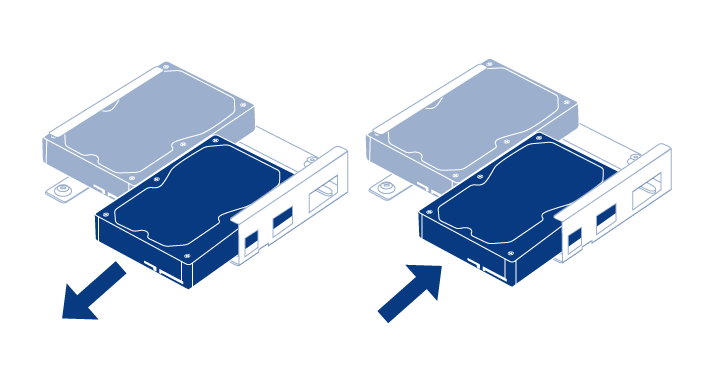
- Turn the drive frame over again, then slide the hard drive out from the hard drive frame, and slide a new one in. Make sure that the large printed label on the hard drive is pointing up.
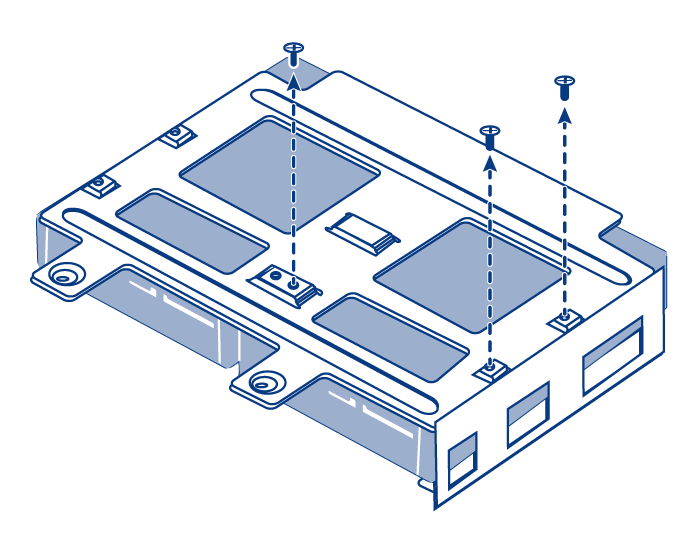
- Screw in the three screws attaching the drive to the drive frame.
- Screw in the four screws securing the drive frame to the chassis.
- Reconnect the SATA and power cables. Be careful to ensure that the numbers correspond to the correct disk number (from 0-3). The cables and disks are numbered to make this easier.
- Slide the product's top panel back in place and secure it by screwing the three screws at the rear.
- Rebuild the RAID array. For details, refer to Software.


© LaCie 2024
Last modified : Mar 01, 2013