User Tools
Site Tools
d2, 2big, and 5big Network 2 (OS 2.2)
User Manuals Print page
 Save page as PDF
Table of Contents


Table of Contents
Advanced Accessibility Features
This chapter will describe your LaCie product's advanced accessibility features such as remote access, creating shortcuts to your shares, and multimedia streaming.
Remote Access
LaCie's new remote access system, called LaCie MyNAS, makes accessing your NAS away from home a cinch. Simply create a unique, public username for your NAS in Dashboard > Network, then use this name to access the NAS in a browser – from anywhere.
Important info: In order to prevent unauthorized access, it is critical to protect each of the user and administrator accounts registered to your NAS with a strong password BEFORE setting up remote access. Since LaCie MyNAS lets you access your NAS with a simple URL, malicious users could guess the URL and access your NAS' files unless each user is protected by a strong password.
Set Up Remote Access
- Navigate to Dashboard > Network.
- Under Remote Access, check the Automatic port forward box.
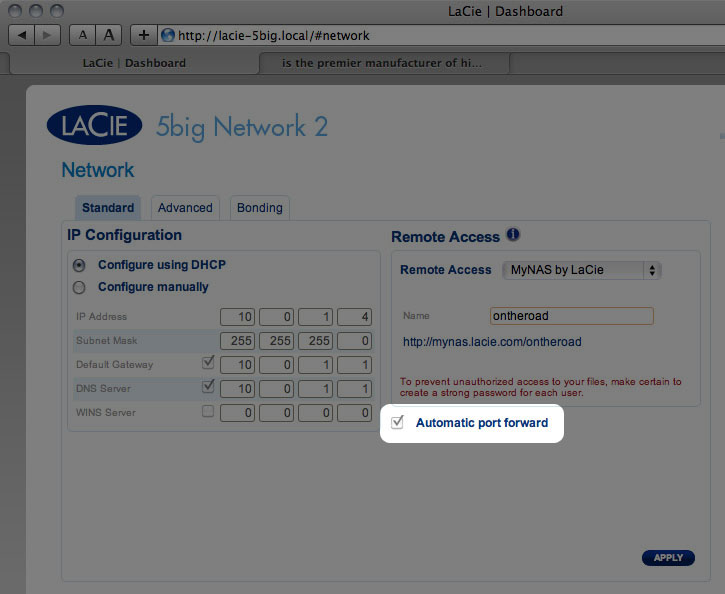
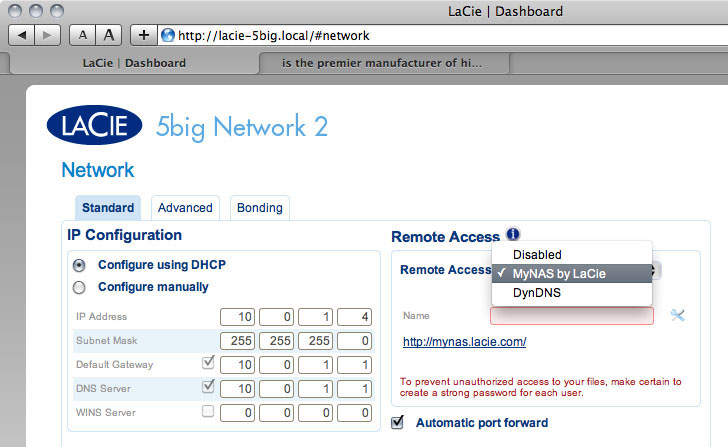
- In the drop-down menu, choose LaCie MyNAS.
- Next, type a name for your NAS in the Name field.
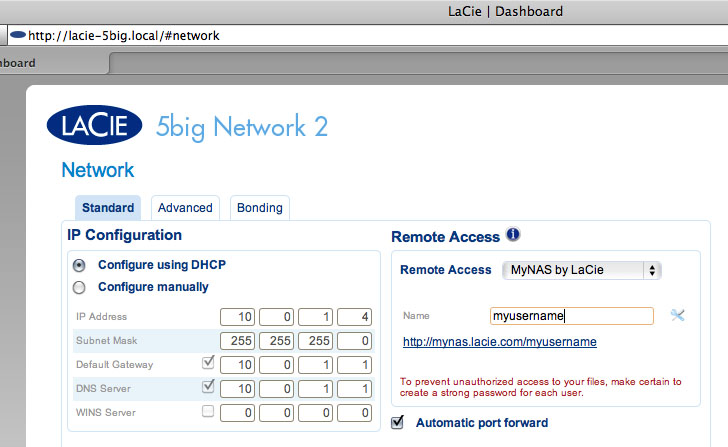
- Next, click Apply. If your NAS is able to connect to the internet, the Dashboard will query the mynas.lacie.com server to see if the name you chose is available. If so, you will receive a message confirming the connection.
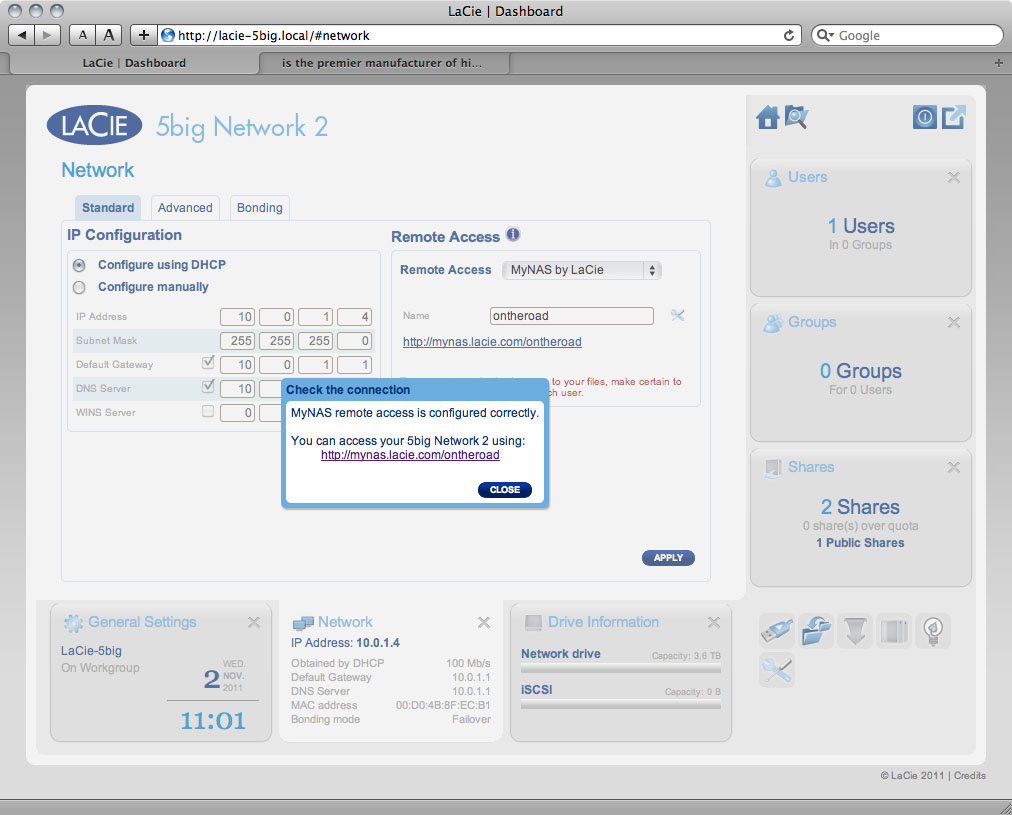


If your name is already chosen, type a new one and click Apply until you find an available name.
Failed Connection

If you receive an error that your NAS is unable to connect to the internet, you may need to configure port forwarding, or if you are using a proxy, the proxy configuration could be preventing the remote connection.
If the issue is related to your router, you will need to access its administration page in order to forward a port (by default, 8080), which will create a path from your NAS to the internet. Refer to your router's documentation for details.
- Once your router has been configured, return to the Dashboard > Network page.
- Next to the Name field, click the configuration icon, then select Advanced settings.
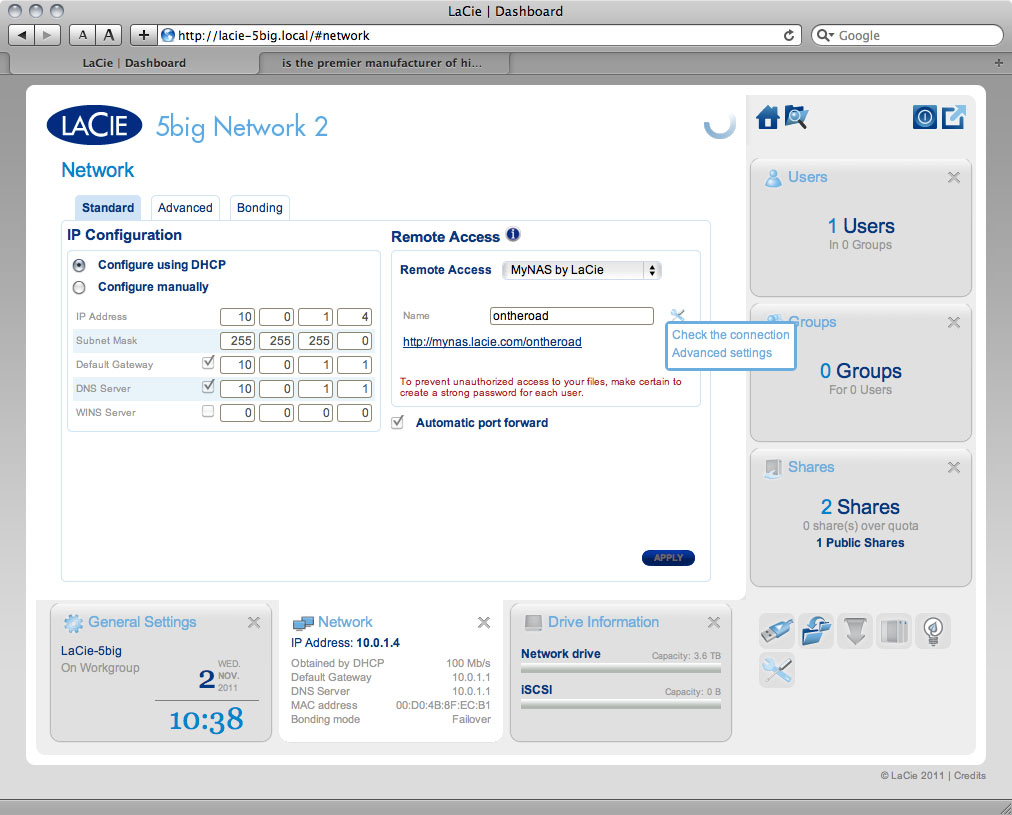
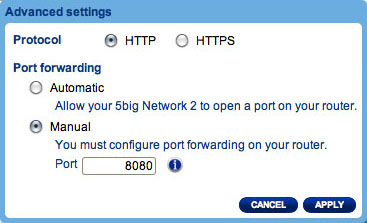
(If you do not see the configuration icon next to the Name field, first type a name and then click Apply, and the icon will appear.) - In the dialogue window that appears, click manual.
- Next, identify which port your forwarded in your router.
- Click Apply.
- Retry the remote access connection.


Using Remote Access
Once configured, simply type your NAS' URL into any browser, anywhere.

Your URL will be: mynas.lacie.com/username
After you input the URL, you will be asked to log in to the Dashboard. Note that this username and password are the ones the administrator created in Dashboard > Users.
Once logged in, you will be able to access the Dashboard in order to administer your NAS (if you have administrative privileges) or access the File Browser. The File Browser lets you upload, download, and stream many types of multimedia files such as mp3. For more information on the File Browser, see Dashboard - File Browser.
Creating Shortcuts to Shares
Once you successfully set up your LaCie NAS, you can create shortcuts so you can quickly access stored files. You can do this by using your operating system or LaCie Network Assistant.
Create Shortcut Using LaCie Network Assistant
LaCie Network Assistant (LNA) can be configured to automatically mount shares on your computer, which allows you quick access to the files they store. To create this shortcut to shares using LNA, follow the steps below:
- From the LNA menu, click Configuration Window.
- Select your NAS from the left-hand column.
- Click the Volumes tab.
- Next to the share(s) you wish to map, click the check box under the column Auto Mount.
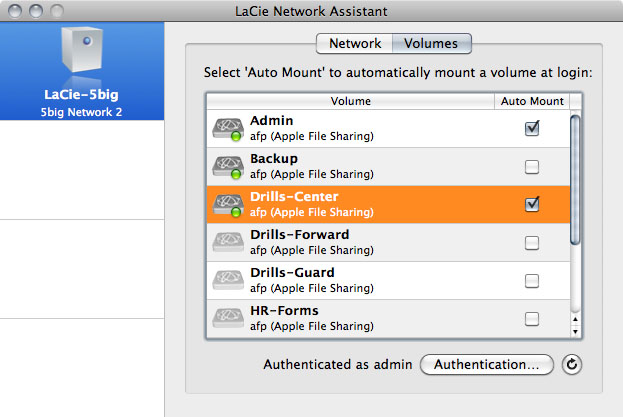
If you see the message “can't list volumes,” it may be because you are using an outdated version of LNA. Download the most recent version from the LaCie website. - PC users: The share will mount in My Computer/Computer automatically when the computer detects it on the network.
Mac users: The share volume icon will appear on your desktop and in your Finder automatically when the computer detects it on the network.

Create Shortcut Using Operating System
If you would like a shortcut to accessing shares, follow this procedure.
Windows XP, Vista, and Windows 7 Users
- From an Explorer window in Windows XP, select Tools> Map Network Drive. For Windows Vista and Windows 7, open an Explorer window, navigate to Computer, and click Map Network Drive.
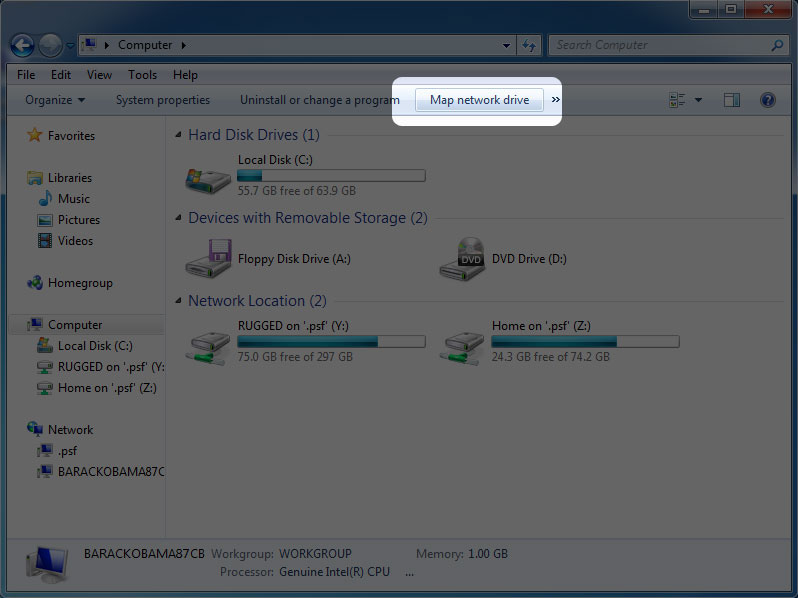

- Browse to and select the share you wish to auto mount.
- Windows will offer the option to mount the share each time you log on to the computer.
- Repeat steps 1-3 for other shares.


Mac Users
- Open a new Finder window. On the left of the window, navigate to Shared > [machine name] > [share]. If prompted, type in your username and password and click Connect.
- Repeat step 1 for each share.
- To mount the share automatically each time you log on to you computer:
- From the Apple icon in the menu bar, select System Preferences > Accounts > Login Items.
- Click on the ”+” sign to add a new item to the list and browse for the share. Please note that the shares must be mounted in order to add them to the list.
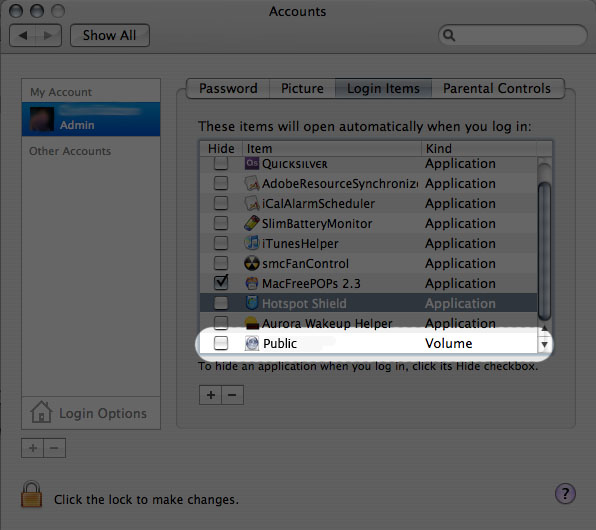
- When you log on to the Mac OS, the share(s) will automatically mount on your desktop (as long as you haven't configured your Finder not to display connected servers on your desktop).

Accessing Shares via FTP
The FTP protocol is used to transfer files from one computer to another through a local network or over the internet. This protocol allows you to exchange files with your friends or relatives securely, as only people with a user account will have access.
The FTP service is disabled by default, so you must enable it in on the Dashboard - Network page.
To connect to your NAS via FTP locally on the LAN, enter in your browser's or FTP client's address field:

ftp://[IP-address]
Example: ftp://192.168.10.149
Technical note: Find your NAS' IP address in the LaCie Network Assistant Configuration Window.
OR
ftp://[username:password]@[ip or machine name]/
Example: ftp://ringo:4xtp23@lacie-5big/
To login, enter your Dashboard username and password. (By default, admin/admin.)
To remotely access the share from a computer NOT on your network, refer to Remote Access. Instead of the machine name or LAN IP address, you will use the host name created by the DYNDNS service.
Wake on LAN (WOL)
You can use LaCie Network Assistant (LNA) to wake your LaCie NAS from Deep Sleep.
First time you use WOL:
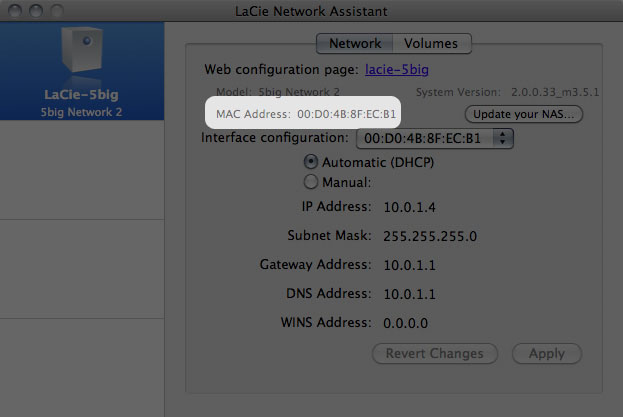
- You’ll need your drive’s MAC address. Click the LNA icon in your system tray (Windows) or menu bar (Mac) and select Configuration Window…. Select then copy the MAC address text.
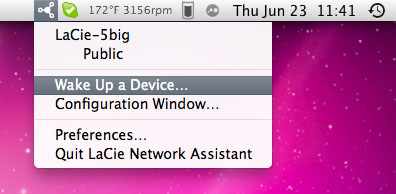
- Next, click the LNA icon in your system tray (Windows) or menu bar (Mac) and select Wake Up a Device….
- Paste the MAC address into the field and click Wake Up.
- A message will inform you that the message has been sent to your NAS.


Subsequent use:
- Click the LNA icon in your system tray (Windows) or menu bar (Mac) and select Wake Up a Device….
- Choose the NAS product you wish to wake up from the menu.
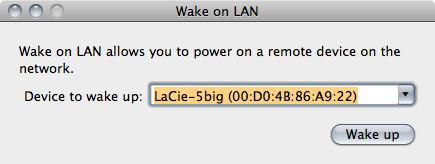
- Click Wake Up.

Media Servers
You can configure your LaCie NAS to share files (read-only) with UPnP/DLNA devices connected to the same network. Follow these steps:
- Make sure your LaCie NAS is connected to your home network as described in Connect to the Network.
- Enable the Multimedia service on the Dashboard (see Dashboard - General Settings).
- Now you will be able to play files located on your NAS' share onto any other UPnP/DLNA-certified player/adapter (such as an XBox 360, Play Station 3, a DLNA mobile phone, etc.) that is connected to your network.
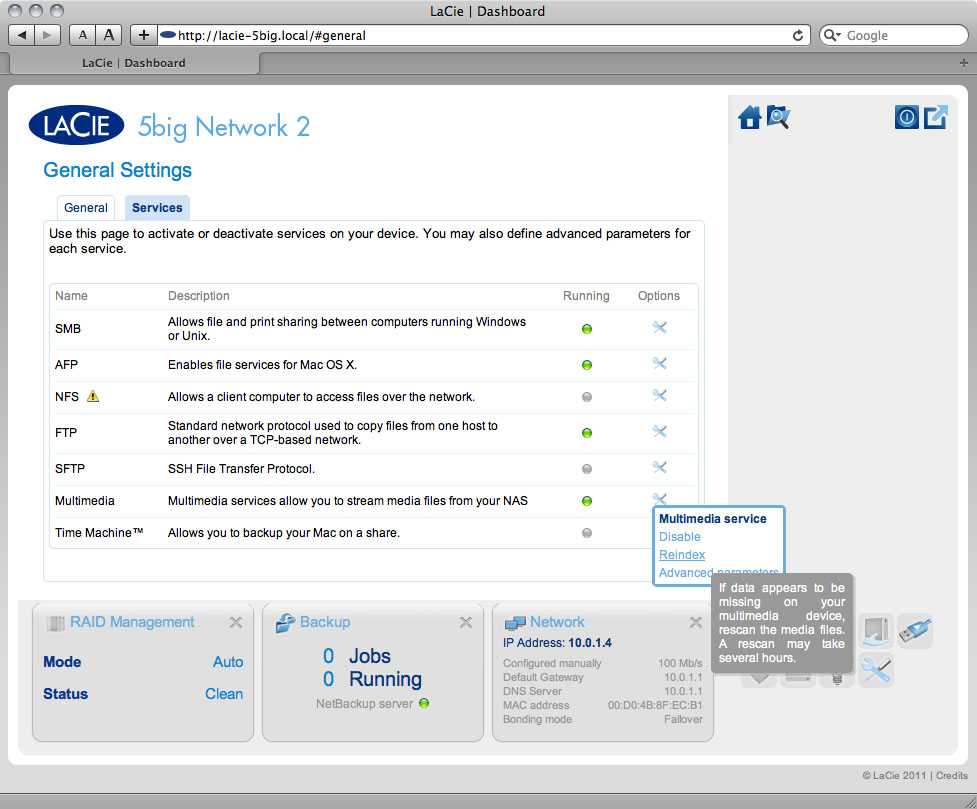
Reindex the Media Server
If some files seem missing on your multimedia device, you can force a re-scan of your media files. To do so:
- Navigate in the Dashboard to the General Settings page, then click the Services tab.
- Click the configuration icon in the Options column of the Multimedia row.
- Click the Re-index link. Note that if you have a lot of multimedia files on your NAS, this process could take more than an hour.

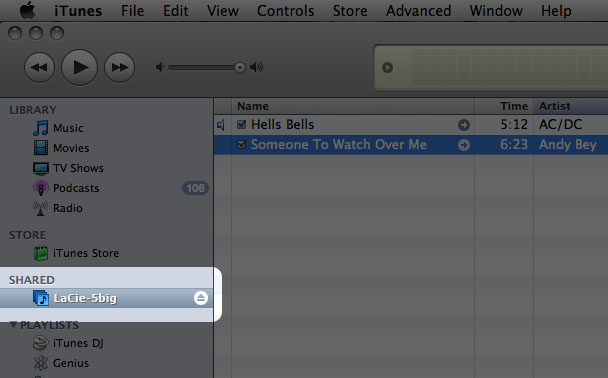
Media Servers - iTunes
Your LaCie NAS can act as an iTunes Music server, streaming audio files to a computer on the network running iTunes. Once configured, a playlist bearing your NAS' machine name will appear in the Shared category within iTunes, and audio files stored on the NAS will be listed in this playlist. Follow these steps:
- Make sure your LaCie NAS is connected to your home network as described in Connect to the Network.
- Enable the Multimedia service on the Dashboard (see Dashboard - General Settings).
- In iTunes, make sure Library sharing is enabled in Preferences > Sharing > Look for shared libraries.
- Access the shared playlist in iTunes.

Technical note: The iTunes Server Service supports the following file types: .mp3, .wav, .aac, .pls, and .m3u.
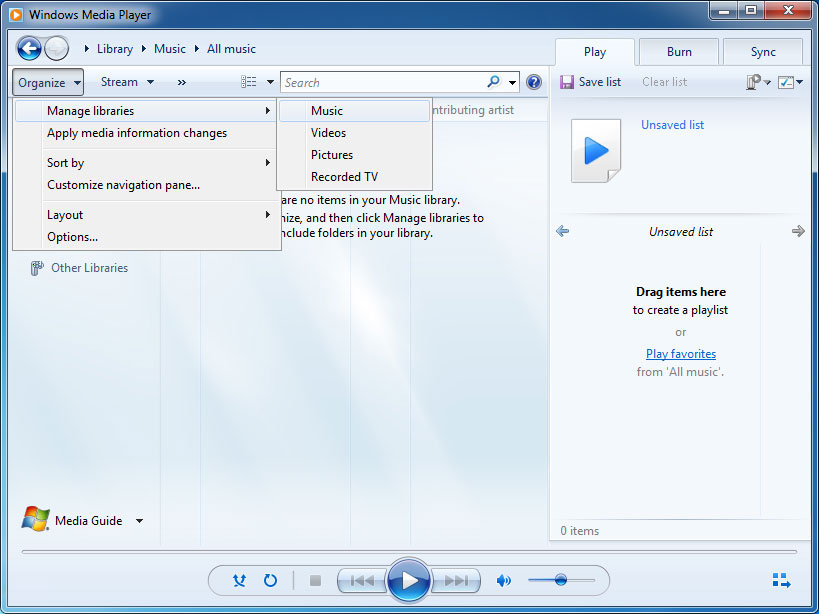
Media Servers - Windows Media Player
Once configured, Windows Media Player (WMP) can play files located on the LaCie NAS through the network connection. Follow these steps:
- Make sure your LaCie NAS is connected to your home network as described in Connect to the Network.
- Enable the Multimedia service on the Dashboard (see Dashboard - General Settings).
- In WMP, click Organize > Manage Libraries > Music (or Video or Pictures).
- In the dialogue window, click Add, select your NAS' machine name under the Network section, and click Include Folder.
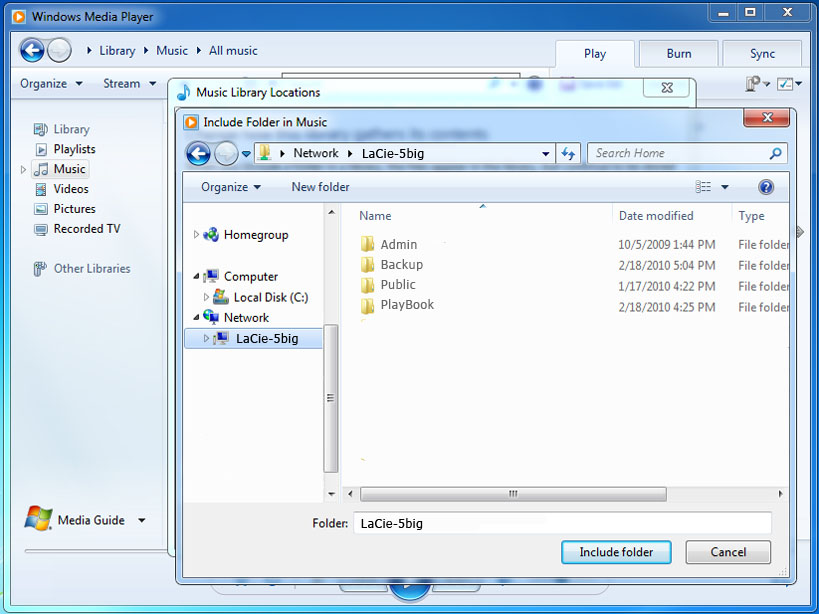
- WMP will begin indexing the media files. Once completed, they will appear in the WMP library.


Using Backup Software
Your LaCie NAS is fully compatible with Time Machine®, Windows Backup and Restore®, and Genie Timeline®. A share on your NAS can be set as a backup target for these software. Just make sure that the user whose computer will be backed up onto the share has access to the share.
© LaCie 2024
Last modified : Mar 01, 2013