User Tools
Site Tools
d2, 2big, and 5big Network 2 (OS 2.2)
User Manuals Print page
 Save page as PDF
Table of Contents


Table of Contents
Administration (Dashboard)
All LaCie NAS feature an easy-to-use browser-based administration tool, called the Dashboard, that will allow you to manage users, groups, shares, and the other product features.
Dashboard - Accessing
There are two ways to access the Dashboard, using the LaCie Network Assistant and using a browser.
Access Dashboard Using LaCie Network Assistant
- Click on the LaCie Network Assistant icon in the system tray (Windows users) or menu bar (Mac users) and select [machine name] > Web Access (Windows users) or [machine name] (Mac users).

- The login page will open in a new browser window or tab. If your browser is not open, LaCie Network Assistant will open it for you.
- The first time you access the Dashboard, fill in the information in the Setup Wizard. (Password should be from 4-20 alphanumeric characters and symbols, and username should be from 1-20 alphanumeric characters.) In subsequent logins, simply type in your username and password in the login prompt.
- Click Log in.


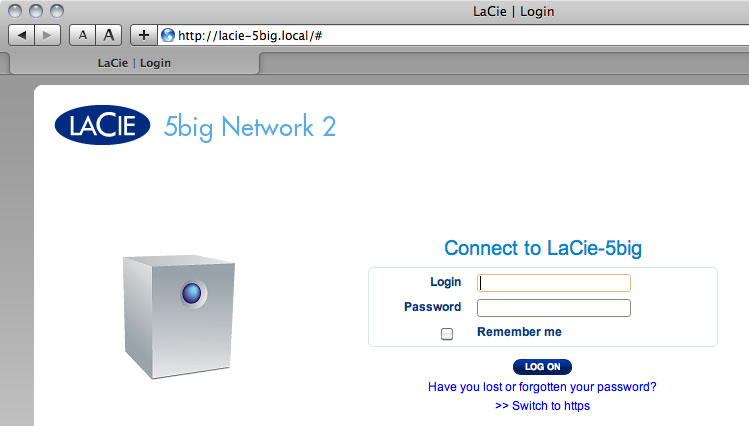
Access Dashboard Using a Browser
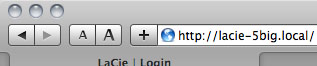
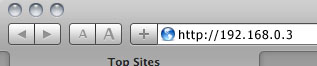
- Open your Internet browser (Firefox, Internet Explorer, Safari, etc.) and type your NAS' IP address or machine name in the browser's URL (web address) field.
For example: http://[IP-address] or http://[machine name] (Windows) or http://[machine name].local (Mac)
- The first time you access the Dashboard, fill in the information in the Setup Wizard. In subsequent logins, simply type in your username and password in the login prompt.
- Click Log in.


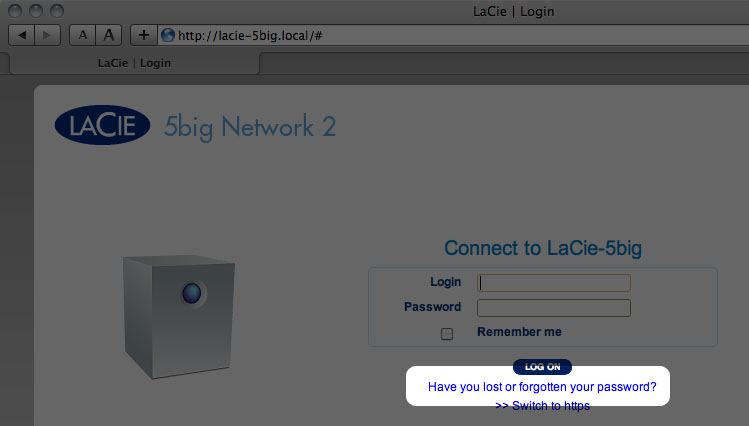
Recovering a Lost Password
If a user has forgotten his/her password, it can be recovered if an SMTP server has been assigned (see Dashboard - Network) and an email address has been input for that user on the Users page.
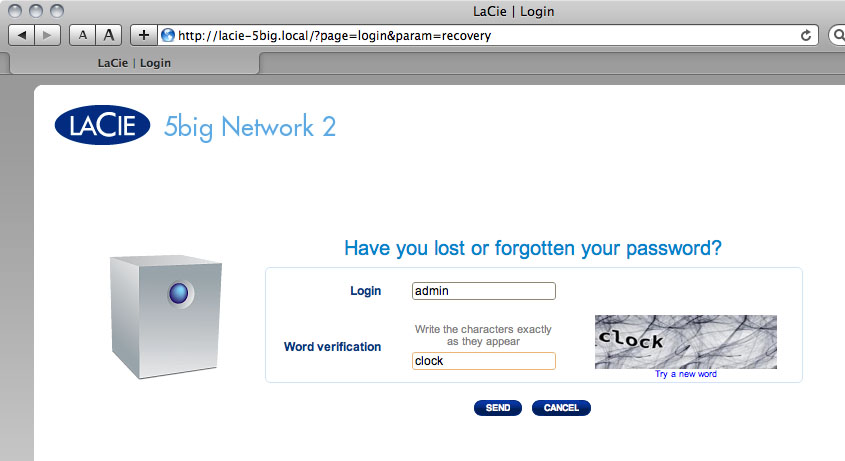
- In the login page, click Have you lost or forgotten your password?.
- In the next page, type in the username. Then type the word you see in the image on the right (this ensures that the request is coming from a person) and click send.
- The email will arrive in the user's email inbox. In the email, click the Click here link.
- In the Reinitialize your password screen, type your login, new password, then reconfirm the new password, then click Send.


Dashboard - Welcome
The welcome page contains links to helpful documents from the LaCie website, the ability to change details for the currently logged in user, and a list of the different pages that make up the Dashboard.

Important info: Note that if you log in to the Dashboard with administrative credentials, you will have full access to the Dashboard's features. Without administrative privileges, the only pages available to a user will be the File Browser, Welcome page, and General Settings page.
Logged in User Information

- To change the username for the currently logged in user, click the username (admin in the above screenshot) and type a new one.
- Click Change my email address: (if you haven't input one already) or click the actual email address (if you have). Giving an email address allows you to receive notifications from your LaCie NAS or to recover your password if you forget it. Note that an SMTP server also needs to be defined on the Dashboard or you won't be able to modify the email address.
- Click Change my password to modify the currently logged in user's password.
- Click View my groups to see to which groups the currently logged in user belongs.
Restart or Deep Sleep Mode
To restart or put the NAS into deep sleep mode, click this button, then choose between Restart and Deep Sleep Mode. Note that Deep Sleep Mode must be enabled or this option will not be available (see Dashboard - Eco Management).

Log Out
To log out of the Dashboard, click the log out button.

File Browser
Dashboard - Navigation
The Dashboard is made up of a central area surrounded by widgets, or small boxes that represent the different pages that make up the Dashboard. The widget displays a summary of the information contained in the page. For full information, navigate to the page itself.
- To navigate to a page, click the widget below its title; or, drag and drop a widget to the center of the window.
- To minimize a widget, click the X next to its title.
- To expand a minimized widget, drag its icon over an expanded widget or to an open widget space.
- To rearrange widgets, drag the minimized widget icon or the expanded widget's heading onto the place of another widget.
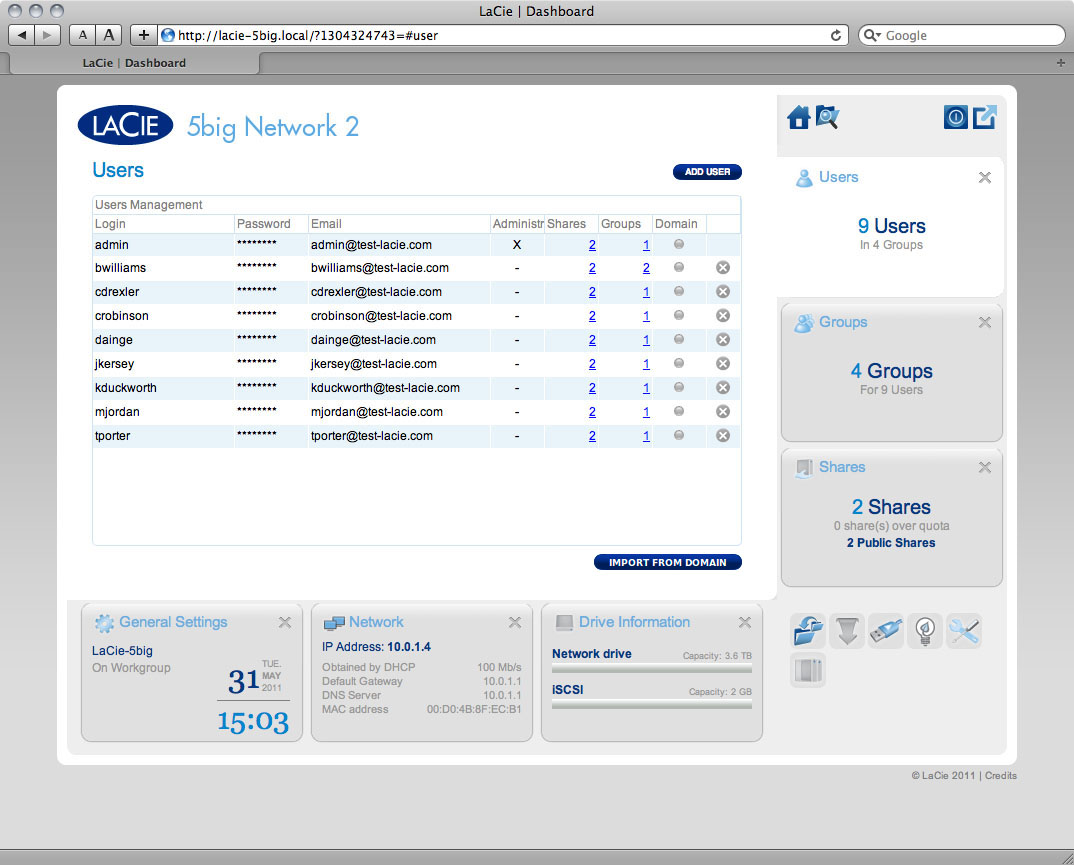
Dashboard - Users

This page allows you to manage user accounts. See below for details.
New User
To create a new user, click the Add User button, then fill out the required fields.
Important info:
The password is case-sensitive.
In text fields, you may enter from 4 to 20 characters using letters, numbers, symbols, hypen, and underscore. Do not begin or end with a hypen or underscore.
The password is case-sensitive.
In text fields, you may enter from 4 to 20 characters using letters, numbers, symbols, hypen, and underscore. Do not begin or end with a hypen or underscore.

Existing User
User data is organized in a table.
- Click the text in the Login column to change the user name.
- Click the text in the Password column to change the user's password.
- Click the text in the Email column to change the user's email address.
- An X in the Administrator column indicates the user has administrative privileges.
- The number in the Shares column indicates to how many shares the user has access. Click the number to view the assigned share(s).
- The number in the Groups column shows to how many groups the member belongs. Click the number to view the group(s).
- The bullet in the Domain column indicates whether the user has been inherited from when the product joined a domain, or if it was created using the Dashboard.
Importing Users from Active Directory
- If you have successfully connected to an Active Directory domain (see Dashboard - General Settings), you will see a button on the Dashboard - Users page labelled IMPORT FROM DOMAIN. Click the button.
- A window will appear listing all the users on the domain. Type a few characters in the text field to filter results.
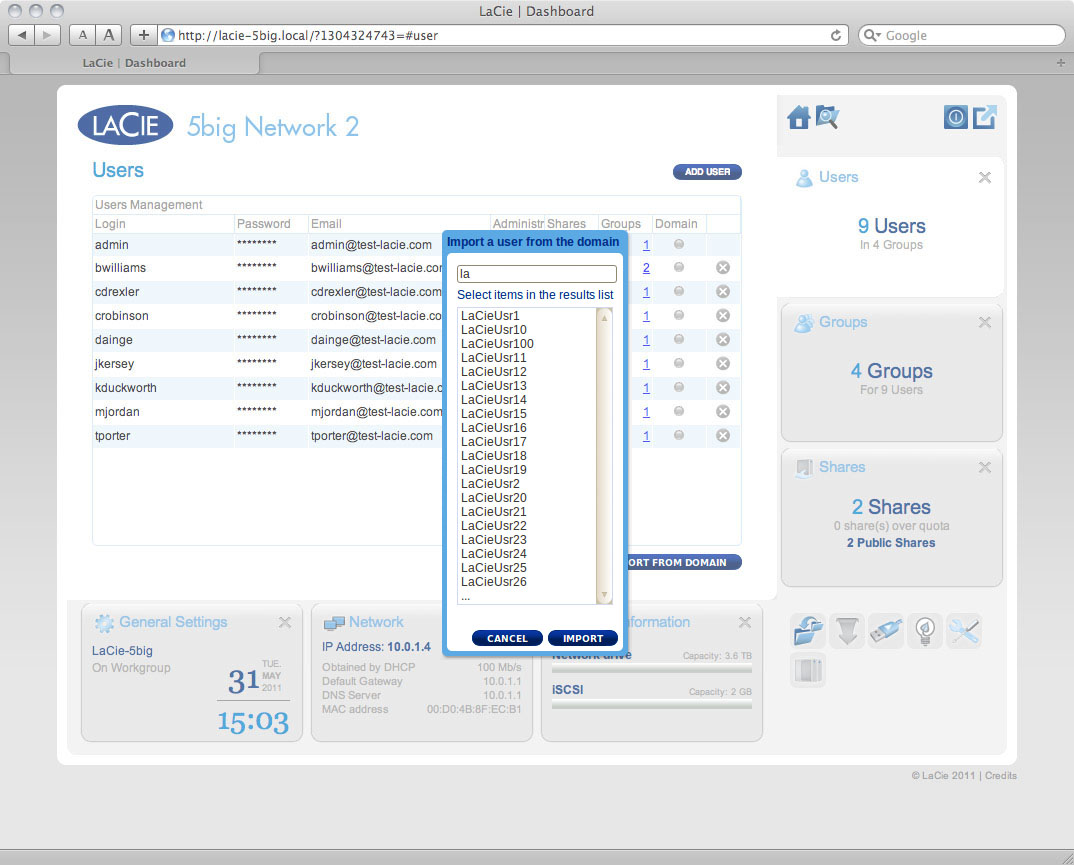
- Hold down the Command key (Mac users) or Ctrl key (Windows users) to select multiple users.
- Click the IMPORT button.
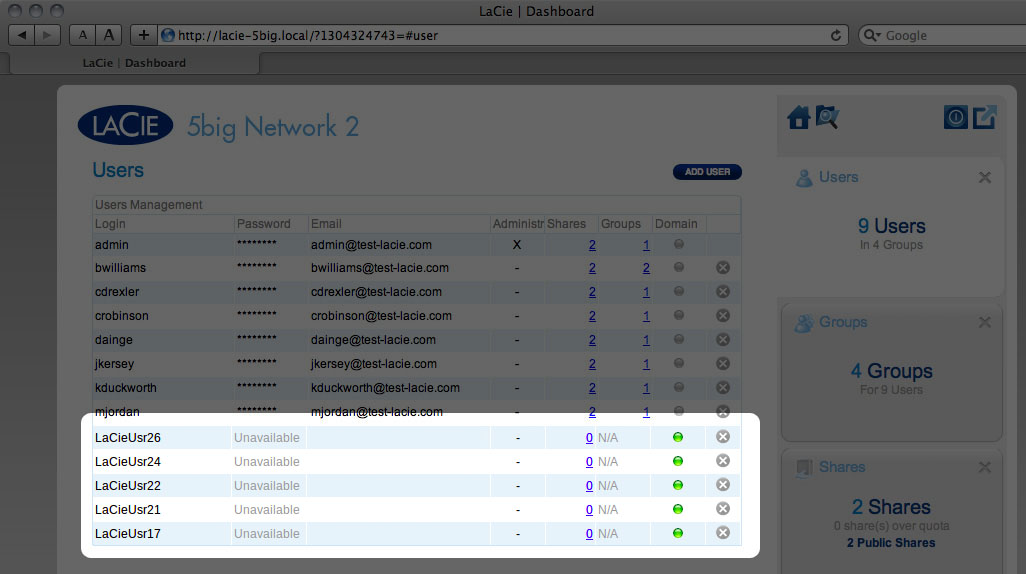
- The imported users will appear in the table. You can identify which users were imported from the domain because the circle in the Domain column will be green.


Delete a User
To delete a user, click the gray X on the far right of the user's row. Confirm in the dialogue window.

Dashboard - Shares

Shares—network folders—comprise the storage capacity of your LaCie NAS. Out of the box, it has two shares, Share and Public, and USBShare (d2/2big only) or iSCSIShare (5big only) is created automatically when storage is allocated to it using the Dashboard. The Shares page in the Dashboard allows the administrator to assign quotas and access rights to users and groups, and to toggle share-level service activation.
Note: It's not necessary to create shares in order to use the product. Simply use the default Share or Public.
Important info: In text fields, you may enter 1 to 20 characters using letters, numbers, hypen, and underscore. No other symbols, special characters, punctuation, or spaces may be used. Do not begin or end with a hypen or underscore.
New Share
To create a new share, click the Add Share button, then fill out the required fields.

Existing Share
Share data is organized in a table.
- Click the text in the Name column to change the share name.
- Click the text in the Description column to change the share's description (optional).
- Click the text in the Quota column to change the share's maximum size.
- A number in the Usage column indicates the amount of storage space occupied by the share.
- The number in the Groups column shows how many groups have access to the share. Click the number to view the group(s).
- The number in the Users column shows how many users have access to the share. Click the number to view the user(s).
- A blue circle in the Protocols column indicates that the network protocols for this share are controlled by the global value set in Dashboard - General Settings (Services tab). Click the circle to override the global value for this share.
- Click the configuration icon to bring up a settings menu for the share. Most of the options in this menu are explained above, except for the ability to make the share public/public or to delete the share. A public share is read+write for all users and non-users.
Caution: Decreasing the capacity of a quota can cause data to be deleted.
Manage Share Access

Click the configuration icon in the right-hand column and select either Manage User Access or Manage Group Access, then click the Edit button. In the left-hand column of the resulting window, the users or groups without access to the share are listed. Select the group or user to be granted access, then click the right arrow either to the Read + write access cell or to the Read only access cell. To withdraw access, select a user or group in the Read + Write access cell or the Read only access and click the right arrow.
Select Grant read access to Guest and System Users to give read-only access to the share to non-users.
Delete a Share
To delete a share, click the gray X on the far right of the share's row. Confirm in the dialogue window. Note that deleting a share deletes all files on the share as well as any backup jobs involving that share.

Dashboard - Download

The LaCie NAS Dashboard features a torrent server that will allow you to download torrent files. For more information on torrents, see:
http://en.wikipedia.org/wiki/BitTorrent_protocol
- Click the Start Download Machine button.
- To start a download, click the Add Download button.
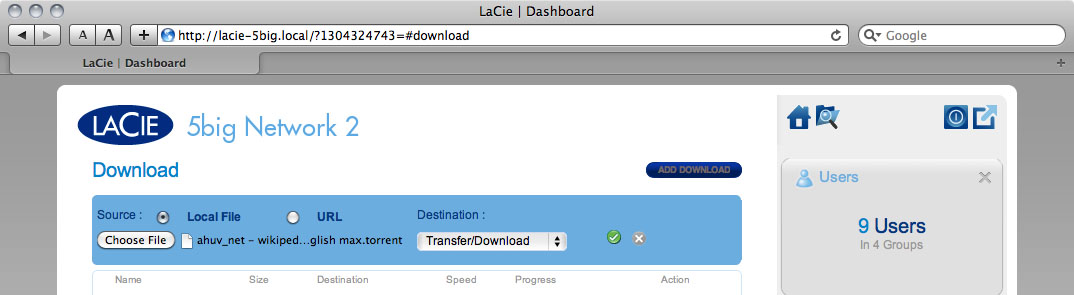
- Choose whether the torrent source is a file or a URL, then navigate to the source.
- Choose the destination (i.e., on which share the downloaded file will be stored) and click the green check box.
- Click the play button in the Action column. The file will begin downloading (can sometimes take a few minutes to begin).
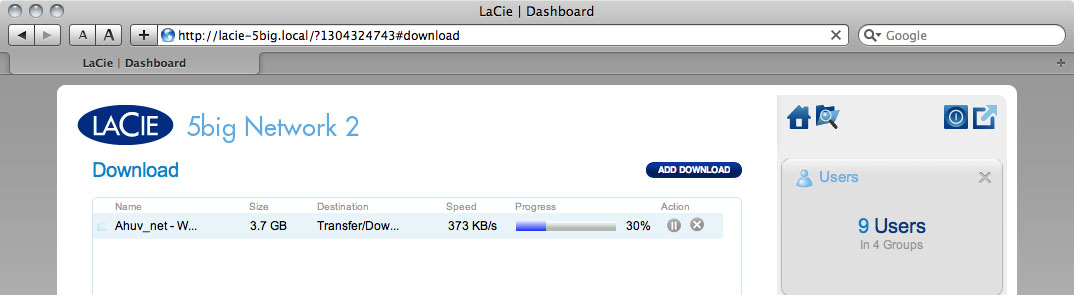


Download Page Settings

Below the list of downloads are several settings.
- TCP Listening port: Click the number to choose a router port through which the torrent service will operate.
- Download rate limit: Click the number here to type a maximum download speed.
- Upload limit rate: Click the number here to type a maximum upload speed.
- Max. active downloads: Click the number here to limit the number of torrents that can download/upload simultaneously. Type zero for no limit.
Technical note: Because the torrent client service uses bandwidth and system resources, multiple simultaneous downloads can impact your LaCie NAS' performance. Additionally, even after a download has completed, it may continue to use system resources if it is uploading, as long as the torrent is active.
Dashboard - General Settings
General Tab

- Machine Name: The machine name identifies your LaCie NAS on your network. You can change it from the default by clicking on the text and typing a new one. Keep in mind that the machine name is limited to 15 characters, is case-sensitive, and can consist only of alphanumeric characters without spaces or symbols.
- Date: The date and time are set automatically if you assign an NTP server (see below). If not, click the text and select a day from the calendar.
- Time: If the time is not set by the NTP server, click the text and select the proper time.
- Language: Click the text to change the Dashboard language.
- Timezone: Click the listed time zone, then select your timezone from the dropdown window.
- Time Synchronization: This option allows your NAS to sync the time and date with an NTP (network time protocol) server. Having it set automatically means you won't have to worry about adjusting your NAS' time settings for daylight savings.
- Workgroup: Click the text, then type a Windows workgroup name (use from 1 to 15 alphanumeric characters).
- Domain: This feature allows you to join the LaCie NAS to a Windows Active Directory. Once connected, existing users/passwords in the domain are respected by the LaCie NAS and treated exactly as if they were created in the Dashboard. You can use the Users page to assign domain users access to the LaCie NAS' shares.
To connect to a share, select the Domain box, then fill in the Fully Qualified Domain Name, Administrator login, and Administrator password. For more complex network configurations, click the Advanced Criteria arrow and fill in the Server name and Server IP.
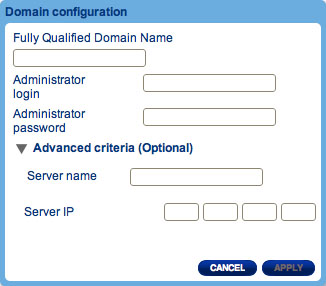
Once connected, you should see the domain's associated users in the Dashboard's Users page (these users will be identified by the word Domain in place of password).
To leave the domain, click the Leave button, then authenticate by inputting admin username and password.
For help with joining your NAS to a domain, see Troubleshooting the Active Directory Connection.

Services Tab

This page allows you to activate or deactivate services on your device on a global or default level. There are three levels of service activation – global, default, and share. The global level overrides the other levels. If a service is activated at the global level, a green light will be listed in the Running column. When the light is green, the service will be activated by default when a new share is created. The share level overrides the default level but not the global level. To activate a service at the share level, see Dashboard - Shares).
Click the box in the service's row to activate or deactivate the service for all shares.
Click the Options icon to:
- Activate or deactivate the service at the global level.
- Activate or deactivate the service at the default level.

The following table describes the available services.
| Service | Description | Active by Default |
|---|---|---|
| SMB | Allows file and print sharing between computers running Windows or Unix. | Yes |
| AFP | Enables file services for Mac OS X. | Yes |
| NFS | Allows a client computer to access files over the network. | No |
| FTP | Standard network protocol used to copy files from one host to another over a TCP-based network. | No |
| SFTP | SSH File Transfer Protocol. | No |
| Multimedia | Multimedia services allow you to stream media files from your NAS to UPnP-enabled players (such as cell phones, computers, and game consoles). See Advanced Accessibility Features for details. | No |
| Time Machine™ | Allows Time Machine to back up a Mac onto your LaCie NAS' share. | No |
Dashboard - Drive Information

5big Network 2

2big Network 2

d2 Network 2
This page shows you information about disk usage and will allow you to reformat your disk(s).
When you click the top FORMAT button, ALL data on the disk(s) (including on USBShare or iSCSIShare) will be erased and the disk(s) will be formatted. Data on any USB or eSATA hard drive connected to the expansion ports will not be affected.
To reformat:
- Click the FORMAT button.
- In the blue window that opens, confirm by clicking the FORMAT button.
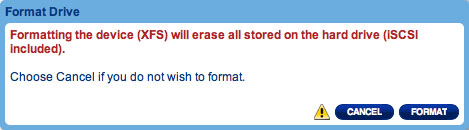

Caution: Formatting will erase all the data on your drive (but will not remove users or settings). Make sure to back up all your data onto another volume before proceeding. If you are formatting USBShare and wish to back it up first onto another share, LaCie recommends you use the File Browser (see Dashboard - File Browser instead of using SMB/AFP (i.e. using the Finder for Mac users or an Explorer window for Windows users). LaCie cannot be held for responsible for the loss of data occurring during formatting.
Details specific to the d2/2big:


Dashboard - Support
Configuration

- Version: Your LaCie NAS' operating system version will be listed here. This information is important when you're updating the OS or if you need to speak with LaCie technical support.
- System Log: Click the Download button to save the system log to your computer. The log may be useful to LaCie tech support in troubleshooting any issues.
- Email notification: Toggle this box to email notifications. Note that an SMTP server must be defined and the administrator(s) must have input an email address.
Email Notification Triggers
The following events will trigger an email notification if an email address has been provided in the User page:
| Event Identifier | Description | Recipient |
|---|---|---|
| Capacity | When the total available capacity is less than 90% | Admin |
| Quota event | When capacity reaches 90% of the amount set by the quota | Admin |
| Download | When a download has completed or when a download error has occurred | Admin |
| Backup | When a backup begins, ends, is cancelled, or fails | Admin |
| Fan | When the fan stops and restarts (2big/5big only) | Admin |
| Temperature | The product has remained at maximum temperature for at least one minute | Admin |
| Password recovery | A user has recovered his/her password | Admin or user, depending on who made the request |
Auto-Update
If you wish, your LaCie NAS will automatically check if an operating system update is available from the update server, and will install it for you. See Update Product Operating System for details.
Logs
The Logs section will list important events, such as RAID change results and warnings.
To purge the listings from this list, click the trash icon.
Dashboard - Groups

Assigning users to groups gives you powerful tools to manage large numbers of users and their privileges. They allow administrators to change access rights to entire groups rather than individually.
From this page, administrators can: create, modify, delete, and add users to groups.
Important info: In text fields, you may enter 1 to 20 characters using letters, numbers, hypen, and underscore. No other symbols, special characters, punctuation, or spaces may be used. Do not begin or end with a hypen or underscore.
New Group
To create a new group, click the ADD GROUP button, then fill out the required fields.

Existing Group
Group data is organized in a table.
- Click the text in the Group Name column to change the group name.
- Click the text in the Description column to change the group's description (optional).
- The number in the Shares column shows how many shares the group has access to. Click the number to view the share(s).
- The number in the Users column shows how many users belong in the group. Click the number to view the user(s).
- The bullet in the Domain column indicates whether the group has been inherited from when the product joined a domain, or if it was created using the Dashboard.
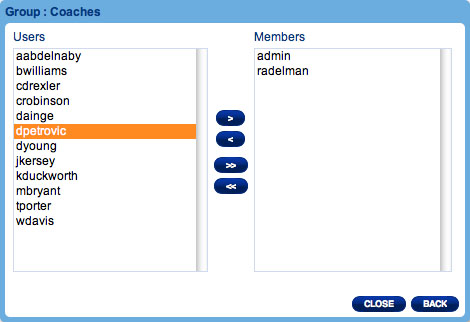
- Click the configuration icon to bring up a settings menu for the group. From this menu, you can:
- Manage users to modify group members. In the resulting window, highlight a user, then click the arrows to join/disjoin a user from the group.
- Delete this group. See below.

Importing Groups from Active Directory
- If you have successfully connected to an Active Directory domain (see Dashboard - General Settings), you will see a button on the Dashboard - Groups page labelled IMPORT FROM DOMAIN. Click the button.
- A window will appear listing all the groups on the domain. Type a few characters in the text field to filter results.
- Hold down the Command key (Mac users) or Ctrl key (Windows users) to select multiple users.
- Click the IMPORT button.
- The imported groups will appear in the table. You can identify which groups were imported from the domain because the circle in the Domain column will be green.
Delete a Group
To delete a user, click the gray X on the far right of the user's row. Confirm in the dialogue window. Note that deleting a group will not affect user data.

Dashboard - Backup

Your LaCie NAS features a robust backup and restore system. It allows you to back up files:
- To and from another NAS on your local network or through the Internet
- To and from your NAS and an external hard drive
- Between shares on your NAS
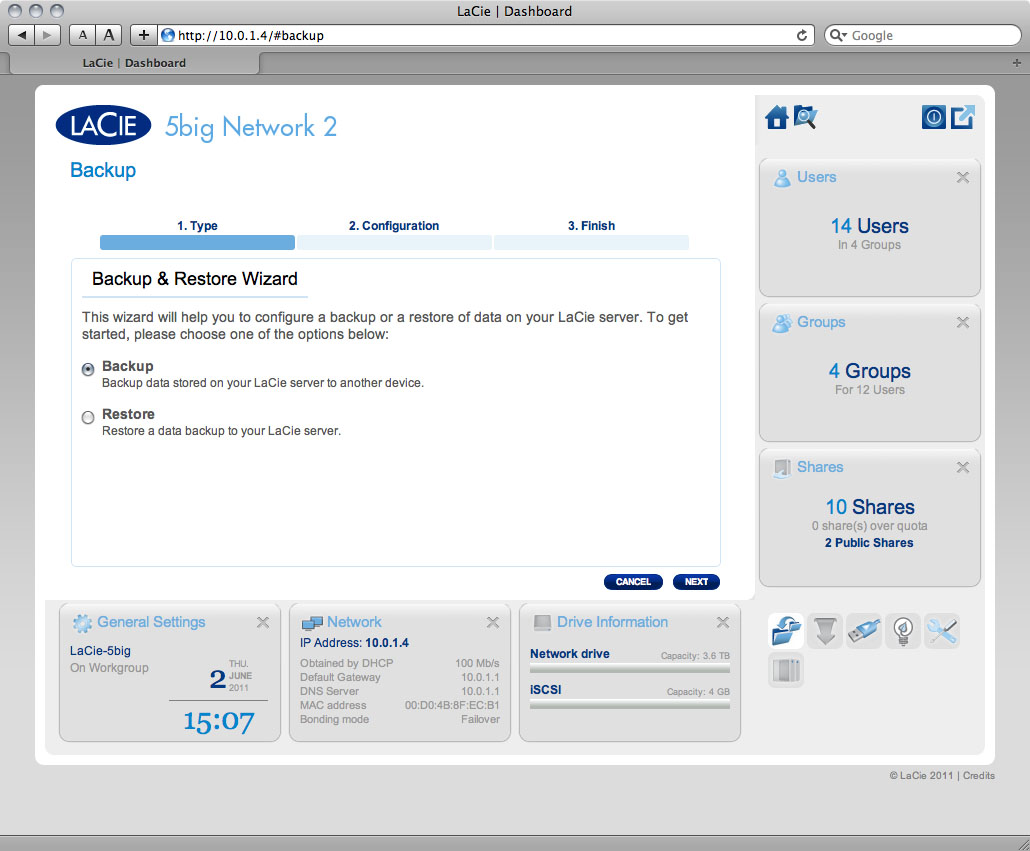
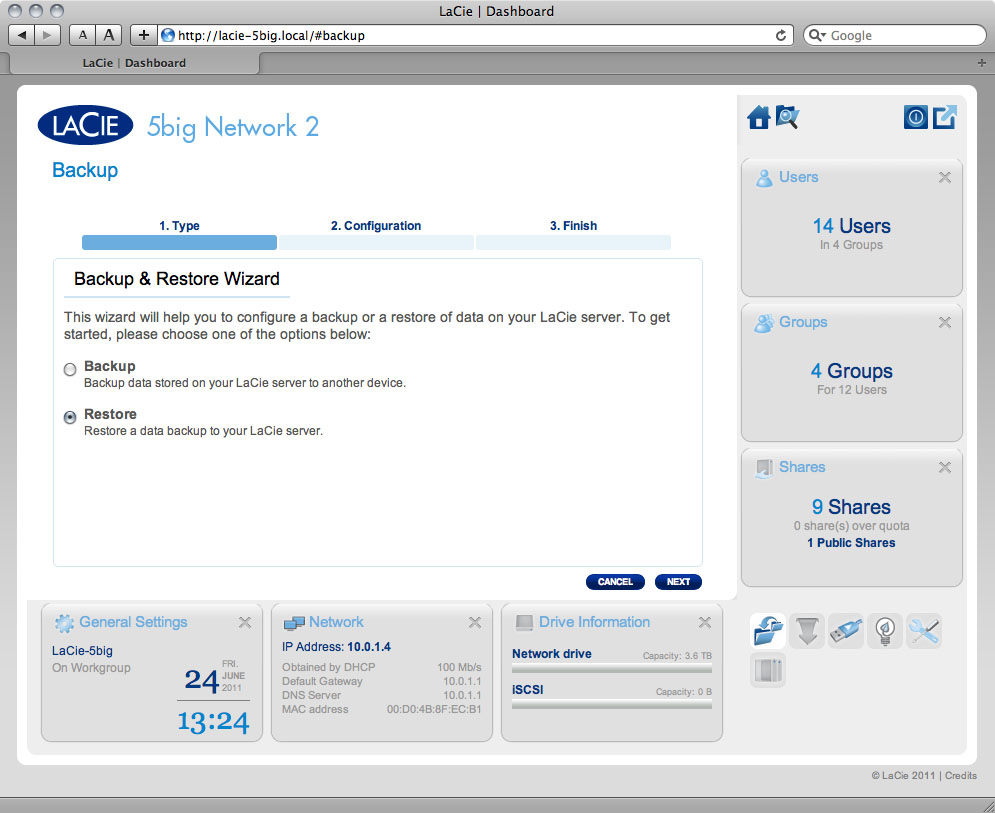
The Backup & Restore Wizard will help you set up backup jobs. In the case of DAS backups, the system even saves versions of backups, so you can restore earlier versions of files.
Local Backup
Local backup will let you use an external hard drive connected to your NAS as a backup source or destination. It will also allow you to back up a share on your NAS onto another share on the same NAS.
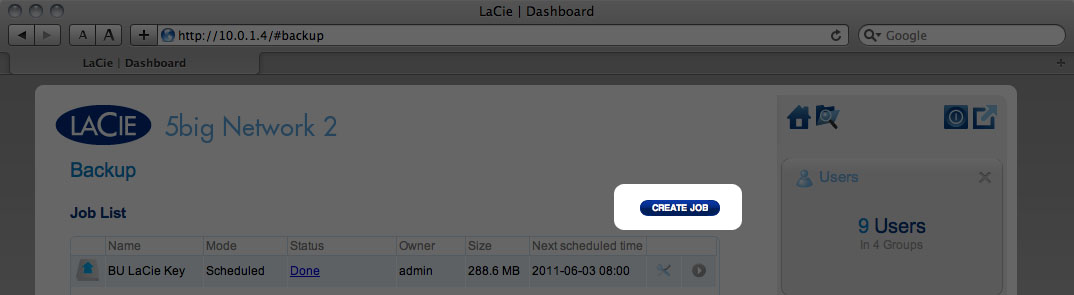
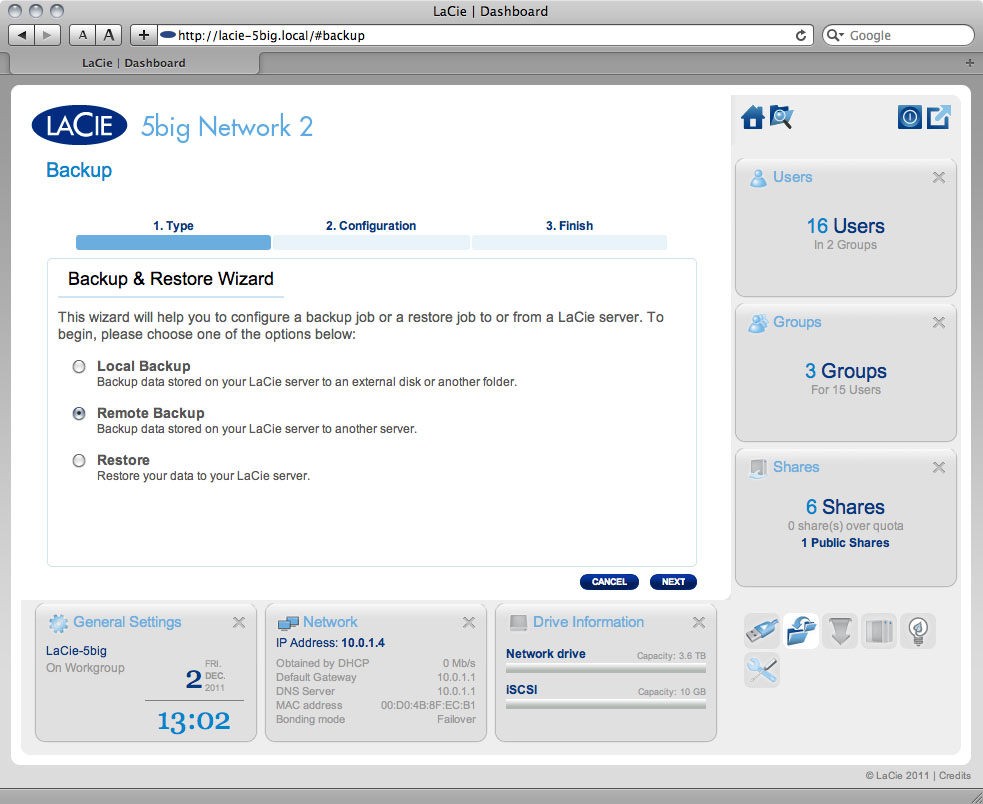
- Click the CREATE JOB button, then choose Backup.
- Next, choose Local backup, then click NEXT.
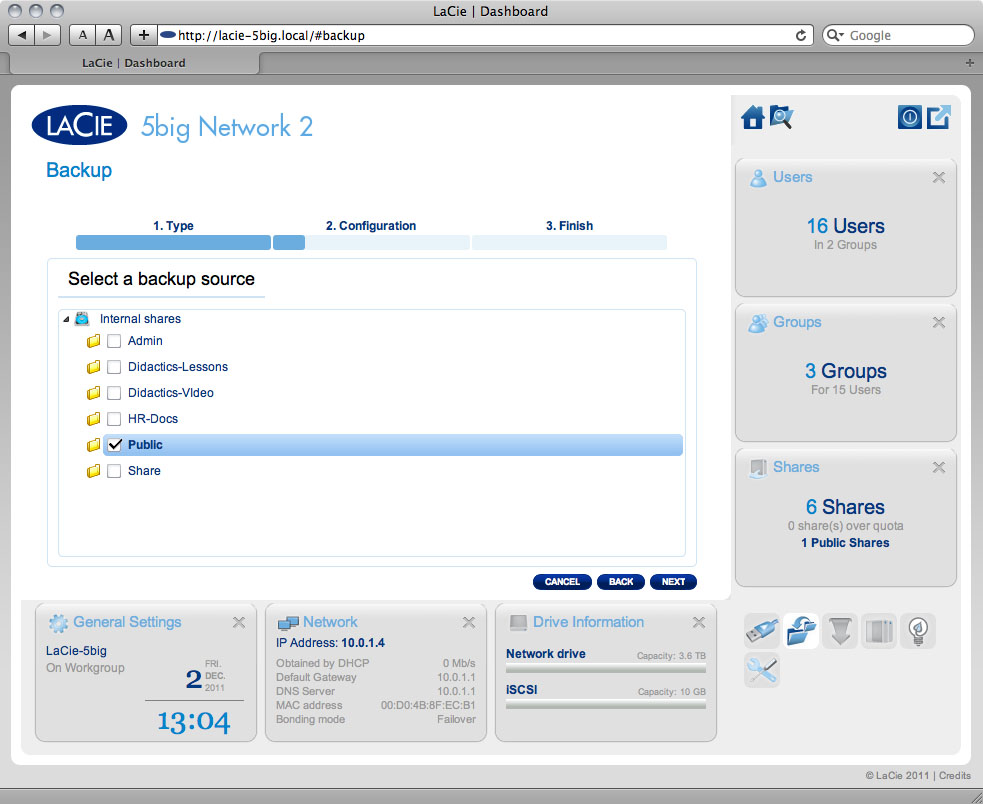
- In the next screen, choose one or multiple sources (ie, what will be backed up) in the left-hand column. Then choose a destination (ie, where the files will be backed up) in the right-hand column. To create a new folder, navigate to where you wish it to be created, then click the CREATE FOLDER button. Note that shares or folders to which you do not have write access will not be listed. Click NEXT.

- Select a backup type, then click NEXT.

- Full means the entire contents of the source folder will be saved each time the backup job runs. This method offers high security but may not be the most efficient use of storage capacity.
- Full (optimized) means that, after the initial full backup, only modified (or missing or new) files are modified in subsequent backups.
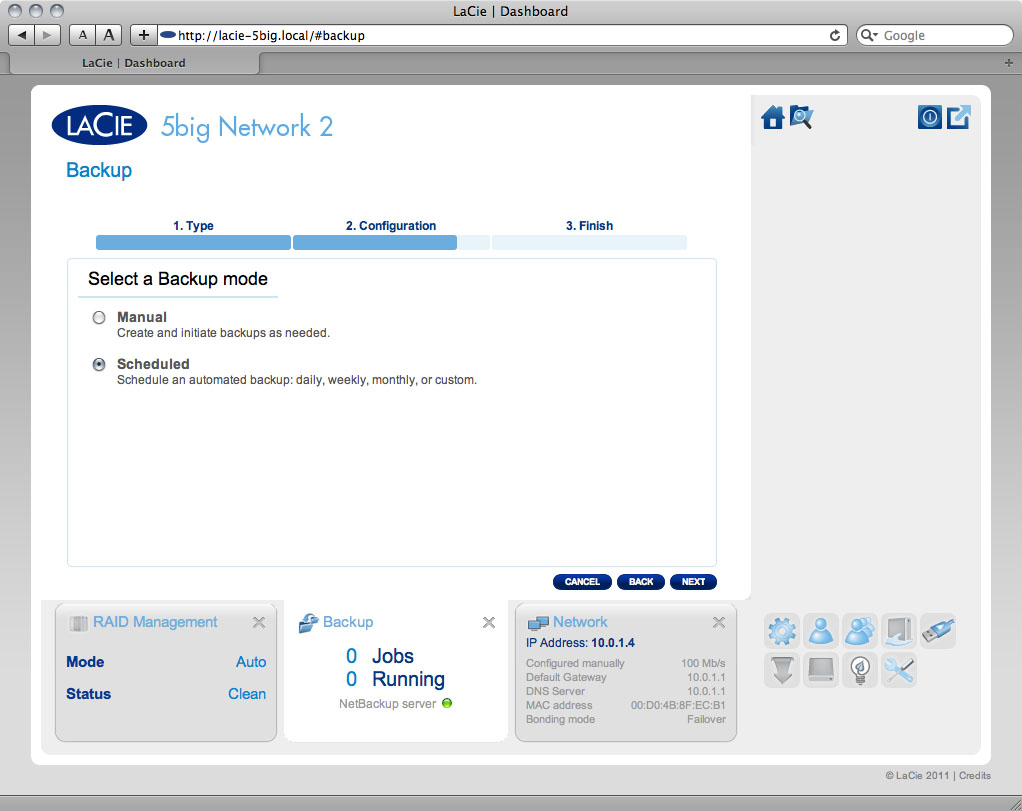
- Select a backup mode, then click NEXT.
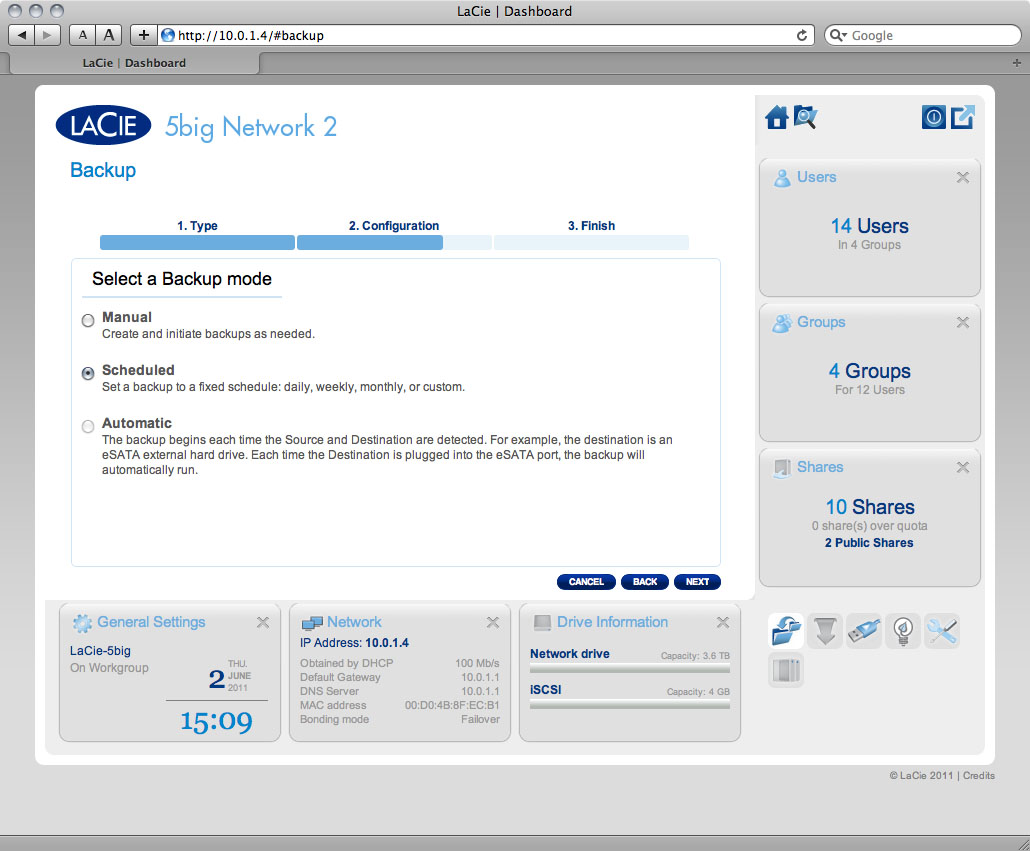
- Manual means that the backup job will only run when you execute it.
- Scheduled means that the backup job will run according to a schedule you set.
- Automatic is available only when the backup target is an external hard drive. This choice will cause the backup job to run automatically when the drive is connected to the NAS. If you select this mode, you will have the option of selecting Auto eject, which unmounts the external hard drive once the backup has completed.
- If you selected Scheduled backup mode in the previous screen, choose a frequency and a time, then click NEXT.
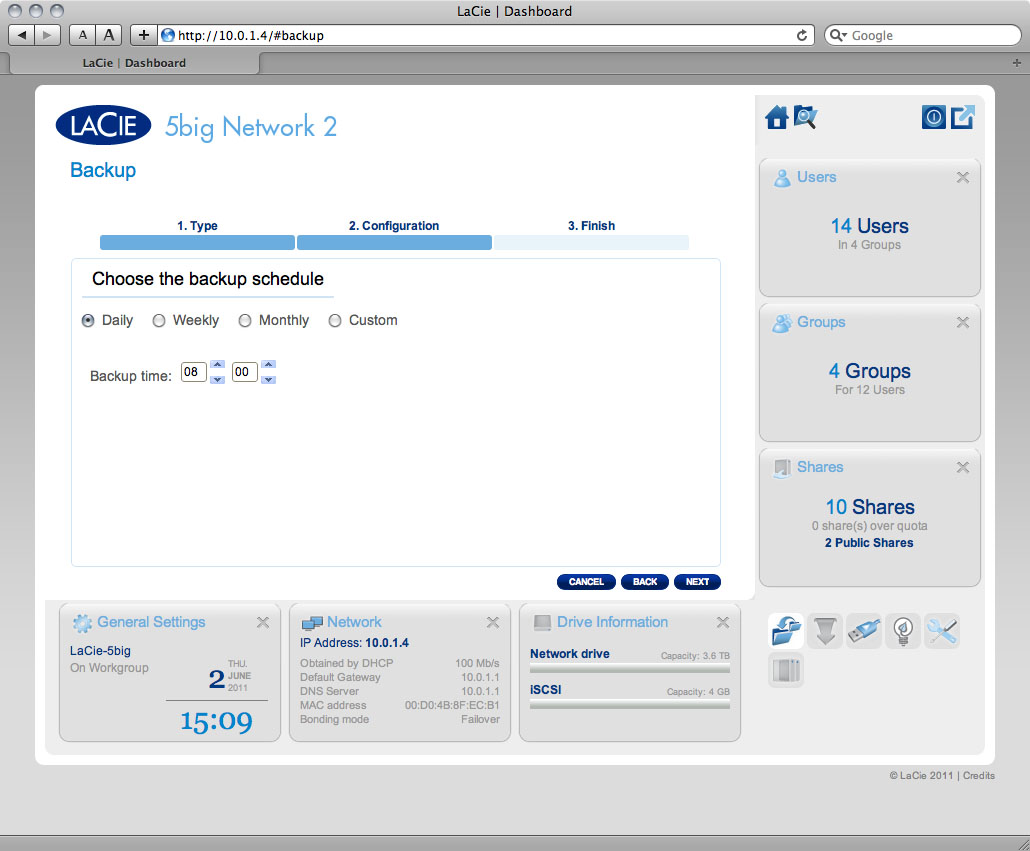
- In the next screen, type a name for the backup job, then click Next.
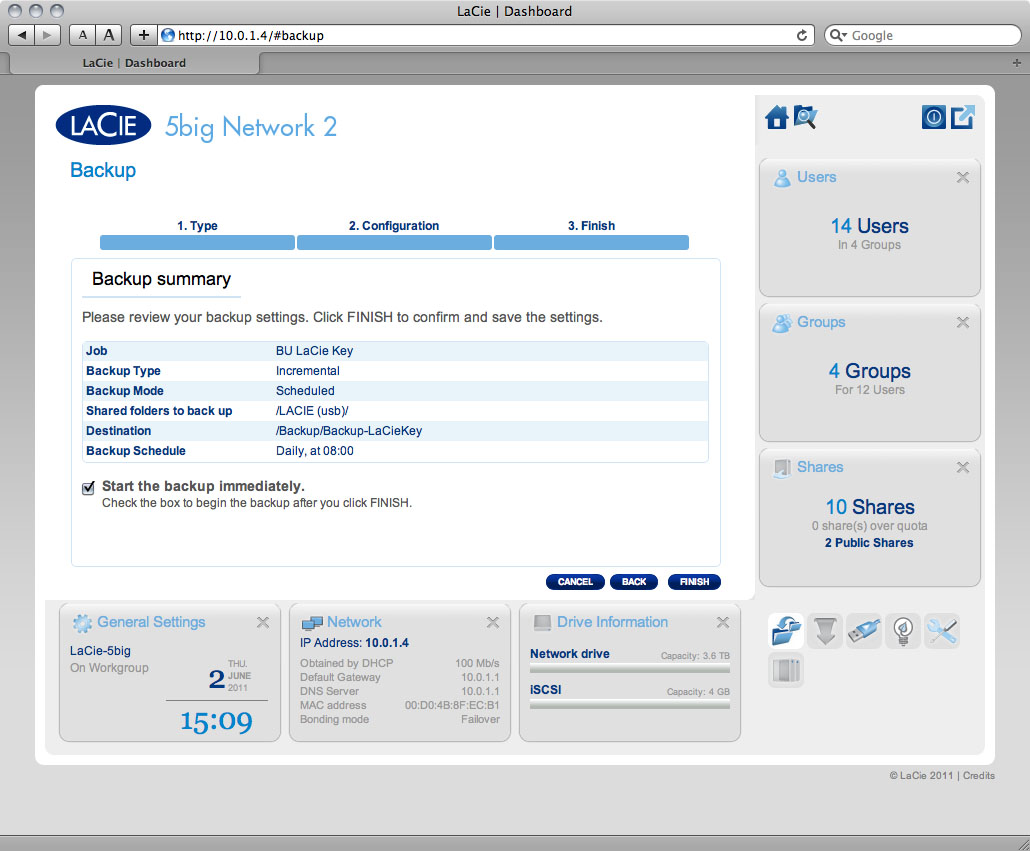
- The next screen will display the details for the job you've just created. Click FINISH.


Remote Backup
Remote backup will let you back up your NAS onto another NAS, whether it be on the local network or through the Internet. Note that the system will not store multiple iterations of the same backup, so a new backup will replace the existing one.
Compatibility Preconditions
- In the case of remote backup, both the source NAS and the destination NAS must be accessible to the Internet. You may have to open ports on your router of both networks in order to accomplish this. Refer to your router's documentation for details.
- The target NAS must be rsync compatible.
- A LaCie NAS must have the most up-to-date operating system and Network Backup server enabled; see Enable Network Backup Server.
About Network Backup Share
When a remote backup is performed, a share called Network Backup will be created on the target NAS which will contain the backed up files. This share will be not be password-protected by default.
Initiate a Remote Backup
- Click the CREATE JOB button, then choose Backup.
- Next, choose Remote backup, then click NEXT.
- In the next screen, choose a share or folder on your NAS you wish to back up, then click NEXT.
- In the next screen, choose whether the destination NAS is a LaCie NAS or non-LaCie rsync-compatible NAS. Then click NEXT.
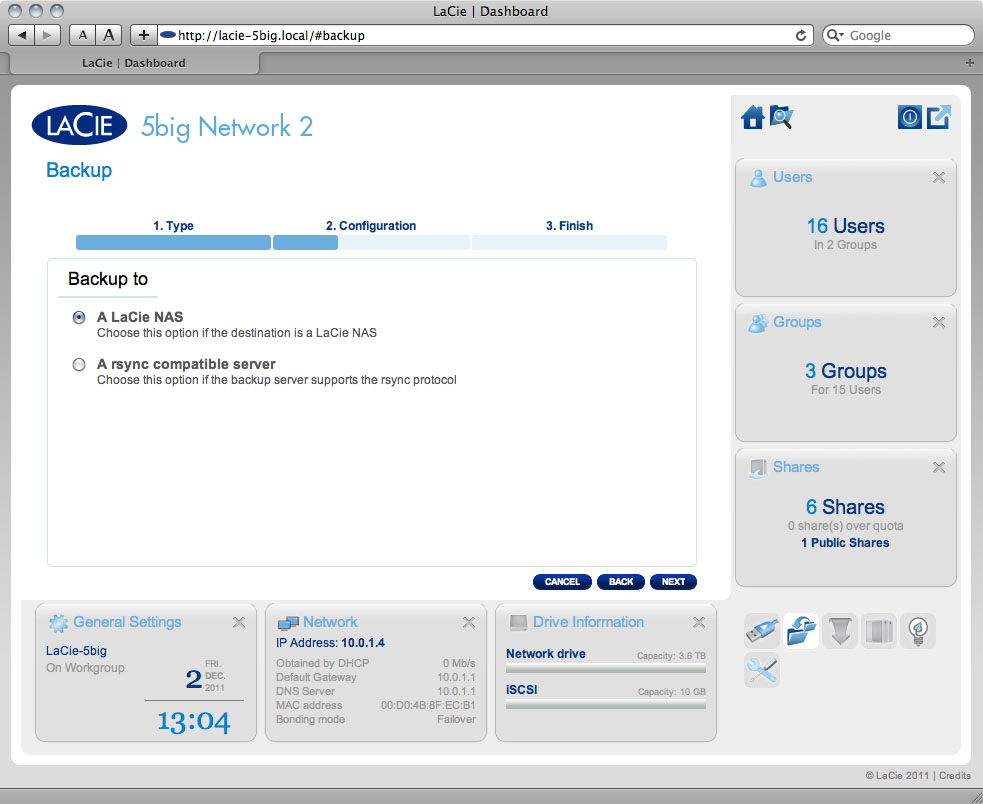
- If you choose LaCie NAS:
- In the next screen, the Dashboard will scan the local network for LaCie NAS.
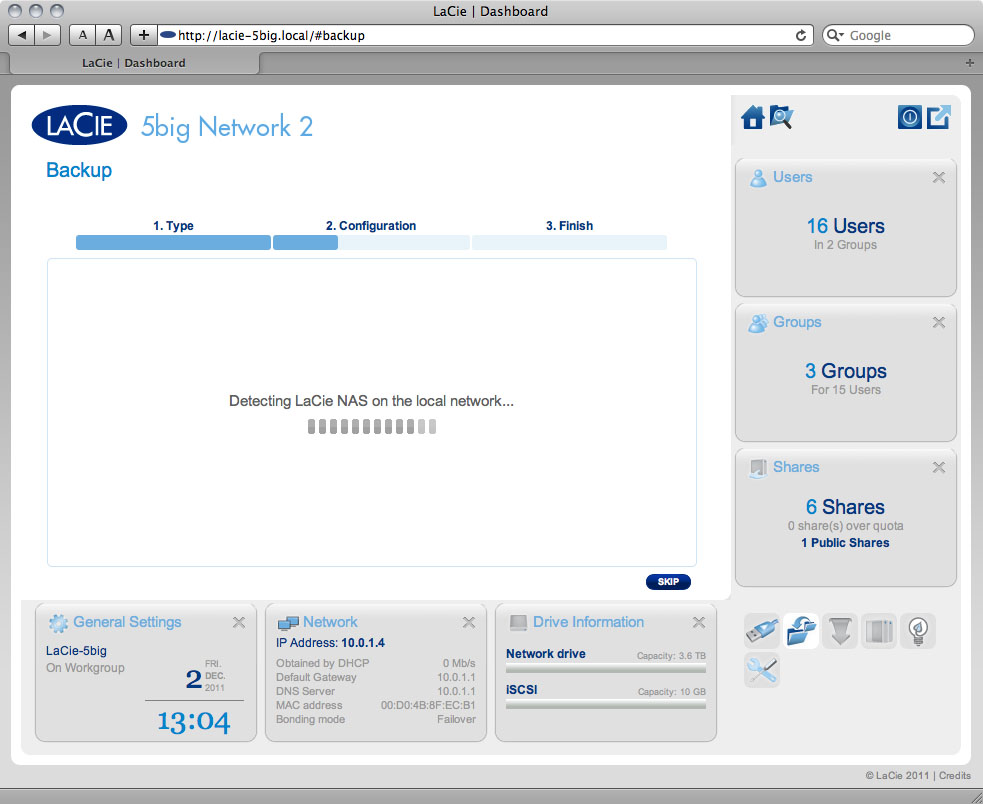
- In the next screen, the local LaCie NAS will be listed. If a NAS is listed but grayed out, this NAS either has an outdated operating system or does not have Network Backup server enabled.
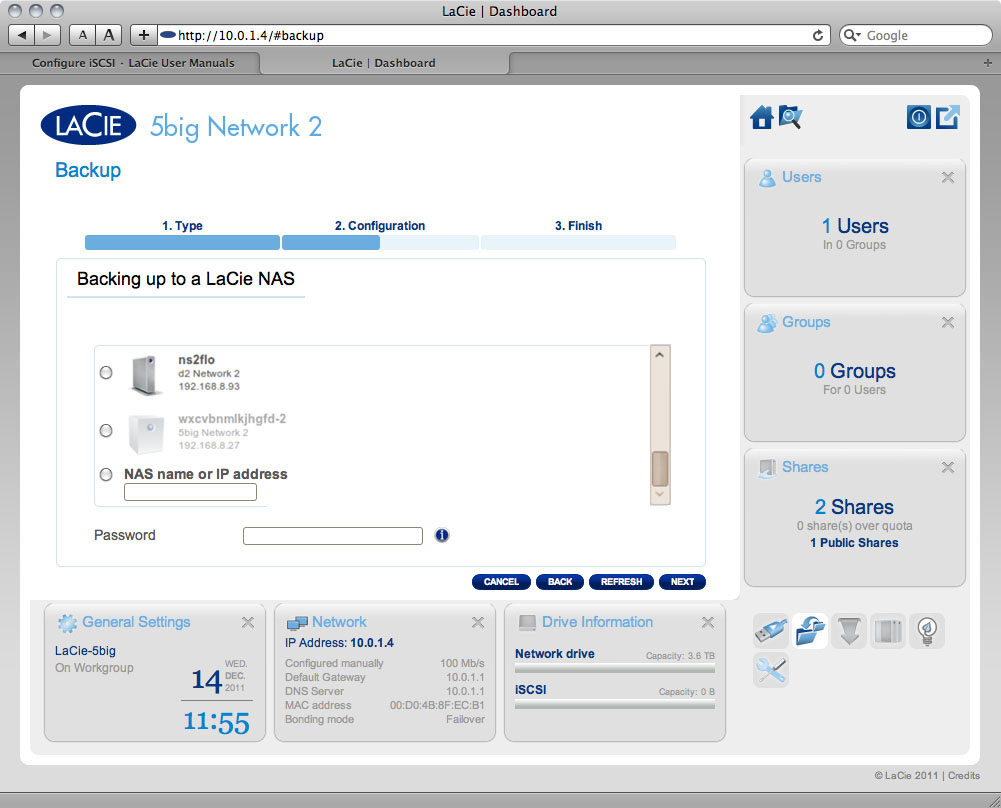
Either:- Select a NAS, then type in the password you created when activating Network Backup on the target NAS.
- Or, type in the public IP address of a remote LaCie NAS, then type in the password you created when activating Network Backup on the target NAS.
- For details on preparing the target NAS, see Enable Network Backup Server below.
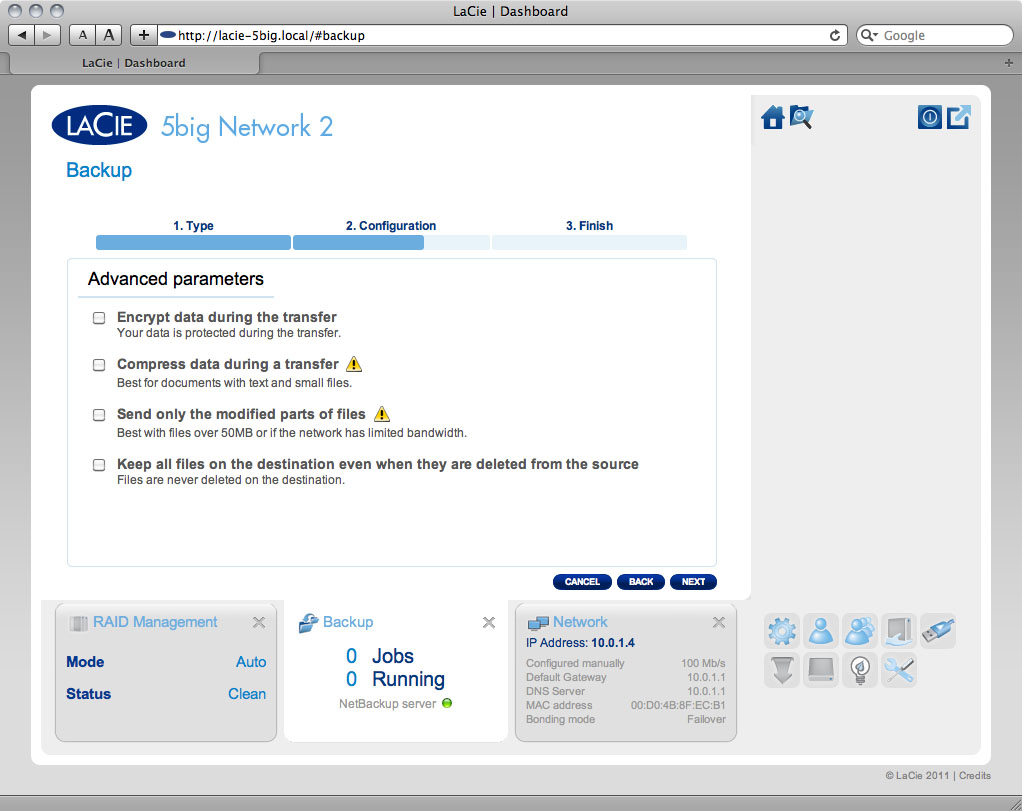
- The NAS will test the connection. If successful, you will see the advanced parameters screen. Otherwise, retry with modified settings.
- In the Advanced parameters screen, choose optional features such as encryption or compression, then click NEXT.
- In the next screen, the Dashboard will test the connection. If the connection succeeds, you will see the Select a Backup mode screen, which is explained in the local backup section of this user manual.
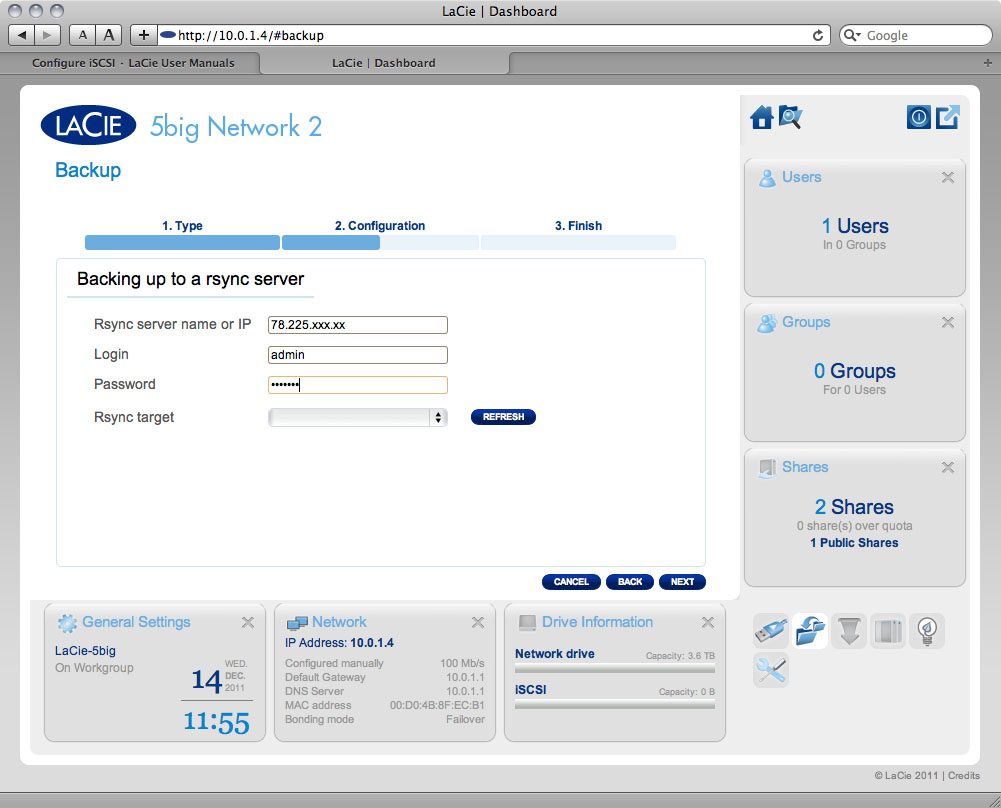
- If you choose non-LaCie NAS:
- Type the rsync server name or IP, login, and password, then select the rsync target. Click NEXT.
- The NAS will test the connection. If successful, you will see the advanced parameters screen. Otherwise, retry with modified settings.
- In the Advanced parameters screen, choose optional features such as encryption or compression, then click NEXT.
- In the next screen, the Dashboard will test the connection. If the connection succeeds, you will see the Select a Backup mode screen, which is explained in the local backup section of this user manual.
- The rest of the wizard follows the same process as for local backup.


Restore
Note: Remote NAS backups aren't available for file restoring by the Backup & Restore Wizard. To restore a file, access it on the target NAS using a file service (AFP or SMB).
- Click the CREATE JOB button.
- Choose Restore, then click NEXT.
- Select a restore type, either from an existing backup job, or from a backup folder. Click NEXT.
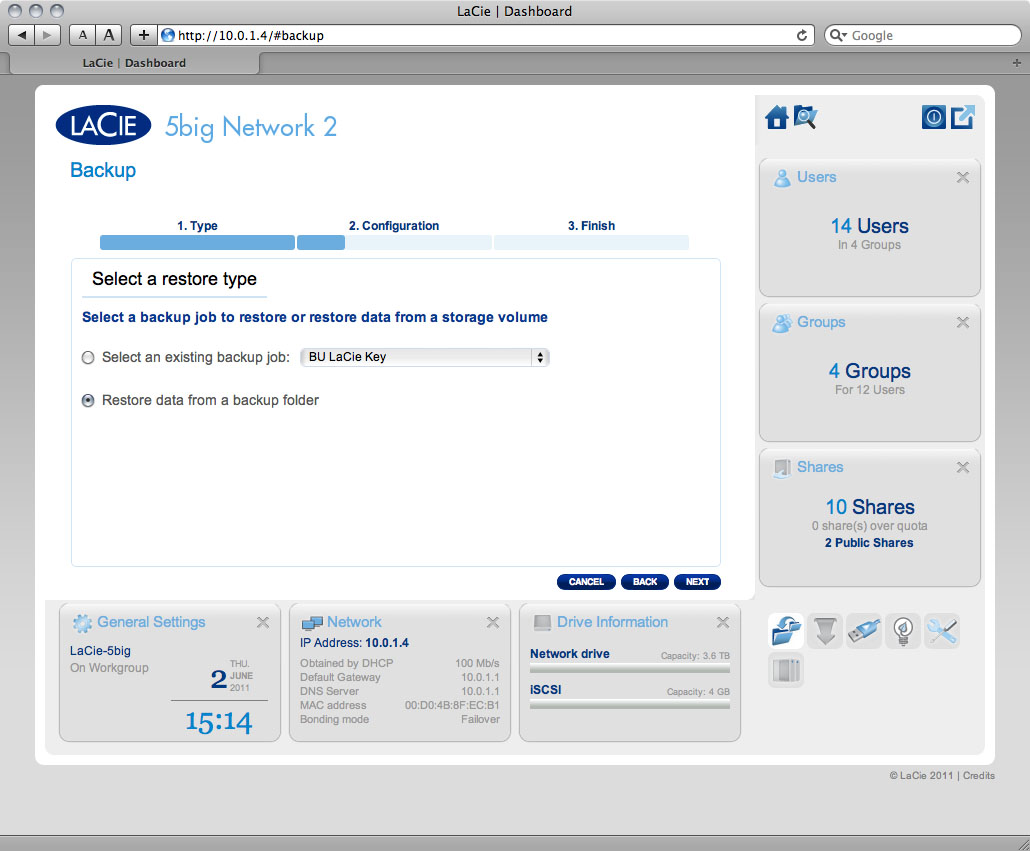
- If you chose to restore from an existing backup job, information about that job will be listed in the next screen for your confirmation. Click NEXT.
- If you chose to restore from a backup folder, the next screen will allow you to select the source from which you want to restore the data. Valid backups will have a red folder icon. Choose the backup directory, then click NEXT. Information about that backup source will be listed in the next screen for your confirmation. Click NEXT.
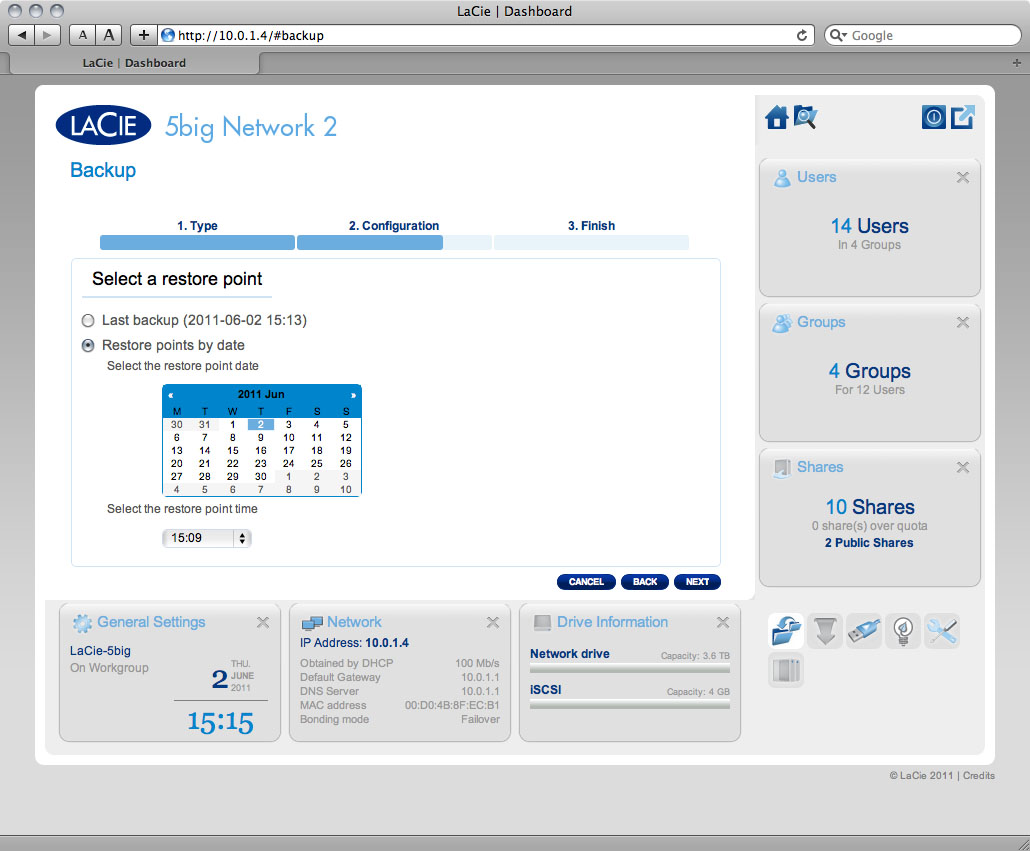
- In the next screen, choose a restore point. A restore point corresponds to a version of the directory for each time it was backup up. Choose to either restore the directory from the last backup, or by date. If you choose by date, select the date in the calendar, and the time from the drop-down menu. Then click NEXT.
- In the next screen, choose where to restore the backup.
- Restore to the initial place to save over the source folder with the backed up folder. This will erase the source folder contents.
- If you want to restore the backup to a specified folder, click this option, then click the BROWSE button. Navigate to the destination, then click APPLY.
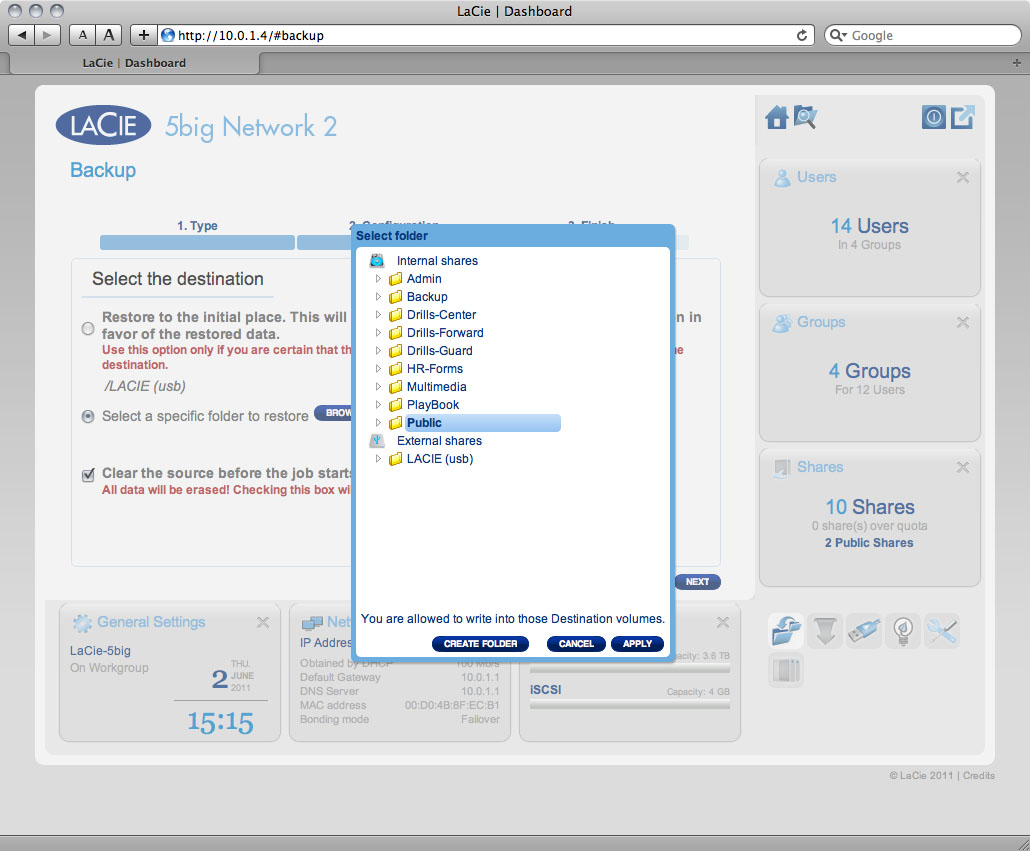
- You can also choose to clear the target folder before the job starts. All data will be erased in the target folder.
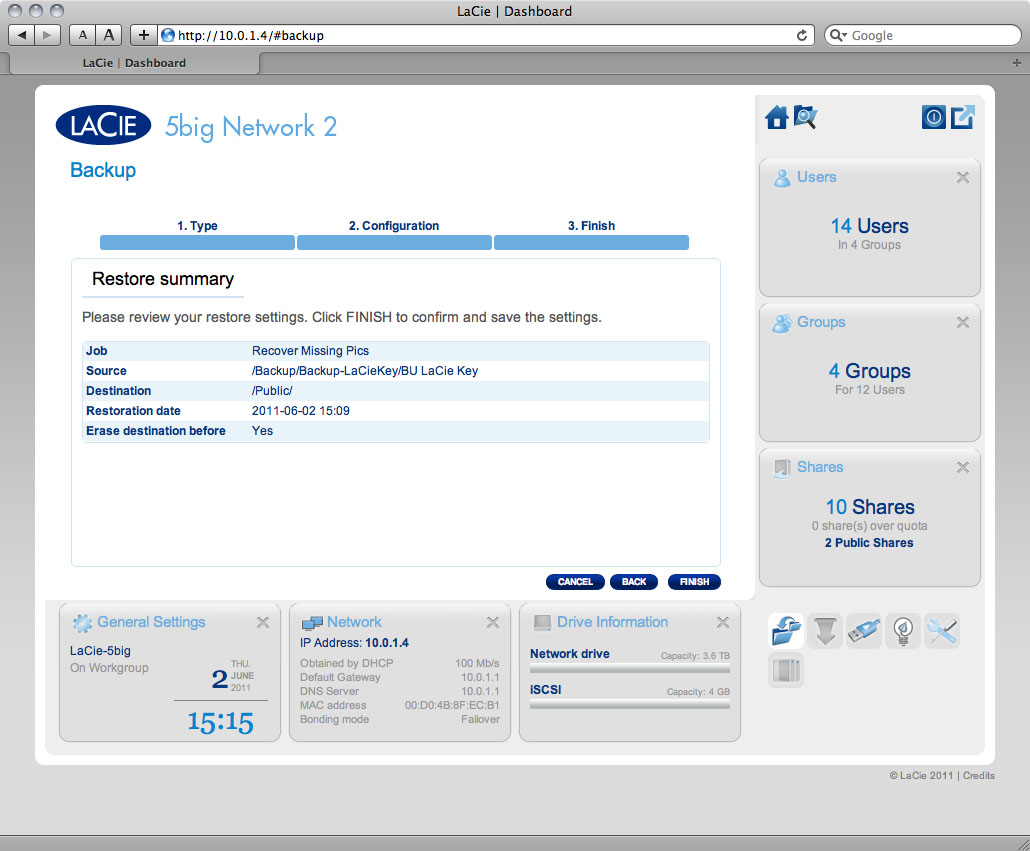
- In the next screen, name the restore job, then click NEXT.
- In the next screen, click FINISH.


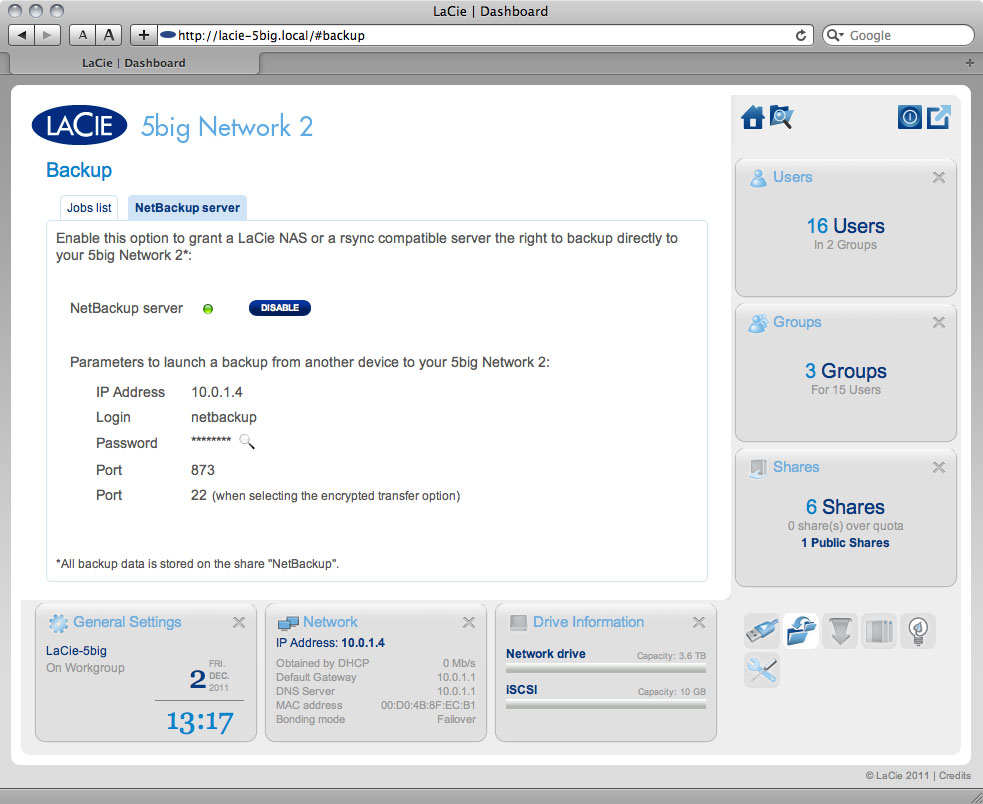
Enable Network Backup Server
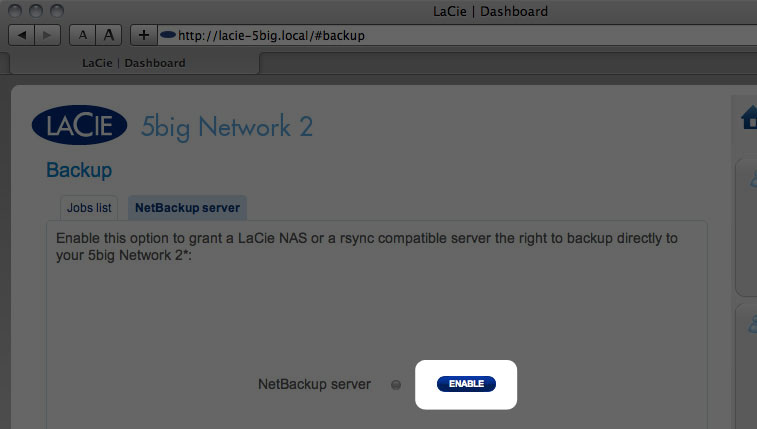
Your NAS can be used by another NAS, whether it's on the same network or is remote, as a target for backup. This function must be activated before it will function. A non-LaCie NAS must be rsync compatible. To activate the service:
- From Dashboard > Backup, click the Network Backup Server tab.
- Click the ENABLE button.
- Choose a password. This password will protect your NAS from unauthorized access through the rsync protocol.

- The next screen will list all the parameters you will need in order to create a backup job on the other NAS targeting your LaCie NAS. Note that you can click the magnifying glass to view the password.


Disable Network Backup Server
- From Dashboard > Backup, click the Network Backup Server tab.
- Click the DISABLE button.
- Choose an option:
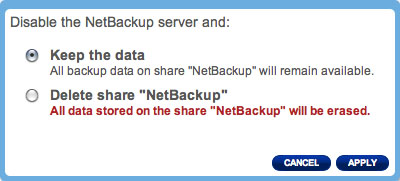
- Keep the data. All backup data on the share Network Backup will remain available.
- Delete share “Network Backup”. All data stored on the share Network Backup will be erased.

Modifying Existing Backup Jobs
Jobs you have created will be listed in the table on the Backup page. This table will display useful information about the job and allows you to manage the jobs. Click the configuration icon in the far-right column for options. You can get detailed information on a job, start it, delete it, or enable/disable it.
If you disable a scheduled job, it will not run until it is enabled.

Dashboard - External Ports

This page provides you with information on devices connected to one of the LaCie NAS' USB or eSATA expansion ports.
USB Printer
Your LaCie NAS features a printer server. To activate it, click the Activate the printer server check box. Then power on the printer and connect it to the NAS via a USB expansion port on the rear of your LaCie NAS. Once connected, the printer will be listed on the Dashboard - External Ports page, and the printer will become available throughout your network. Correct printer drivers must be installed on the host computer.

Important info: For multi-function printers, only the print feature is supported. If your printer has a scan feature, for example, it will not work when connected to LaCie NAS.
In addition, only PostScript printers are supported. If your printer does not display on the Dashboard - External Ports page, it is likely that the printer does not support PostScript printing. This is frequently the case with multi-function and photo printers. LaCie cannot guarantee that your printer supports the proper protocols to make it a networked printer.
In addition, only PostScript printers are supported. If your printer does not display on the Dashboard - External Ports page, it is likely that the printer does not support PostScript printing. This is frequently the case with multi-function and photo printers. LaCie cannot guarantee that your printer supports the proper protocols to make it a networked printer.
External Drives
Connect an external hard drive to the LaCie NAS via either USB or eSATA, and it will be listed on this page. Once connected, it will behave similarly to the local shares on your LaCie NAS. It will be listed on the Dashboard - Shares page and can be accessed using your operating system's file system (Explorer Window for Windows users, and Finder for Mac users). However, external hard drives are always fully public on the network, quotas cannot be assigned to them, and their names cannot be changed.
Click the Multimedia Indexation box if you wish your DLNA devices to be able to access files on the external USB or eSATA hard drive connected to the LaCie NAS. Note that the Multimedia service must be activated on the Dashboard - General Settings page.

To avoid damaging your external hard drive's file system, click the EJECT button before disconnecting it from your LaCie NAS.

Technical note: External USB or eSATA hard disks must be formatted in one of the supported systems to be compatible with your LaCie NAS: MS-DOS (FAT32), NTFS, HFS+ (non-journaled only), EXT3, or XFS.
Dashboard - Network
Standard Tab

IP Configuration
Choose between Configure using DHCP and Configure manually. If your network is DHCP-enabled, as are most consumer networks, the LaCie NAS will automatically be assigned an IP address and other values. As a result, most users will see that the table has been filled in with values. If you select Configure Manually, you will be able to modify the table values to conform to your non-DHCP-managed network.
Remote Access
Advanced Tab

Proxy Configuration
Your LaCie NAS can be configured to connect to a proxy server. First activate the feature by clicking the Enable proxy box, then fill in the proxy server address, port, and optional authentication information and click APPLY.
SMTP Configuration
To permit your LaCie NAS to send alert emails to users, configure the SMTP settings in this section. Verify that the alert system works by clicking the Send a verification email box, inputting an email address, then clicking the APPLY button.
Bonding Tab (5big Only)

This section displays features made available to the 5big Network 2 when it is connected to the network via two Ethernet cables. In the first two boxes, information about LAN1 and LAN2 are displayed.
In the third box, labelled Bonding, you can select how the 5big will use the dual LAN connection. Choose from:
- No bonding (LAN1 only)
- Load balancing: Load balancing distributes traffic over both LAN connections to optimize data transfers. This feature helps to achieve maximum resource use, optimal throughput, minimize response time, and avoid overload.
- Failover: Failover protects the 5big's connection to the network in case the primary (LAN1) connection fails. In this case, network traffic will automatically be routed through the LAN2, preventing downtime or file transfer disruption.
Dashboard - Eco Management

- Status light on: Uncheck this box to turn off the front blue blue light. Note that this will not disable warning indicators or rear disk LEDs (2big/5big only).
- Turn off hard disk: Set the duration of inactivity after which the disks will revert to Eco mode, which spins down the disks and reduces power consumption. The product leaves Eco mode automatically when a request is sent to the drive.
- Deep sleep enabled: Deep sleep means that the drive will enter a very low energy consumption mode when you activate it using the Shutdown Options button on the Dashboard. This mode can also be triggered by clicking and holding the front blue button. To wake the drive from Deep Sleep Mode, press the blue button or use the Wake on LAN function in the LaCie Network Assistant (see Wake on LAN).
Important info: When deep sleep mode is activated, all processes, including downloads and backups, will be terminated.
- Scheduled power on/off: Set the drive to activate/deactivate deep sleep mode at a certain time to save energy.
- UPS Management: Your LaCie NAS supports UPS (uninterrupted power supply) management. If you connect a supported UPS device to the NAS' USB port, in the Dashboard you will see modifiable parameters. In the left-hand column, a bullet will indicate power supply status.
- If green, power is being supplied through the power cable.
- If gray, power is not being supplied through the power cable.
On the right, under the heading Battery threshold level (%), you can choose a minimum percentage of battery power at which the LaCie NAS will automatically enter stand-by mode.
Below, in the case that battery power is completely drain and the drive is automatically shut down, you can elect to have the drive restarted once power has been restored.
For a list of supported UPS devices, click here.
Dashboard - RAID Management
See Manage RAID.
Dashboard - File Browser

The Dashboard features an interactive file browser that allows you to manage and transfer files via HTTP. Access the File Browser by clicking its icon in the upper right-hand corner of the Dashboard.
The File Browser allows you to transfer, copy, and delete files, as well as view photos in thumbnails and even stream multimedia content such as mp3 or view photos. It is thus a convenient way to interact with files stored on your external hard drives through the network, whether the connection be through the local network or through the internet (see Remote Access). Also, since the File Browser permits faster file transfers than drag-and-drop (SMB), it is most effective for transferring large files.
The File Browser is composed of four parts:
- The toolbar allows you to perform a range of functions, such as changing the way files are displayed and uploading files to streaming files and creating folders.
- Folders shows the folder structure on the selected share.
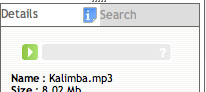
- Details displays information on a selected file, such as name, thumbnail (image files), file type, dimensions (photos), or duration (videos), while Search allows you to search for files based on file name.
- This section displays the files contained in a selected folder. To view the files as thumbnails, click Thumbs in the Tool bar.

You can view photos full-sized as well as stream certain types of music and text files. Select the file, then:
- Photo: Click the View button in the toolbar.

- Music: Click the play button in the Details panel.
- TXT files: Click the Edit button in the toolbar.


© LaCie 2024
Last modified : Jun 06, 2016