User Tools
Site Tools
d2, 2big, and 5big Network 2 (OS 2.2)
User Manuals Print page
 Save page as PDF
Table of Contents


Table of Contents
Manage RAID
Note: This chapter refers to the 2big and 5big Network 2 only.
Your 2big or 5big Network 2 feature a robust RAID management system that will allow you to choose and manage the RAID mode most optimized for your data.
Modify RAID Mode
Navigate to the Dashboard - RAID Management page. This page consists of the following elements:
| 5big | 2big |
|---|---|
 |  |
- RAID mode: This box shows you the current RAID scheme for your NAS, as well as the number of disks involved in the scheme.
- RAID status: This box lets you know whether the array is healthy, degraded, or synchronizing. A yellow warning icon will inform you if your array is unprotected in the case of a single disk failure. This may be due to a degraded protected RAID array or if you have chosen RAID0.
- Drive map: Click the illustration of the disk to see which slot in the NAS the disk occupies.
RAID Setup Wizard
Click the MANAGE button to launch the RAID Setup Wizard. In the next screen, choose between Automatic RAID (5big only) and Manual RAID.

Automatic RAID (5big Only)
In automatic mode, the RAID mode will be chosen automatically to ensure constant protection with maximum capacity. At least two disks must be installed in your 5big for this option to work. This way, you can increase the number of disks in your NAS, or rotate in new, higher-capacity disks, without ever losing your data. The Wizard will also tell you know if you're about to choose a destructive (ie one in which data will be lost) RAID change, such as moving three disks in RAID5 to four disks in RAID0.
Caution: If the Wizard warns you that a destructive RAID change will occur, cancel the Wizard and perform a backup before proceeding with Automatic RAID mode.
Once you select Automatic RAID, click NEXT, then click FINISH to initiate the Automatic RAID mode, your NAS will stop and then restart services. It will rebuild the array if necessary.
Manual RAID
This method allows you to manually choose the RAID level. Click NEXT to continue. In the next screen, you can choose how many disks you wish to include in the RAID array. Disks not involved are spares that can be added to the array when and if you choose.

Click NEXT.
In the next screen, choose a RAID level. Clicking the RAID mode's button will give you an explanation of its strengths and weaknesses.
 |  |
| 5big | 2big |
|---|
If you select a RAID mode under the heading Without data loss, converting the new mode will not erase files stored on your LaCie NAS. If you select a RAID mode under the heading With data loss, converting to the new mode will erase files on the shares (but Dashboard configuration will not be affected).
In the next screen, review the information, then confirm the RAID change by clicking the FINISH button. Then in the next screen, click the FINISH button once again, then confirm by clicking YES.

The Dashboard will become unavailable while the RAID mode is changed.
Rebuilding Times
Rebuilding a protected RAID array takes many hours, depending on the capacity of the disks and your NAS' available resources (concurrent tasks such as backups or torrent downloads will slow rebuilding). Changing to an unprotected RAID mode (ie RAID0) takes less than a minute. Note that data is accessible during rebuilding.
About RAID Modes
Refer to the table below for an overview of the different RAID modes, and see the descriptions for details. Note that this information is also explained in the RAID Setup Wizard on the Dashboard (see above for details).
| RAID Mode | Capacity | Protection | Product | Factory Default |
|---|---|---|---|---|
| RAID 0 | 100% |  | 2big/5big | 2big |
| RAID 11 | 50% |  | 2big/5big | – |
| RAID 5 (default) | 80% |  | 5big | 5big |
| RAID 5+Spare | 60% |  | 5big | – |
| RAID 6 | 60% | | 5big | – |
1 RAID 1 is only available for the 5big if there only two disks are installed.
RAID0 (2big and 5big): RAID 0 (also called Spanning mode in some LaCie devices), is the fastest RAID mode. In a RAID 0 array, the available capacities of each disk are added together so that one logical volume mounts on the computer. It offers the best performance but no protection in the case that a disk fails.
Caution: In a RAID0 array, if one physical disk in the array fails, the data of all disks becomes inaccessible because parts of the data have been written to all disks.
| 2big | 5big |
|---|---|
 |  |
RAID1 (2big and 5big [only if two disks are installed]): RAID 1 is a secure RAID mode that is available if the 5big Network 2 has only two disks installed. RAID 1 provides data safety since all data is written to each disk at the same time. In the event of a single disk failure, data remains available on the other disk. Due to the time it takes to write the data twice, performance is slightly reduced. RAID 1 is a good choice when safety is more important than speed. However RAID 1 also reduces the available disk space by 50% due to the need to write each bit of data on each hard drive.

RAID5 (5big only): In RAID 5, data is striped across all disks (minimum of three) and a parity block for each data block (P in the illustration below) is written on the same stripe. If one physical disk fails, the data from the failed disk can be rebuilt onto a replacement disk. No data is lost in the case of a single disk failure, but if a second disk fails before data can be rebuilt to a replacement drive, all data in the array will be lost.

RAID5+Spare (5big only): RAID 5+Spare is a RAID 5 array in which one disk is used as spare to rebuild the system as soon as a disk fails. At least four disks are required. If one physical disk fails, the data remains available because it is read from the parity blocks. Data from a failed disk is rebuilt onto the hot spare disk. When a failed disk is replaced, the replacement becomes the new hot spare. No data is lost in the case of a single disk failure, but if a second disk fails before the system can rebuild data to the hot spare, all data in the array will be lost.

RAID6 (5big only): In RAID 6, data is striped across all disks (minimum of four) and a two parity blocks for each data block (p and q in the illustration below) is written on the same stripe. If one physical disk fails, the data from the failed disk can be rebuilt onto a replacement disk. This Raid mode can support up to two disk failures with no data loss. RAID 6 provides for faster rebuilding of data from a failed disk.

Replacing Disk
Disk Removal
If your array is protected, ie in a RAID1 or RAID5/6 (5big only) mode, you can remove a disk without damaging the array and losing data, a process also referred to as “hot-swapping”. However, if you remove a disk from an unprotected (ie RAID0) array, you may lose data.
Caution: After continuous use of the NAS, drives may be hot. Use caution when removing.
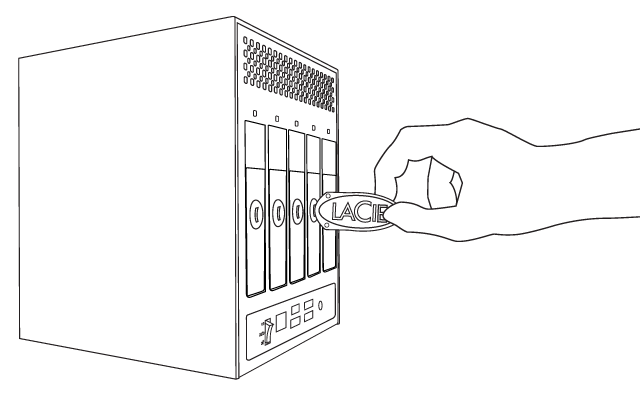
- The drive tray may be locked. To unlock it, use the included drawer key to turn the lock until the slot is vertical.
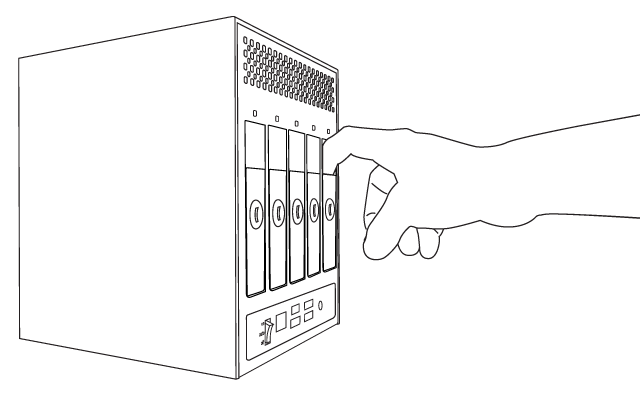
- Draw out the drive tray by inserting your finger into the space behind the drive tray handle and pulling to disengage the drive.
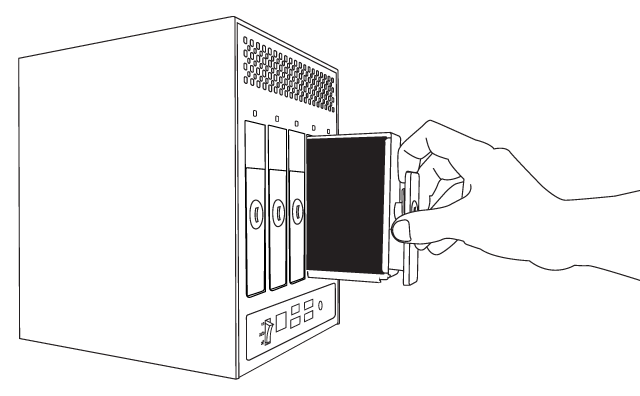
- Grasp the drive tray handle and carefully extract the drive.


Disk Insertion
Important info: In the event that an individual hard disk fails in your LaCie NAS, please contact your LaCie reseller or LaCie Customer Support. Please replace a defective hard drive only with a new drive provided by LaCie.
Replacing a drive involves two main steps, installing the new drive and claiming the new disk on the Dashboard - RAID page (see below). Note that the new disk must have equal or greater capacity than the disk it is replacing.
- Carefully insert the drive tray into an empty drive bay. When the drive tray is most of the way in and you feel resistance, press the drive tray handle firmly until you feel the drive snap into place and the drive tray handle is flush with the back of the NAS.
- Use the drawer key to lock the drive.
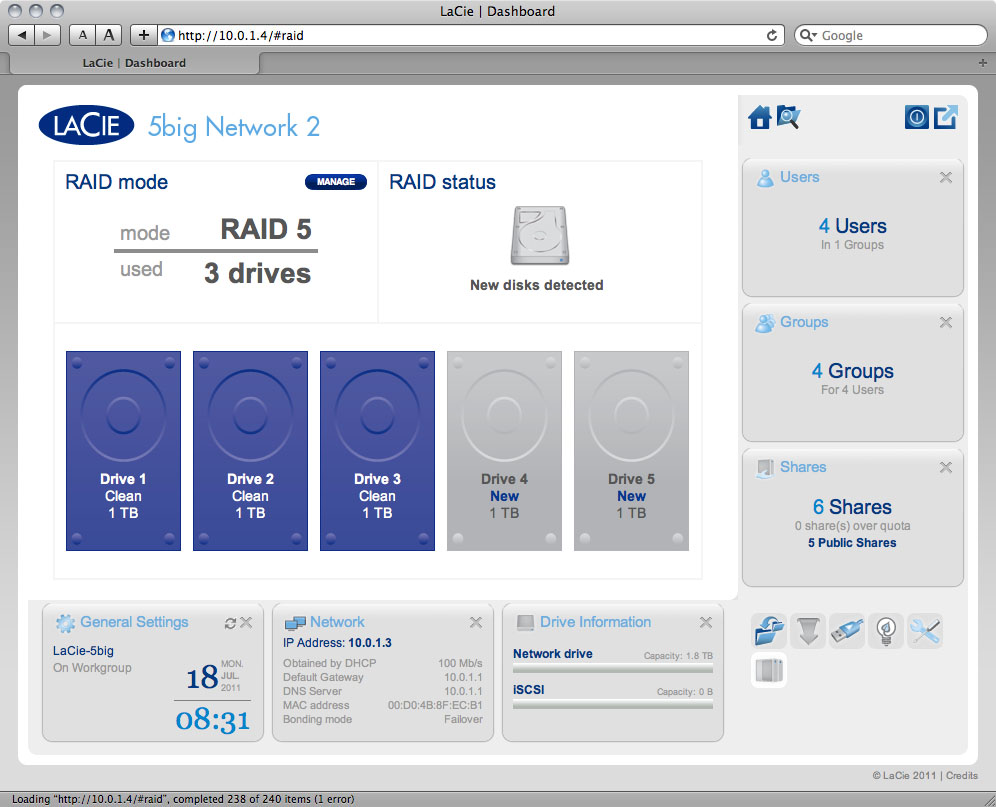
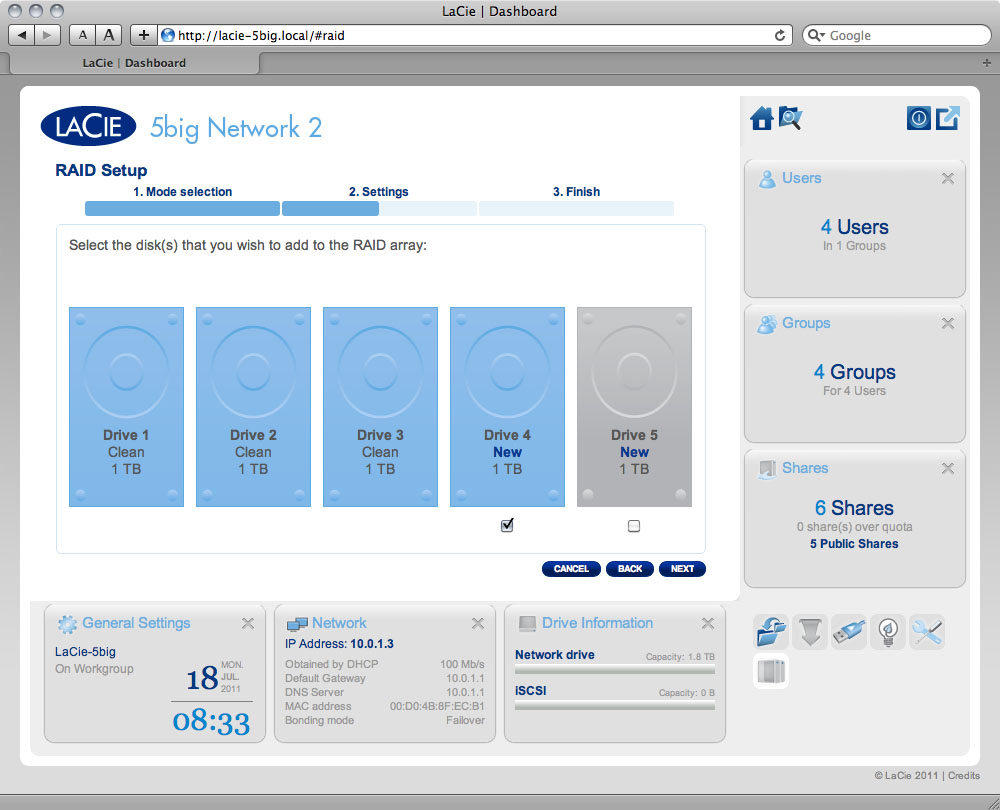
- Navigate in the Dashboard to the RAID Management page. In the drive map, the new disk will be represented by a lighter blue color than the already-claimed disks and will be labelled New (see screenshot below).
If your RAID array is in automatic mode (5big only), you will see the text New disk detected in the RAID status box. Click the EXPAND button to add the disk to your array and it will begin to rebuild.
If your array is in manual mode:- Click the MANAGE button.
- Click the box under the new disk, then click NEXT.
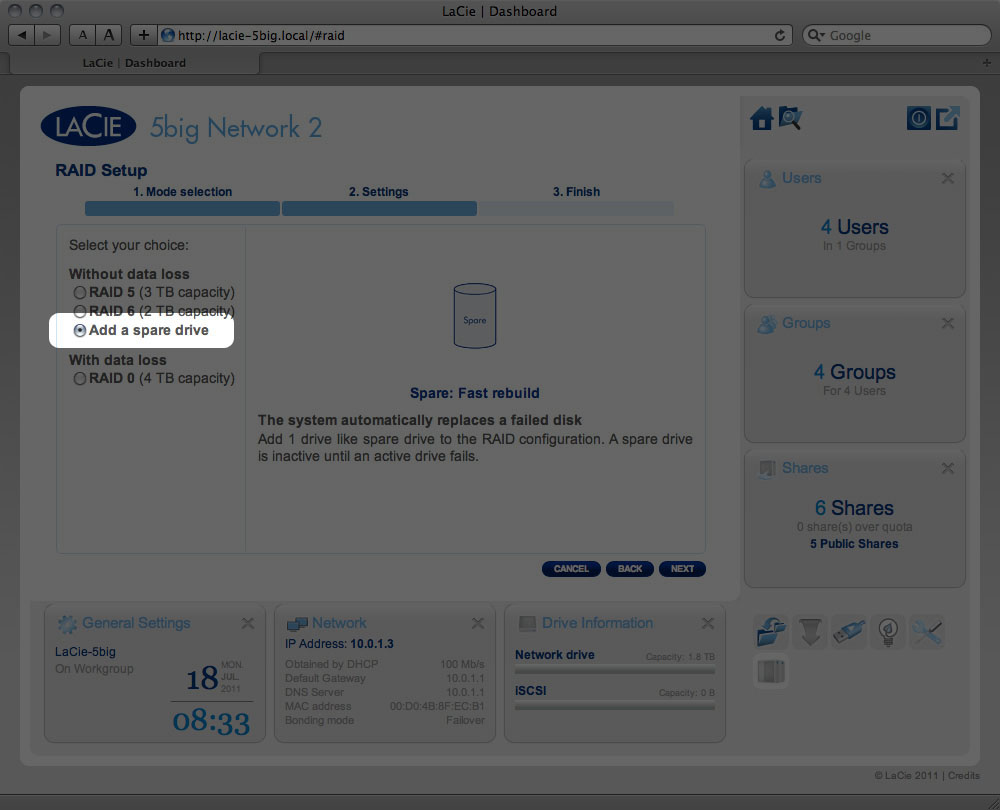
- Choose a RAID level, then click NEXT. Note that you can choose to add the new disk as a spare. If you leave a disk as a spare and one of the disks in the array fails, the array will automatically be rebuilt using the spare. This method assures continues data access even in the case of disk failure, but doesn't allow you to use the capacity of the spare disk.
- In the next screen, review the information, then confirm the RAID change by clicking the FINISH button.
- Then in the next screen, click the FINISH button once again, then confirm by clicking YES. The Dashboard will become unavailable while the RAID mode is changed. The new disk will be added as a part of a RAID array and will begin to rebuild. If the new disk is a spare, no rebuilding will occur.


© LaCie 2024
Last modified : Mar 01, 2013