User Tools
Site Tools
d2, 2big, and 5big Network 2 (OS 2.2)
User Manuals Print page
 Save page as PDF
Table of Contents


Table of Contents
Connect to a Computer via USB
Note: This chapter refers to the d2 and 2big Network 2 only.
This chapter explains how to connect your LaCie d2 or 2big Network 2 to a computer via USB. For details on connecting your NAS to a network, see Connect to the Network.
If your network is limited to 10/100 Mbit transfer speeds or if you use WiFi, the USB connection will generally permit faster transfer times. In this case, LaCie suggests that as a first step you copy large quantities of files from your computer to your LaCie NAS via USB, then as a second step, connect it to the network.
Connection Steps
Follow these steps to connect your LaCie NAS to a computer via USB:
- You must successfully connect your NAS to the network (see Connect to the Network) and complete the Setup Wizard on the Dashboard (see Dashboard - Accessing before connecting the d2 or 2big Network 2 to your computer via USB.
- You must also allocate space to the USB share before continuing. To do so:
- While the NAS is still connected to the network, access Dashboard - Drive Information.
- In the drive table, in the USBShare row, click the configuration icon.
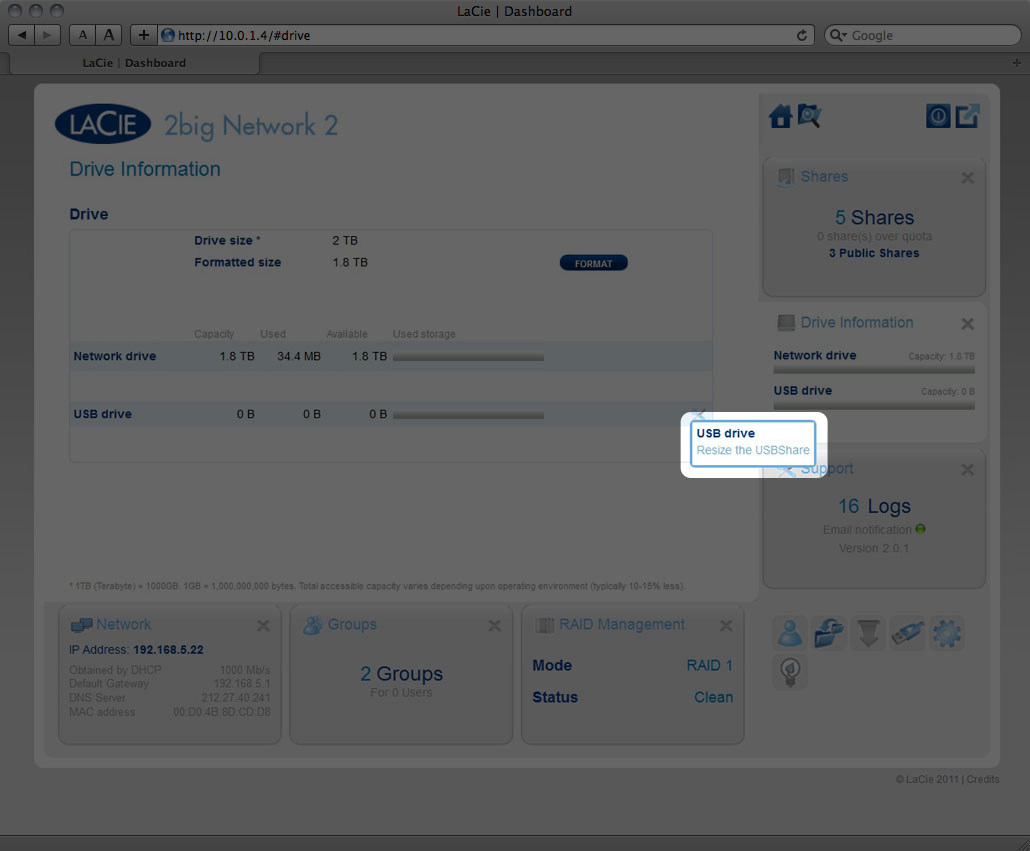
- Click Resize USBShare.
- Drag the slider to change the amount of space allocated to USBShare (maximum is 500GB). After you click the slider, press the right and left arrow keys on your keyboard to fine tune.
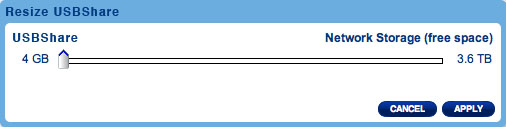
- Click the Apply button, then confirm in the popup window.
- Disconnect the product's Ethernet cable from the network, then turn it off using the power button. Wait for it to fully shut down. When the front blue light shuts off, move on to the next step.
- Connect the USB cable to the NAS and to your computer.
- Turn on the NAS using the power switch on the rear of the product. The LED will begin blinking.
- USBShare will mount on your computer. Transfer files from your computer to the NAS normally.


Technical note: USBShare, when it is created by the NAS operating system, is formatted in MS-DOS (FAT32) for use with PCs and Macs. To format USBShare into a different file format (NTFS or HFS+), you can do so using your computer's native disk management application.
Disconnect the USB Connection
USB, FireWire, eSATA, and Thunderbolt external devices feature “plug & play” connectivity, which means that your drive can be connected and disconnected while the computer is running. To prevent failures, however, it is important to follow these steps when disconnecting your LaCie hard disk.
Windows XP Users
From the System Tray (located in the lower right-hand side of your screen), click the Eject icon (a small green arrow over a hardware image). A message will appear, listing the devices the Eject icon controls (it should say, “Safely remove…”). Click on the LaCie hard disk in this prompt.

This message will appear: “Safe to Remove Hardware” (or similar). It is now safe to disconnect the device.
Windows Vista & Windows 7 Users
From the System Tray (located in the lower right-hand side of your screen) click on the plug icon (note the white check mark inside a green circle).

A message will appear, detailing the devices that may be safely unmounted.
Select Eject for the device you wish to unmount. A message will appear notifying you that it is safe to remove the device.

Mac Users
Drag the hard drive icon to the trash. (The icon pictured below is a generic USB device icon. Your drive may be represented by an icon that looks like the drive itself.)

When the icon disappears from the desktop, the drive can be disconnected.
© LaCie 2024
Last modified : Mar 01, 2013