User Tools
Site Tools
d2, 2big, and 5big Network 2 (OS 2.2)
User Manuals Print page
 Save page as PDF
Table of Contents


Table of Contents
Adding Disks to an Empty Enclosure
Note: This section only applies to new, diskless LaCie NAS enclosures. When following the directions below, please install one or more disks that have not been formatted and do not contain system information. If you own a 2big Network 2 or 5big Network 2 with hard drives pre-installed in one or more disk slots, please go to Connect to the Network. Note that the product does not need to be connected to the network during this process. To reset your LaCie NAS to its factory default, go to Reset to Factory Conditions.
Please follow the order of operations when adding hard drives to your diskless LaCie NAS enclosure:
See the full explanations for each step below.
1. Choose a Compatible Hard Drive
- When adding a new drive to an empty slot, consider a LaCie 5big Drive. LaCie drives are specially prepared and optimized for use with LaCie NAS.
- If you are installing non-LaCie disks, please check the list of supported Network Hard Drives. LaCie cannot guarantee performance or functionality when using unsupported drives.
- Only 3.5” SATA II drives may be used in the NAS enclosure.
- LaCie recommends selecting drives that are equal in storage capacity. For example, if the first drive has a 1TB disk, fill all the slots with 1TB drives.
2. Select the Correct Disk Tray
Please make certain to add new drives in the order of the numbered slots.

3. Remove the Empty Disk Tray


4. Secure the Disk

Find a suitable work area with adequate space and a flat, even surface. Make certain that all necessary components are available:
- LaCie NAS Disk Tray
- Hard drive
- Disk Tray screws. Use only the screws that are provided with your LaCie NAS.
- Phillips head screwdriver. Please confirm that the head of the screwdriver is the proper size for the Disk Tray screws.
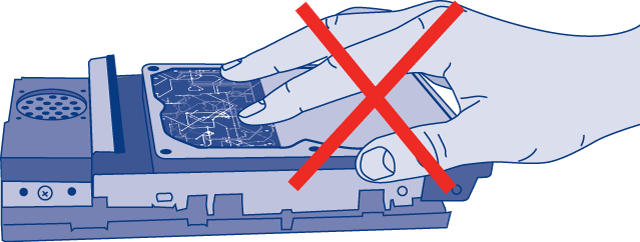
Caution: To avoid potential problems caused by electrostatic discharge (ESD), it is recommended that you do not touch the hard drive’s printed circuit board. As a further precaution against ESD, please use an anti-static wristband or an anti-static mat to ground yourself when handling the hard drive.

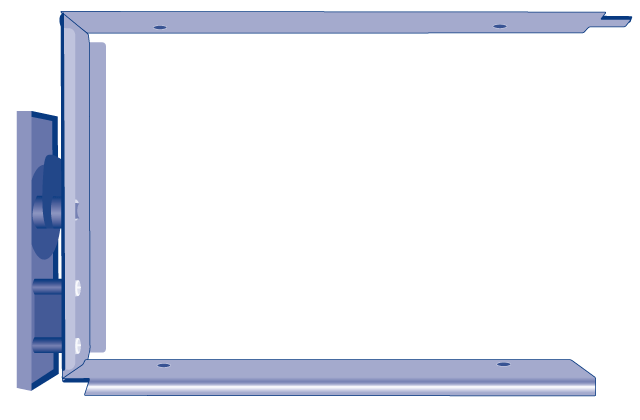
To secure the disk in the drive tray:
- Place the empty drive tray onto the flat work area with the handle on the bottom left.
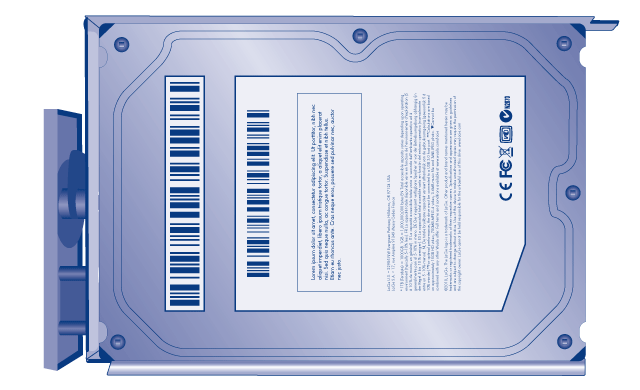
- Many disks have a label on one side and the printed circuit board on the opposite side. With its label side facing up, gently place the hard disk within the drive tray. Keep the side with the printed circuit board on the work space and the SATA connector facing to the right. The four tray screw slots should align with the disk’s four screw holes.
- Using the Phillips head screwdriver, carefully fasten all four screws into the four tray slots. Do not overly tighten the screws. Doing so can affect the integrity of the screw holes on the drive as well as the threads on the screws.
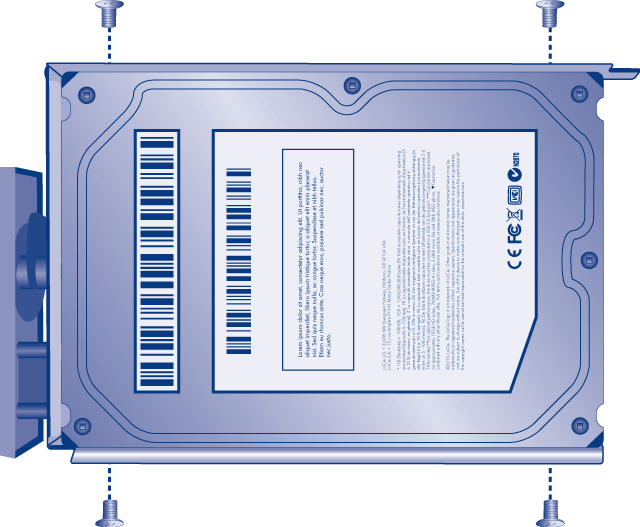
- Repeat the process if you are adding more than one disk.
- Carefully insert the full drive tray into the empty Disk Slot 1. You will feel resistance when the drive tray is most of the way in the bay. Gently push the drive tray handle firmly until you feel it snap into place. The drive tray handle should be flush with the back of the enclosure.
- If you are adding more than one disk, please insert full drive trays into empty slots in the enclosure. Make certain to follow the slot numbers. For example, the second disk should be inserted into Disk Slot 2, the third disk into Disk Slot 3, etc.
- Use the drive lock tool to lock the drive(s) in place.


5. Power on and initialize the LaCie NAS
Caution: Only use the AC adapter supplied with your specific LaCie device. Do not use a power supply from another LaCie device or another manufacturer. Using any other power cable or power supply may cause damage to the device and void your warranty. Always remove the AC adapter before transporting your LaCie device. Failure to remove the adapter may result in damage and will void your warranty.


6. Format the disk(s)
Steps 1 through 3 should take approximately seven minutes.

© LaCie 2024
Last modified : Mar 01, 2013