User Tools
Site Tools
2big NAS | 5big NAS Pro
User Manuals Print page
 Save page as PDF
Table of Contents


Table of Contents
LaCie Network Assistant
LaCie Network Assistant is a software utility that will help you detect and access LaCie NAS connected to your network. Use LaCie Network Assistant for instant information on the device's:
- IP address
- Version of software/firmware
- MAC address (hardware ID number)
LaCie Network Assistant can also help you:
- Launch the Dashboard
- Mount one or more shares
- Auto-mount one or more shares
- Update your product's firmware (2big NAS only, see Update Firmware)
Important info on LaCie Network Assistant and the LaCie 5big NAS Pro LAN Ports: LaCie Network Assistant will always provide information on LAN 1, even if you have connected the NAS to your network using LAN 2.
Install LaCie Network Assistant
LaCie Network Assistant is already installed: To avoid NAS detection conflicts, make certain that you are running the latest version of LaCie Network Assistant. If you have already installed LaCie Network Assistant, go to the product website to confirm it is up to date.
Choose one of the options below:
Install Using the included CD-ROM
Launch LaCie Network Assistant
LaCie Network Assistant will automatically detect your LaCie device(s) on the network. Review the steps below to access your device.
- Windows Users:
- Select LaCie Network Assistant in Start > All Programs/Programs. The application icon will appear in the system tray.
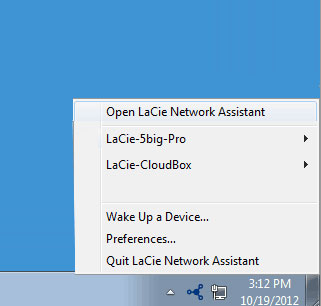
- Right-click on the icon in the system tray.

- Mac Users:
- Select LaCie Network Assistant at Go > Applications > LaCie Network Assistant. The application icon will appear in the menu bar.
- Select the icon in the menu bar.


Find your LaCie NAS's address information
- Launch LaCie Network Assistant.
- Windows users: Select the LaCie Network Assistant icon to choose Open LaCie Network Assistant.
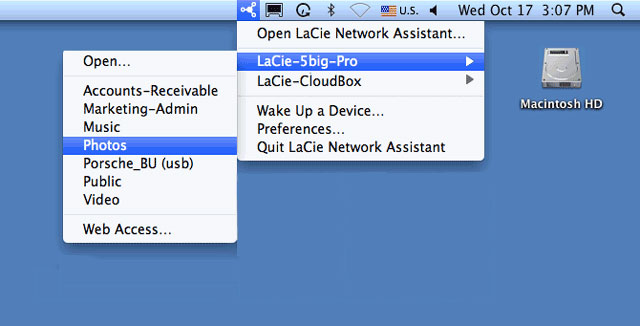
Mac users: Choose the LaCie Network Assistant icon in the menu bar to select Open LaCie Network Assistant…
- If you have more than one LaCie network device, select your LaCie NAS from the list of devices in the left-hand column.
- Choose the Configuration tab.
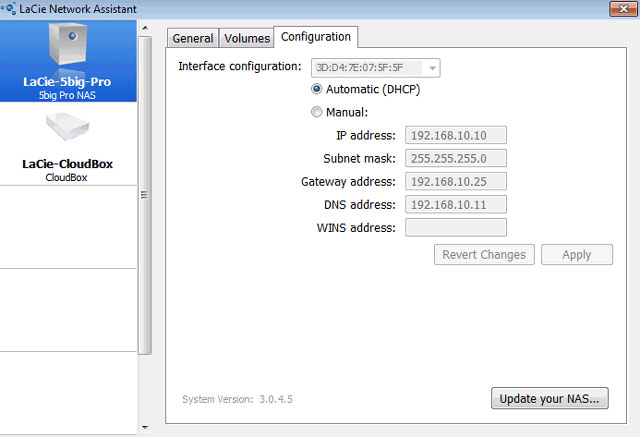
- Review the device's:
- IP address
- MAC address (hardware ID)
- Version of software


Access the Dashboard with LaCie Network Assistant
- Launch LaCie Network Assistant.
- Choose your device:
- Windows: Right-click on the LaCie Network icon in the system tray to select your LaCie NAS.
- Mac: Choose the LaCie Network Assistant icon in the menu bar to select your LaCie NAS.
- Select Web access.
- The Dashboard login page will launch in an internet browser.
Mount shares
LaCie Network Assistant gives you many options to access your LaCie NAS's public and private shares.
Quick access
- If LaCie Network Assistant is not running, launch the program.
- To select the LaCie NAS on your network, do one of the following.
- Windows: From the system tray, right-click on the LaCie Network Assistant icon and select the LaCie NAS.
- Mac: From the menu bar, select the LaCie Network Assistant icon and choose your LaCie NAS.
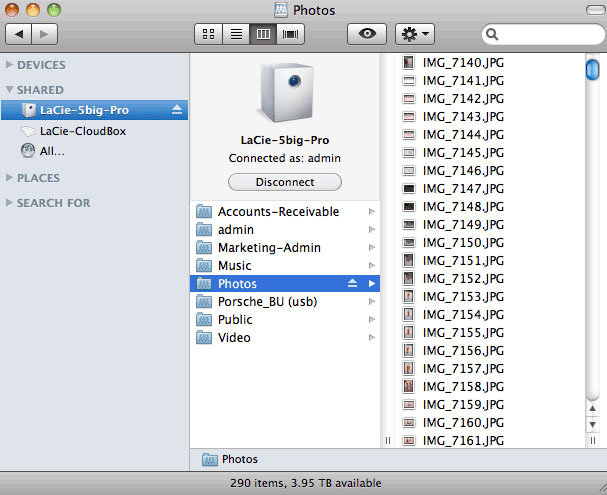
- Choose the share you want to access.
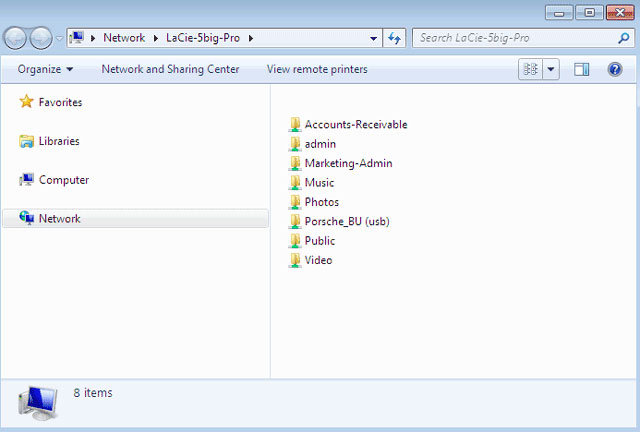
- The share will open in an Explorer window (Windows) or a Finder window (Mac).
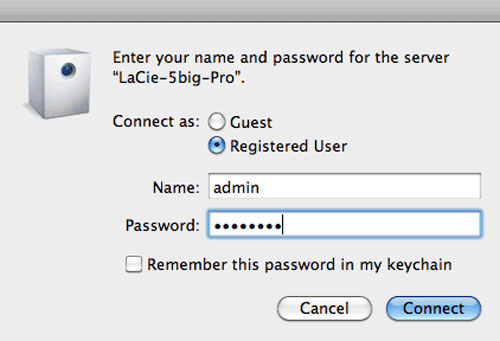
- Public shares are available to everyone on the network. Private shares will prompt a user for a username and password (see Authenticate private shares to learn how to avoid entering the password). The administrator should use the credentials created during the initial setup or Dashboard login (see Connect to the Network/Connect to the Network: Diskless LaCie 2big NAS/Connect to the Network: Diskless LaCie 5big NAS Pro and NAS OS Administration). A user should type the login and password prepared by the administrator (see Users).
- Transfer files normally between your computer and the share. Mac users: If the share does not open in a Finder window, simply navigate in the Finder to SHARED > [machine name] > [share name].


Note on Quick Access to shares: Private shares require a valid username and password (see Authenticate for Private Shares).
Mount
- If LaCie Network Assistant is not running, launch the program.
- Right-click on the icon in the system tray (Windows) or choose the icon in the menu bar (Mac) and select Open LaCie Network Assistant.
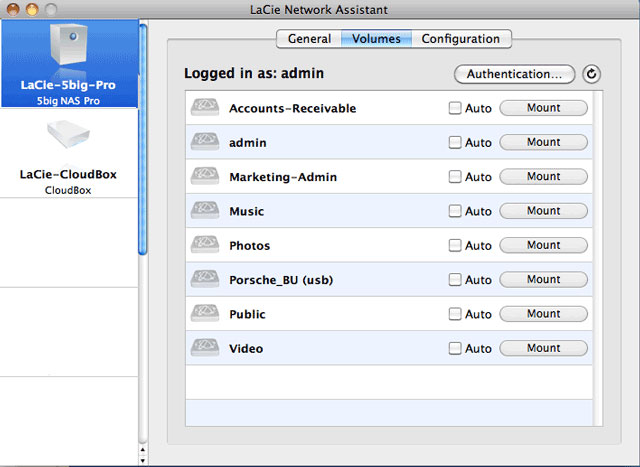
- Select your LaCie NAS's machine name from the list of devices in the left-hand column, then choose the Volumes tab.
- Double-click the share you wish to access. The share will open in an Explorer window (Windows) or a Finder window (Mac). Transfer files normally from your computer to the share.

Technical note: Mac users: If the share does not open in a Finder window, simply navigate in the Finder to Network > [machine name] > [share name].
Note on mounting shares: Private shares require a valid username and password (see Authenticate for Private Shares).
Authenticate private shares
- If LaCie Network Assistant is not running, launch the program.
- Right-click (Windows) on its icon in the system tray or select it in the menu bar (Mac).
- Choose Open LaCie Network Assistant.
- If you have more than one LaCie NAS, select the device you wish to access from the list in the left-hand column.
- Choose the Volumes tab.
- Select Authentication…
- In the pop-up window, choose Registered User and enter your Username and Password. Select OK.
- All available shares will appear in the list of volumes.
- Select Mount as drive (Windows) or Mount (Mac) to open the share.
- The share will be available in an Explorer window (Windows) or a Finder window (Mac).
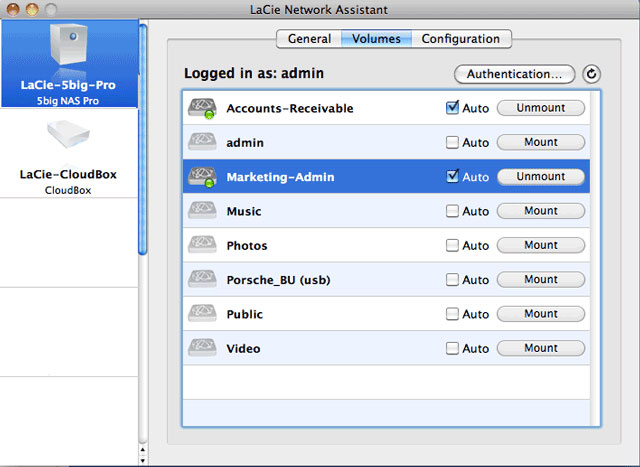
Auto-mount
- If LaCie Network Assistant is not running, launch the program.
- Right-click (Windows) on its icon in the system tray or select it in the menu bar (Mac).
- Choose Open LaCie Network Assistant.
- If you have more than one LaCie NAS, select the device you wish to access from the list in the left-hand column.
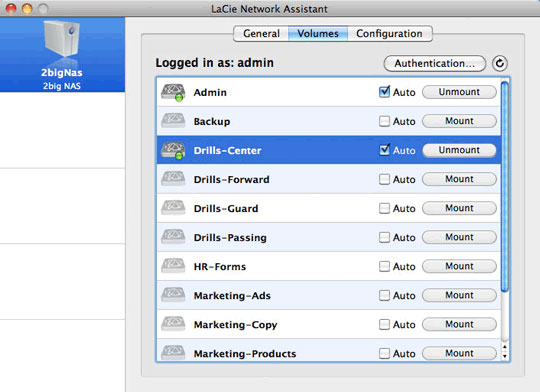
- Choose the Volumes tab.
- If the share you wish to auto-mount is private, choose Authentication… to enter your credentials. In the pop-up window, choose Registered User and enter the Username and Password for the share. Click OK. All available shares will appear in the list of volumes.
- Select the checkbox for Auto to open the share. The share will now mount each time you boot the computer. To cancel auto-mount, uncheck the box for Auto.
- Windows users: The share will mount in Computer/My Computer automatically when the computer detects it on the network.
Mac users: The share icon will appear in your Finder automatically when the computer detects it on the network.


© LaCie 2024
Last modified : Mar 14, 2014