User Tools
Site Tools
Wuala Business
User Manuals Print page
 Save page as PDF
Table of Contents


Table of Contents
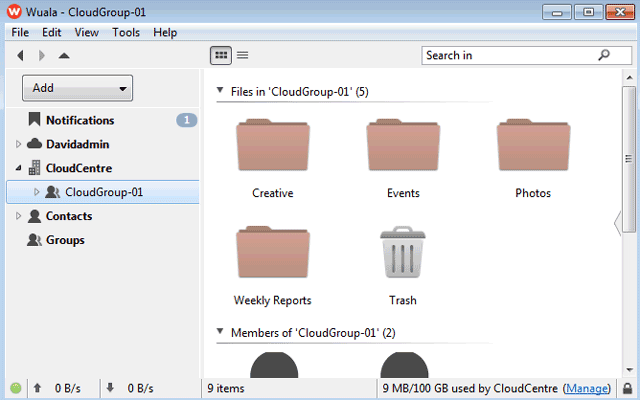
Wuala Features Overview
Wuala provides secure, easy sharing of your business data in the cloud. You will also find important tools that help you to collaborate with your coworkers while protecting everyone's data.
| Feature | Click to view |
|---|---|
| Create folders to share with the group. | Create Folders |
| Add files for the group to share. | Upload Files |
| Copy folders from your desktop to Wuala. | Copy Folders |
| Download folders and files from Wuala to your computer or an external volume. | Download |
| Delete and restore files. | Delete and Restore Files |
| Share files and folders with others via secret weblink. | Share |
| Building Your Wuala Contact List. | Wuala Contacts |
| Backup folders to a Wuala personal account. | Backup |
| Sync folders to multiple computers. | Sync |
| Edit files within Wuala. | Edit Files |
| Find earlier versions of documents. | Versioning |
| Add more Business Groups to your Company Storage. | Multiple Business Groups |
| Move backwards in time to grab earlier versions of folders and files using Time Travel. | Time Travel |
Create Folders
Create folders to better organize the files your team stores on Wuala.
- Right-click on the username or group to select Add Folder…
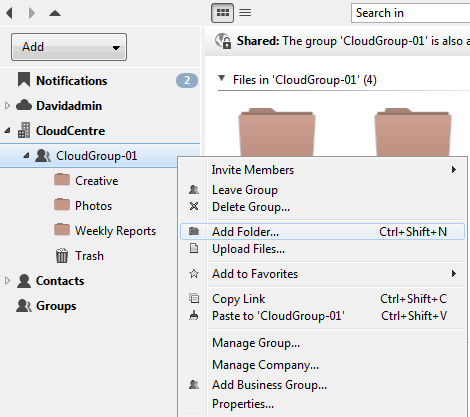
- Enter the name for the new folder then click OK.

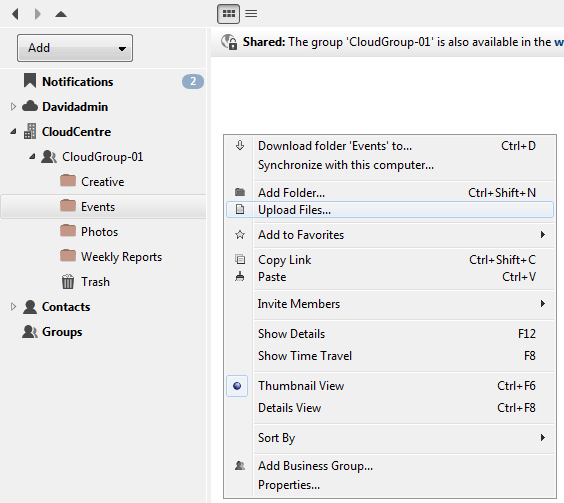
Upload Files
While data can be stored on the root level of personal storage or a group, Wuala highly recommends that you create folders to organize files uploaded to Wuala. To upload files to a folder:
- Open a folder then right click to select Upload Files…
- Browse in your computer to the folder with the files that you wish to upload to Wuala. You may choose to upload one file or several.
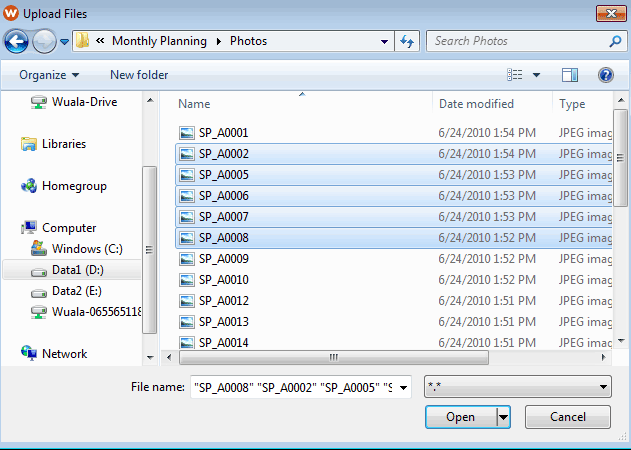

Add one or several files
- The file(s) will appear in the folder. Please note that upload times will vary based upon the speed of your connection to the internet.
- In the case of groups, all members can access the files uploaded by a single member.
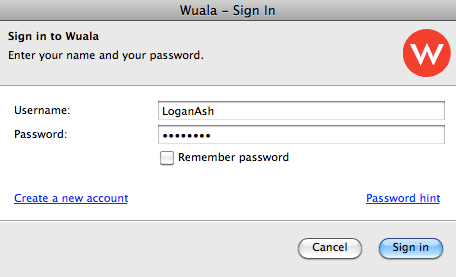
Another member logs onto Wuala
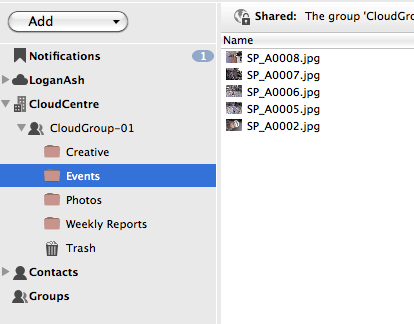
The upload files is available to everyone in the group


Note: Files may also be uploaded to Wuala using drag and drop or copy and paste.
Copy Folders
You may copy folders directly to your Wuala group.
- Log onto Wuala and select your group.
- Locate the folder(s) you wish to copy to Wuala. You can copy folders from internal hard drives, external hard drives, or network volumes.
- To upload the folder(s) to Wuala, drag it/them to the Wuala group.
- The time to complete the upload will depend upon the amount of data stored in the folder(s).
Download
Folders and files can be downloaded to your computer, an external hard drive, or a network volume.
- Right click on the folder or file and select Download To Folder…
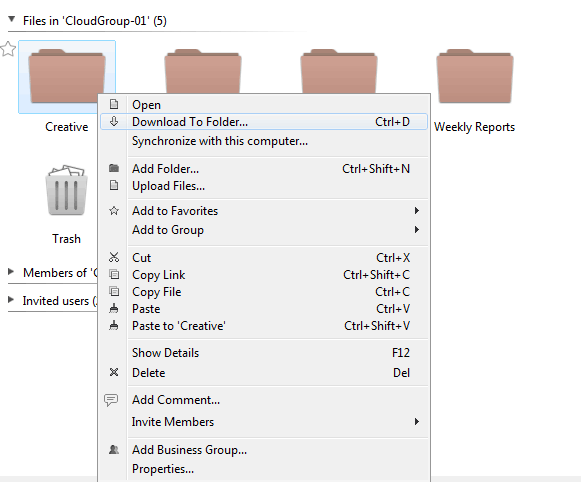
Download a file
- Browse your computer to select the download location and click OK. The time to complete the download will depend upon the amount of data stored in the folder(s) or the size of a file.

Delete and Restore Files
You can move folders and files to the trash for deletion. Files that have not been emptied from the trash may be restored to the group storage.
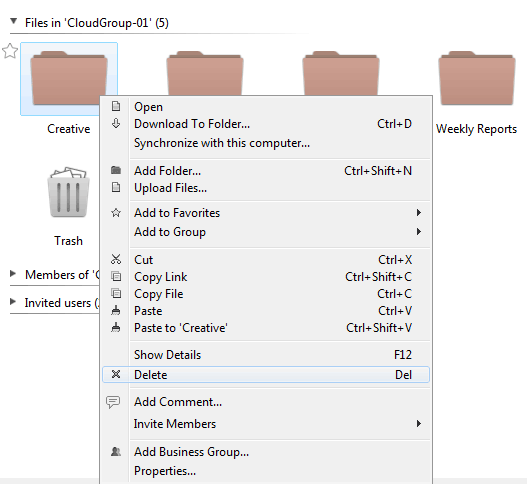
Delete
- Right click on the folder(s) or file(s) you wish to move to the trash and select Delete. You may also click on the folder or file and choose the Delete button on your keyboard.
- A prompt will ask you to confirm the action before moving the folder(s)/file(s).
- If you wish to permanently remove data in the trash, right click on the trash icon to select Empty Trash. Click Yes at the prompt to confirm.

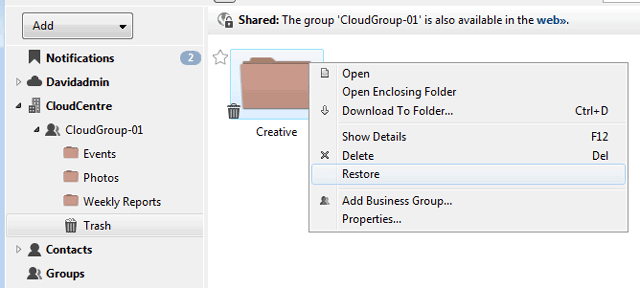
Restore
To remove folders or files in the trash:
- Click twice on the trash icon to reveal its contents.
- Right click on the folder or file you wish to keep and select Restore. The folder or file will be returned to its original location on the group storage.

Share Folders
- Right click on the folder to select Share this Folder > By Secret Weblink.
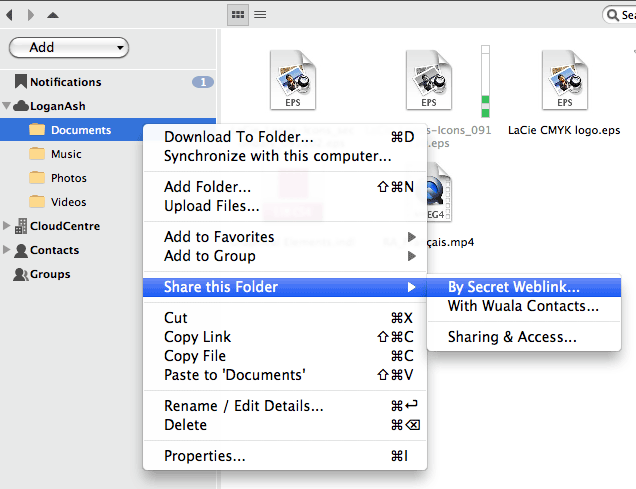
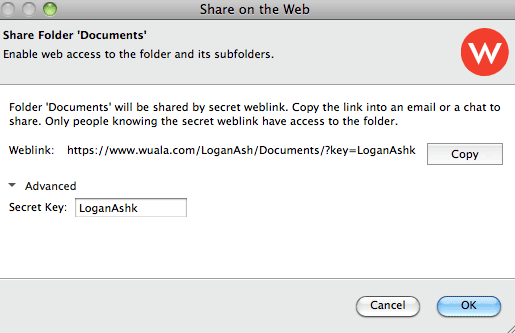
- A prompt will present you with the link to copy. If the link meets your needs, you can click OK to confirm weblink sharing. See the next step if you prefer to personalize the weblink.

- (Skip this step if you do not wish to personalize the weblink). Click on Advanced to reveal the Secret Key. Enter the new weblink reference in the Key field. Wuala suggests making it as brief as possible. The text will appear at the end of the weblink. Click OK to confirm weblink sharing.
- Right click on the folder to select Copy Link.
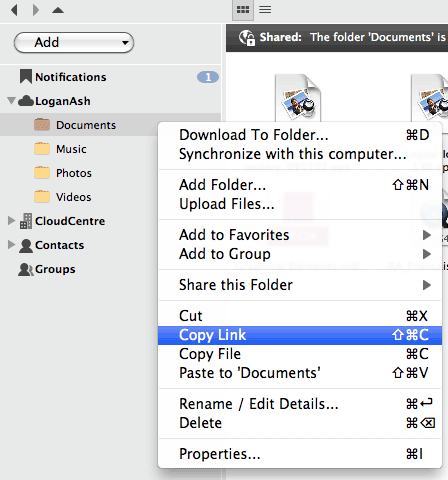
- Paste the weblink to an email meant for people who will share the folder.
- The recipients of the email can click on the link to download files via their web browser.


Wuala Contacts
Add Wuala users to your Contact list.
Step 1: Adding a Contact
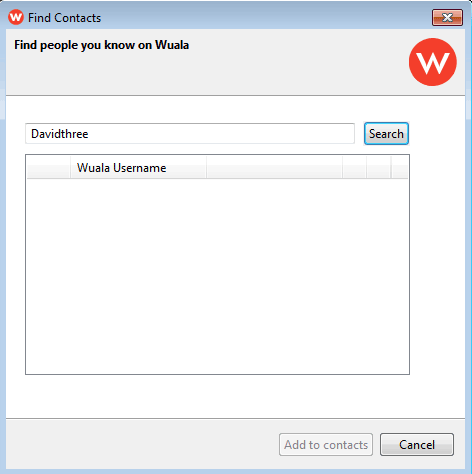
- Open your Wuala account to select Tools > Find Contacts…
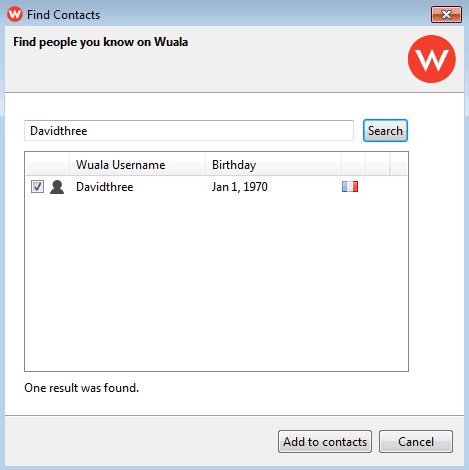
- In the Find Contacts window, type the name of the user you want to add as a contact then click Search. You may need to ask the contact for his Wuala username.
- If the search result is correct, check the box next to the user name and click Add to contacts.
- A prompt will let you know that the contact has been sent a message indicating that you wish to add him to your list. Click Close.


Step 2: Contact Accepts Invitation
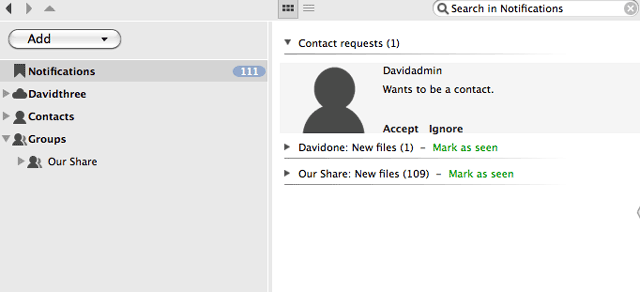
Your contact will receive a prompt in Notifications indicating that you wish to add him as a contact. He should:
- Open his Wuala storage and click Notifications on the left of the window.
- He will see the request to be added as a contact. Click Accept.
- By accepting, he will also add you to his list of contacts.

Step 3: Confirm Contact
You will receive a confirmation that the contact was successfully added to your list.
- Click OK once you have read the message.
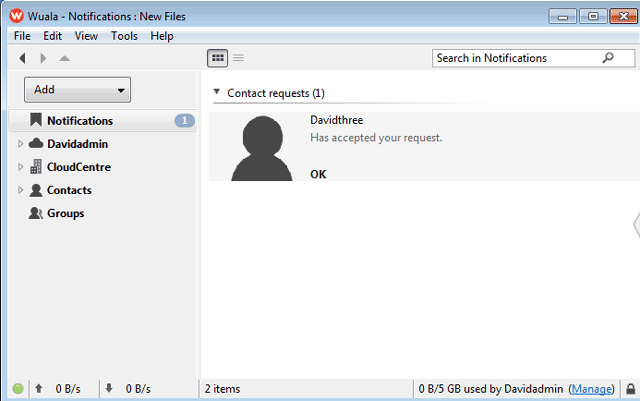
- Your coworker is now on your contact list.

Backup
You may back up data from your computer's internal hard to your Wuala personal storage. At this time, Wuala recommends that you do not back up data from an external or network hard drive to Wuala.
Important info: Please note that members of a Business Group cannot back up data to the Company storage.
Backup Setup
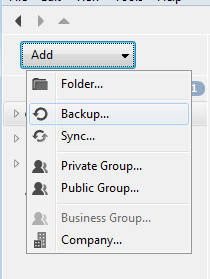
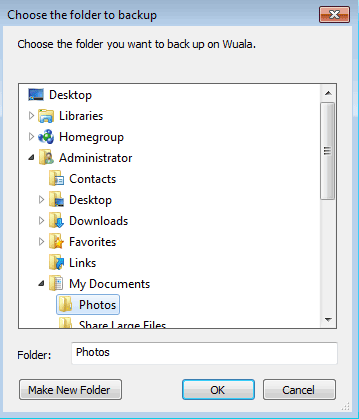
- Click on Add to select Backup…
- Browse to the folder you wish to backup to Wuala. Note that clicking on the arrow next to Advanced opens additional options to exclude certain files from the backup.


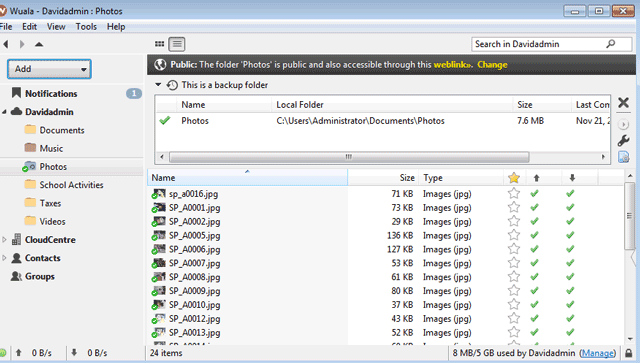
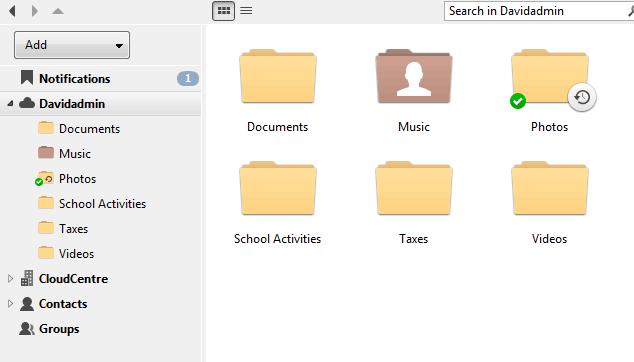
- Wuala will begin the backup. Note that folders marked for Wuala backup include the clock and circular arrow icon.


Manage Backup
To adjust the backup settings:
- Click on the backup folder to choose the wrench icon.
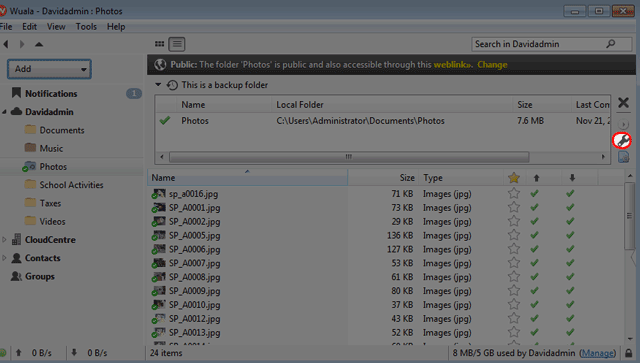
- The Backup Settings window allows you to change the backup interval as well as filter files.

Note: Selecting the minus symbol will delete the backup. Provided that the user has not deleted them, the original files will remain intact on their source storage.
Sync
Members of a business team and single users can have the latest versions of important documents on all their computers:
- Business Storage: A member of the team creates a Wuala Sync folder called Daily Action Plans on his computer. Each member of the same Business Group adds Daily Action Plans to their computers to receive automatic updates and to add documents that they have created.
- Personal Storage: A Wuala user can create a Sync folder called Legal Briefs on her computer. To access the same files in the office, she will log on to Wuala to add Legal Briefs on her work computer. Since Wuala will upload/download the most recent content automatically to all Sync folders, she can leave the work laptop in the office.
You may synchronize data from your computer's internal hard to Wuala storage. Wuala highly recommends that you do not synchronize data from an external or network hard drive as it could delete files.
Create a Sync Folder
Sync folders and Wuala Business Users: Please make certain to highlight the applicable Wuala storage before creating a Sync folder. For example, if the Sync folder is for personal use, select your personal storage. If the Sync folder is for collaboration within your Company, select your Business Group.
Highlight the applicable Wuala storage for your Sync folder

Highlight the applicable Wuala storage for your Sync folder
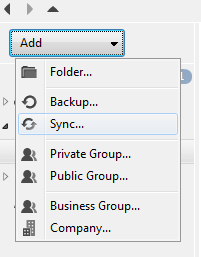
- Click on Add > Sync…
- Browse to the folder on your computer that you wish to sync. Note that clicking on the arrow next to Advanced opens additional options to exclude certain files from the sync.
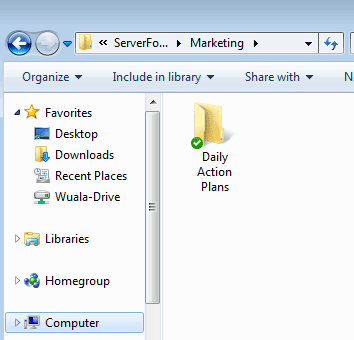
- The sync folder has been added to the Wuala storage.

- A check mark on the folder stored on on the source storage indicates that it is being synchronized with the Wuala storage.


Sync the folder on additional computers
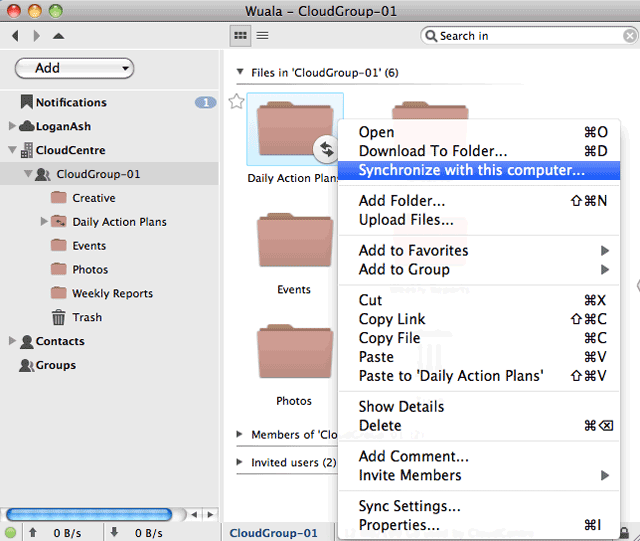
- Log on to Wuala to choose the storage that hosts the folder you wish to Sync (personal or business storage).
- Right click on Sync folder to select Synchronize with this computer…
- Note the location for the local sync folder on your computer then click OK.
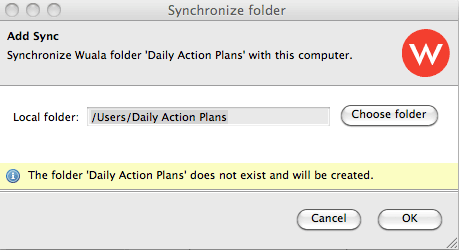
- The folder is now synchronized with the computer. Repeat the steps for each new computer.


Important info on Sync Folder Displacement: Wuala recommends using the default location on your local computer for the Sync folder. Choosing an alternative folder will adjust the name of the Sync folder. Additionally, the contents of the Wuala Sync folder will be mixed with the files in the existing folder on your computer. To prepare a new location, you can create a folder with the same name as the Wuala Sync folder. For example, create a folder called Daily Action Plans on your Desktop before attempting to add the Sync folder.
Managing the Sync Folder
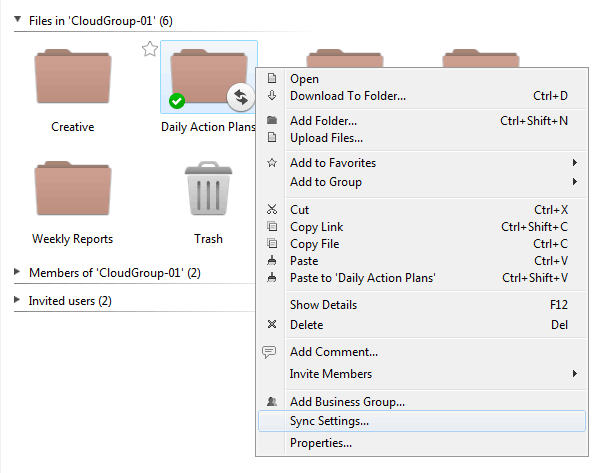
- Adjust the file types you wish to Sync by right clicking on the folder to select Sync Settings…
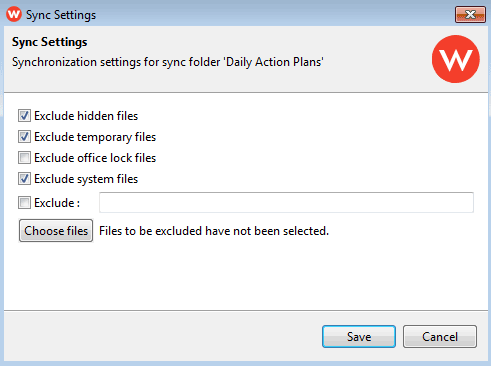
Choose files to exclude from Sync
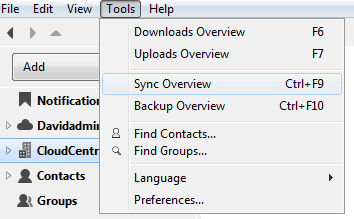
- Review the number of computers that have synchronized with the folder by selecting Tools > Sync Overview. You can also adjust settings within the Sync folder.


Edit Files
Wuala can be used as the primary storage for your documents. Open and edit files within Wuala to reduce frequent copying and pasting of data. By editing documents within Wuala, you can take advantage of Versioning.
- Log into your Wuala account to find the file you wish to open. Right click on it and Wuala will present the compatible applications on your computer.
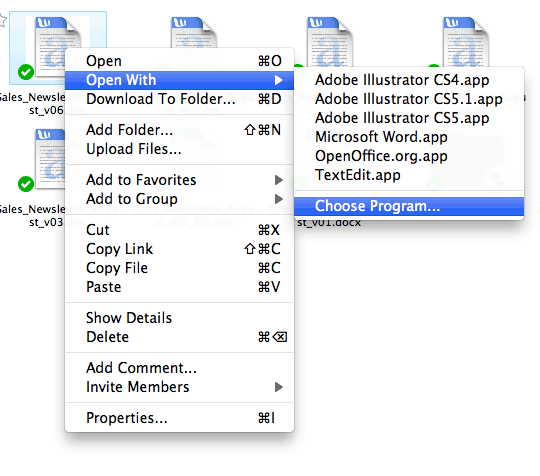
- Choose the application to open the file. You can work on the file and all revisions will be saved on Wuala.

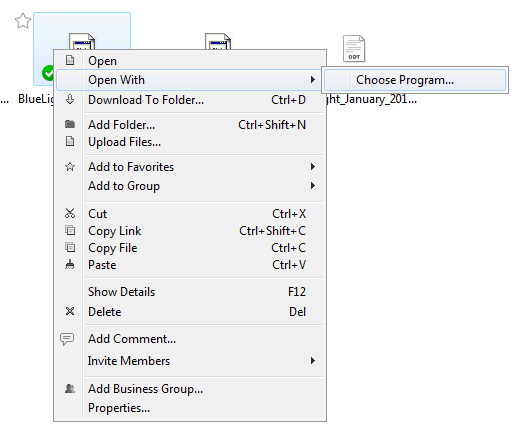
Note on available applications: Wuala empowers you to work on documents from the group storage. Please note that the native application or a compatible program must be available on your local computer. If Wuala cannot find a compatible program, you will be prompted to Choose Program…

File System Integration
File system integration must be turned on to edit files within Wuala. Please note that it is enabled by default.
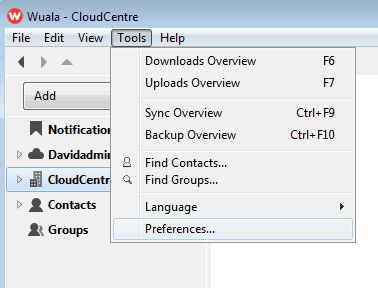
- Windows: Tools > Preferences…
- Mac: Wuala > Preferences…
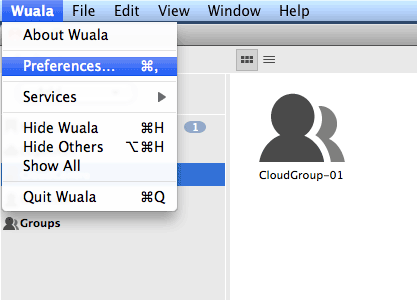
- Select General to make certain that System Integration is enabled.


Versioning
When working within Wuala, Versioning will keep up to 10 versions of a document. In cases when documents are accidentally revised or edited, users can rest assured that an earlier version is available.
Versioning will keep 10 versions of a document if it falls within one of the two conditions below:
- Edited within Wuala.
- Edited within a folder marked for Wuala Sync.
Accessing Versioning
Below is an example of a file that has not been edited within Wuala and does not have earlier versions. Right clicking on the file does not reveal an option to access an earlier version.

Documents that have been edited within Wuala will give you the option to access an earlier version.

Versioning and Sync
Wuala versioning and sync work together to make certain that:
- The last ten versions of edited documents can be accessed for easy reference.
- Important company data within the group is up to date on everyone's computer.
Versioning requires that documents are opened and edited within Wuala. With Sync, files kept on a local sync folder are also stored and updated to its Wuala folder. Therefore, users are free to edit a document from their local sync folder knowing that the last 10 versions will be available on the equivalent Wuala sync folder. See the screenshot below as an example:

The file has been revised and earlier versions are available on Wuala
Multiple Business Groups
A single Wuala Business Code allows administrators to create up to five groups on Wuala. Each group can have up to five users.
Please note that:
- The administrator always counts as one of the users.
- Each new user invited to a Business Group counts as one of the five, even if that user is already a member of another Business Group.
- The 100GB will be shared by all Groups within Company storage.
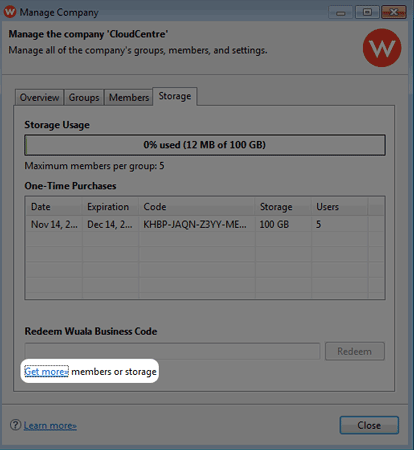
- Additional storage and users per group may be added to a Wuala Business Code at any time by clicking on the Manage link on the bottom right of the Wuala window. You will be directed to a link in the Manage > Storage. Click on Get More to be directed to Buy Wuala Business.

Adding one or more groups
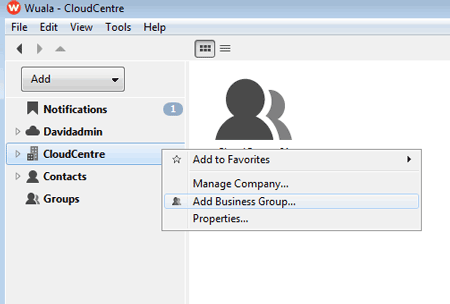
- Right click on your Company name to select Add Business Group…
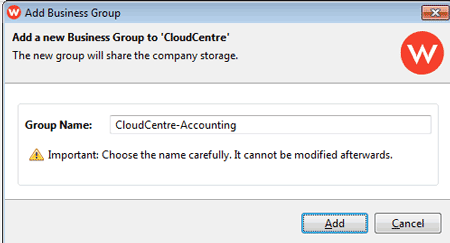
- In the Add Business Group window, enter the name of the new Group then click Add.
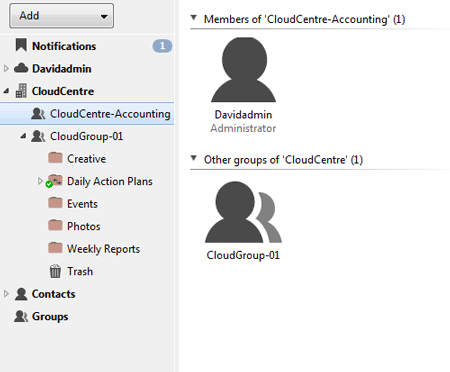
- The new group is ready to use. Invite members just as you did for the first group.


Time Travel
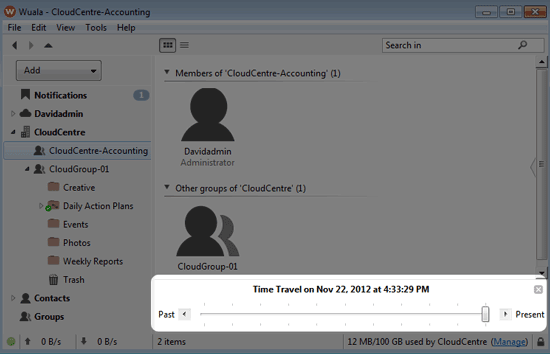
Wuala gives you the option to move back in time to view folders and files as they looked days or weeks before. To use Time Travel:
- Reveal the slider by going to View > Show Time Travel.
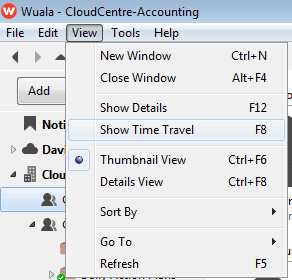
- Move the slider to the left to go back in time.


© LaCie 2024
Last modified : Jun 04, 2014