User Tools
Site Tools
2big NAS | 5big NAS Pro
User Manuals Print page
 Save page as PDF
Table of Contents


Table of Contents
Remote Access: LaCie MyNAS

Remote access to your LaCie NAS is available using:
- LaCie MyNAS
- FTP (see Accessing Shares via FTP)
LaCie MyNAS gives users remote access to the Dashboard, including the File Browser to upload and download files via the internet.
Follow the directions below to configuring LaCie MyNAS.
Set Up Remote Access
For a video demonstration, see here (youtube).
Important info: In order to prevent unauthorized access, it is critical to protect each of the user and administrator accounts registered to your LaCie NAS with a strong password BEFORE setting up remote access. Since LaCie MyNAS lets you access your data with a simple URL, malicious users could guess the URL and access the LaCie NAS's files unless each user is protected by a strong password.
- Navigate to Dashboard > Network > Remote Connection tab.
- In the Remote Access drop-down menu, choose LaCie MyNAS.
- Type a name for your LaCie NAS in the Name field.
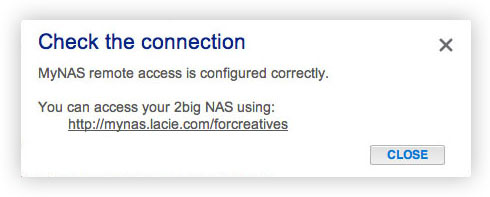
- Click Apply. The Dashboard will query the mynas.lacie.com server to see if the name you chose is available. If so, you will receive a message confirming the connection.

If your name is already chosen, type a new one and click Apply until you find an available name.
Failed Connection
If you receive an error that your LaCie NAS is unable to connect to the internet:
- You may require a proxy server to access the internet. Please contact your network administrator or internet provider then review Network for further instructions on how to add your proxy server's address.
- You may need to configure port forwarding on your router. See the steps below.
If the issue is related to your router, you will need to access its administration page in order to forward a port (by default, 8080), which will create a path from your LaCie NAS to the internet. Refer to your router's documentation for details.
- Navigate to the Dashboard > Network > Remote Access tab.
- Next to the Name field, click the configuration icon, then select Advanced settings.
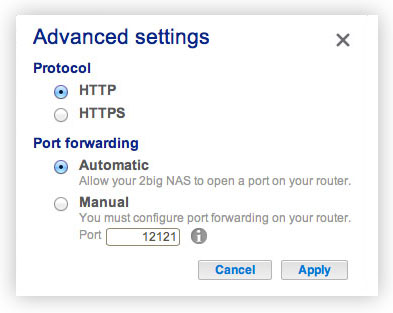
(If you do not see the configuration icon next to the Name field, first type a name and then click Apply, and the icon will appear.) - In the dialogue window that appears, click Manual.
- Next, identify which port you intend to forward in your router.
- Click Apply.
- Access your router's administration page in order to forward this port.
- Retry the remote access connection.

Using Remote Access
Once configured, simply type your LaCie NAS's URL into any browser, anywhere.

Your URL will be: mynas.lacie.com/name
After you input the URL, you will be asked to log in to the Dashboard. Note that this username and password are the credentials created by the administrator in Dashboard > Users.
Once logged in, you will be able to access the Dashboard in order to administer your LaCie NAS (if you have administrative privileges) or access the File Browser. The File Browser lets you upload, download, and stream many types of multimedia files such as mp3 (see File Browser).
Mobile Devices
LaCie MyNAS is compatible with iOS devices. See the iOS App Store for details.
© LaCie 2024
Last modified : Mar 14, 2014