User Tools
Site Tools
LaCie RAID Manager
User Manuals Print page
 Save page as PDF
Table of Contents


Table of Contents
Manage the Array and Virtual Disk
LaCie RAID Manager has a number of management functions to help you:
- Add disk capacity to the array
- Migrate the RAID
- Receive updates on the health of the enclosure
- Enhance performance
Expanding the array’s disk capacity
- Select the array in the Storage pane and roll over the Operation tab.
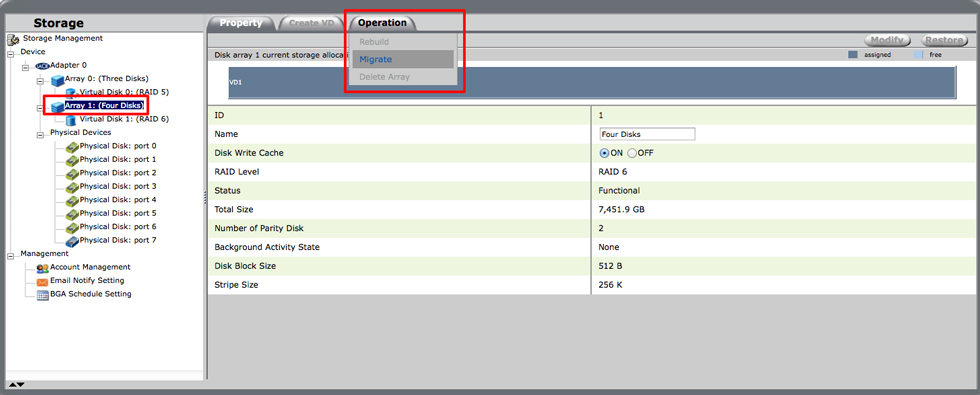
- Choose Migrate.
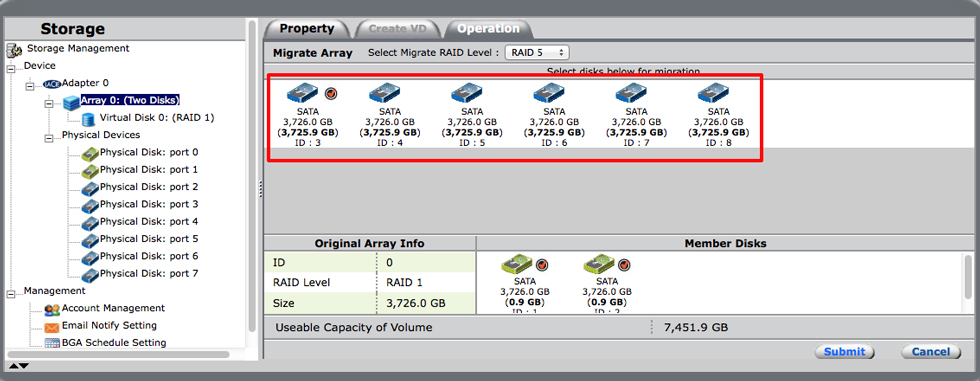
- Click on one or more available disks to add to the array. A checkmark appears next to a selected disk.
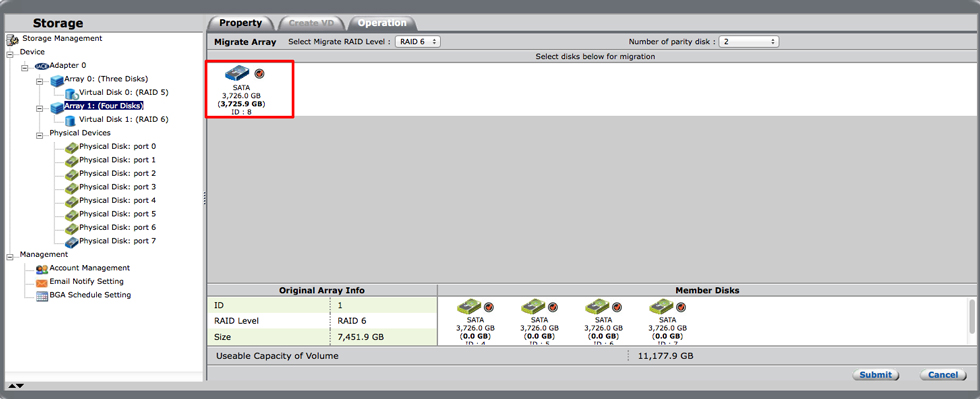
- Choose Submit.
- The Property tab provides a status bar letting you know the progress of the expansion.


Migrating to a higher RAID
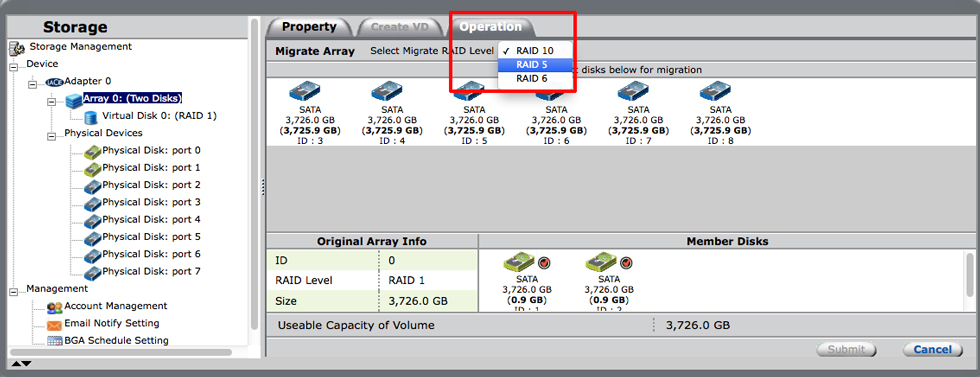
See Discover LaCie RAID Manager Storage Management for details on RAID levels available to your LaCie professional DAS. Make certain that you know the RAID level and its requirements before following the steps below.
- Select the array in the Storage pane and roll over the Operation tab.
- Choose Migrate.
- If necessary, click on one or more available hard drives to add to the array. For example, you must add at least one hard drive when migrating from RAID 1 to RAID 5. However, you do not need to add hard drives if you migrate from a RAID 10 array with four hard drives to RAID 6.
- Click on the RAID pull-down menu to choose the RAID level.
- Choose Submit.
- The Property tab provides a status bar letting you know the progress of the RAID migration.


Enhancing performance: controlling the rate of background activities

The LaCie professional DAS prioritizes background activities based on the specified control rates. When background activities are in progress, the device is still available to the operating system for normal operations. However, the response time may be slower depending on the background activity control rate.
The rate of various background activities can be modified from the Property tab for the Adapter. Move the slider to adjust the rates and choose Modify to confirm the changes.
Modifying the virtual disk cache

The choice between protection and performance can vary with projects. To accommodate such changes, the cache mode for a virtual disk can be modified from the Property tab for the virtual disk. Select between the options and choose Modify to confirm changes.
Viewing properties and renaming
Viewing properties: array, virtual disk, and physical disk
To view the properties of an array, virtual disk, or physical disk, select the item in the Storage pane. The Property tab gives you all the pertinent details.
Renaming the array

The name for an array can be modified from the Property tab for the array. Type a new name in the Name field and select Modify to confirm the change.
Renaming the virtual disk

The name for a virtual disk can be modified from the Property tab for the virtual disk. Type a new name in the Name field and select Modify to confirm the change.
© LaCie 2024
Last modified : Jan 15, 2015