User Tools
Site Tools
LaCie RAID Manager
User Manuals Print page
 Save page as PDF
Table of Contents


Table of Contents
Manage Disk Failure: Auto-Rebuild and Assigning Spare Hard Drives
Using LED indications, your LaCie professional DAS alerts you if a hard drive is failing or has failed. See the user manual for your LaCie product to review the LED indications. LaCie RAID Manager also senses when a hard drive is at risk and updates the Event Log accordingly. Additionally, LaCie RAID Manager has built-in notifications that will you send you email alerts when a disk fails or the enclosure experiences high temperatures (see Manage the Array and Virtual Disk).
With the exception of RAID 6, the loss of a single hard drive in the array will degrade the RAID and prevent it from protecting your data. To help you prepare for the potential of hard drive failure, LaCie RAID Manager gives you two critical options:
- Auto-Rebuild
- Assigning a spare hard drive
Important info on RAID 0 and disk failure: RAID 0 is fast and it provides access to the total disk capacity in the array. However, it does not offer data protection in the event of disk failure. Therefore, if a disk fails in a RAID 0 array, all data is lost.
Enabling auto-rebuild
LaCie RAID Manager will automatically rebuild a degraded array when auto-rebuild is enabled. The rebuild operation will start immediately if a spare drive is available in the enclosure (see below). If you have not assigned a spare drive, auto-rebuild will begin once the failed hard drive is hot-swapped with a replacement. See your LaCie product’s user manual for instructions on how to hot-swap a hard drive.
Enable auto-rebuild:
- Choose Adapter in the Storage pane and select the Property tab.
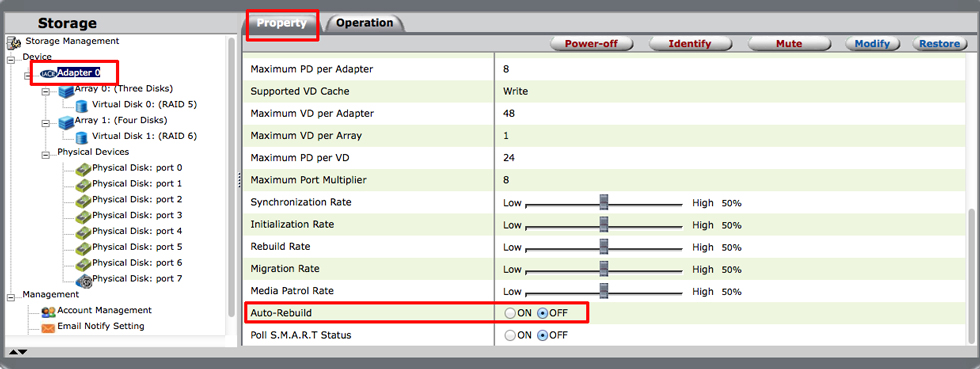
- Scroll down to Auto-Rebuild and choose the On radio button.

Important info: If your degraded array does not auto-rebuild even when a global/dedicated spare drive is available, verify that the spare drive is compatible with your LaCie hard drive enclosure.
Assigning a spare hard drive
LaCie RAID Manager offers two options for assigning a spare hard drive:
- Global spare drive: Global spare drives can be used by any array.
- Dedicated spare drive: Dedicated spare drives are used exclusively for rebuilding a specific array.
Only an unconfigured physical disk can be assigned as a spare drive. A physical disk which is either fully or partially configured cannot be used as a spare drive.
Creating a global spare drive
- Select Physical Disk in the Storage pane.
- Roll-over the Operation tab and select Set as Global Spare Drive.
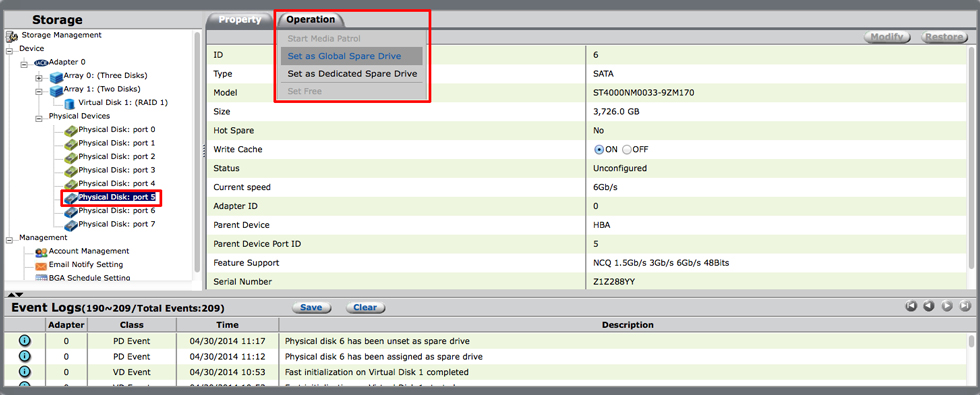

The hard drive’s Property tab confirms that it has been assigned as a global spare drive.

Creating a dedicated spare drive
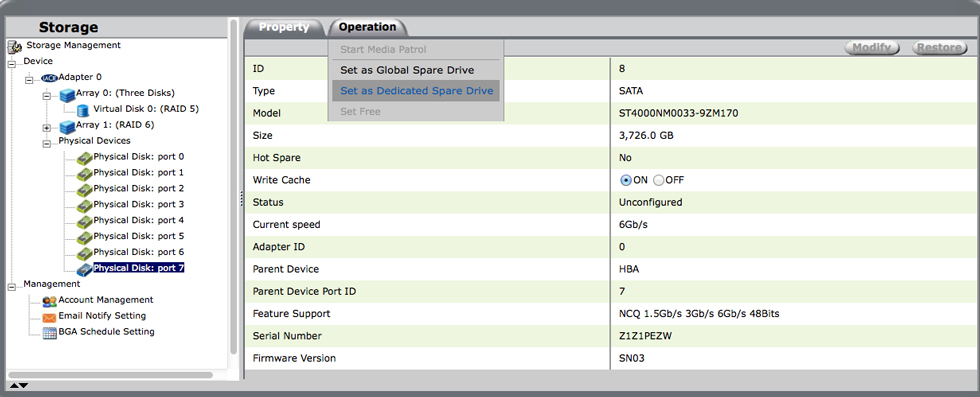
- Select Physical Disk in the Storage pane.
- Roll-over the Operation tab and select Set as Global Spare Drive.
- A screen appears prompting you to choose a RAID array. Click on the array to assign to the spare hard drive.
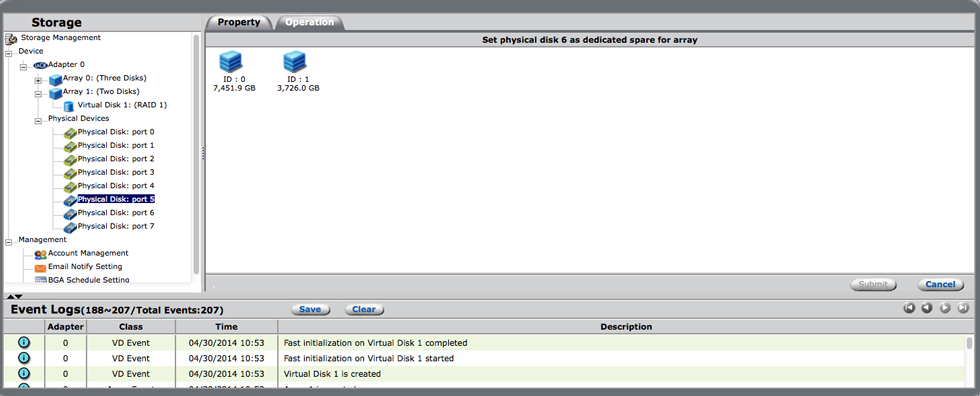
- A checkmark appears next to the selected array. Choose Submit.
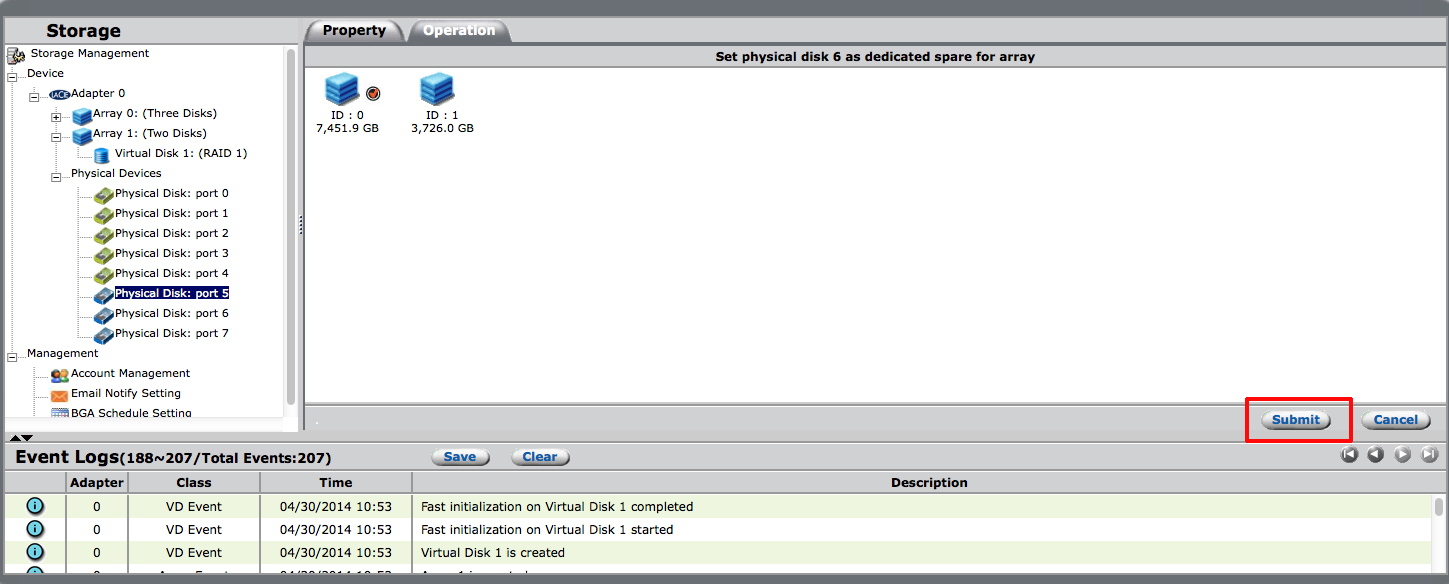


The hard drive’s Property tab confirms that it has been assigned as a dedicated spare drive.
Releasing a physical disk from spare drive status
- Select a hard drive assigned as a global or dedicated spare in the Storage pane.
- Roll-over the Operation tab and select Unset as Spare Drive.
LaCie RAID Manager confirms the change by updating the Status of the physical disk in the Property tab.
© LaCie 2024
Last modified : Jun 12, 2014